
Data Sheet

9/24/2015 ARPI600WaveshareWiki
http://www.waveshare.com/wiki/ARPI600 2/18
How to start up serial debugging function
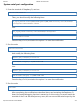
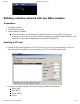
1. Please install a USB to UART driver ﴾cp2102 driver﴿ before applying Raspberry Pi board. After
the installation, please open Device Manager to check whether the PC can identify the USB
to UART driver.
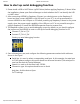
2. After connecting ARPI600 to Raspberry Pi board, you should power up the Raspberry Pi
board and then connect ARPI600 to the USB port on your PC. It is not recommended to
connect ARPI600 to the USB port on PC before powering up Raspberry Pi board or for power
supply, since the power supply capability of the USB port on PC is not powerful enough to
support Raspberry Pi board and ARPI600 expansion board at a same time.
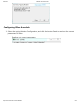
3. The Raspbian system is set to serial debugging output by default, so you should configure
the jumpers on the ARPI600 in order to start up the serial debugging function for PC.
Connect CP_RX to P_TX
Connect CP_TX to P_RX
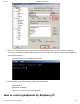
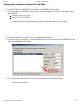
Starting up serial debugging function
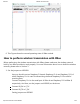
4. Start software/putty.exe, and configure the following parameters marked with red boxes
shown in the Figure
Serial line: it is used to select corresponding serial port. In this example, the serial port
is COM3, please configure this option based on the actual situation ﴾The serial port in
used can be check by Device Manager﴿.
Speed: it is used to set the Baud rate: 115200.
Connection type: this option should be set to Serial.
And then, click the button Open.
PuTTY settings