
User Manual

AlphaBot User Manual
the smart robot. In this case, the robot speed adjustment is controlled by the
analog PWM, which may occupy CPU resource. And the output of the PWM is not
stable. To have a better result, we recommends using Arduino and Raspberry Pi
together to control the smart robot. In this way, Arduino controls the motor and
servo, and Raspberry Pi handles the video transmission and the website control.
Arduino and Raspberry Pi apply serial communication.
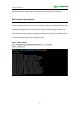
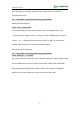
1. Disable the shell serial debugging function of the Raspberry Pi, to allow the
serial port to work independently.
Replace the file config.
cd ~/AlphaBot/mjpg-AlphaBot/ARPI-AlphaBot
sudo cp config /etc/webiopi/config
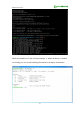
Select AdvancedOptions-> Serial -><No> to disable the serial port debugging
function.
Open the file /boot/config.txt, and find out the following configuration line to
enable the serial port. If you can not find it, please add the line at the end of the file.
enable_uart=1
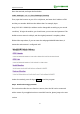
2. Download program to Arduino
Open Arduino IDE,click File-> Example -> AlphaBot -> E11_mjpg-AlphaBot to open
the project.Compile and download the program to the Arduino development board.
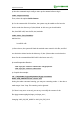
Install the Arduino and the Raspberry Pi to the smart robot. Connect the jumpers
IN1, IN2, ENA, ENB, IN3 and IN4 of the motor in A area to the pins A0, A1, D5, D6,
A2 and A3 of Arduino, respectively. Connect the jumpers S1 and S2 of the servo in C
area to the pins D9 and D10. Switch the UART SWITCH to ON, then reboot the
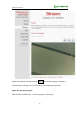
Raspberry Pi. Input the ip address of the Raspberry Pi and the port number 8000 in
50
share awesome hardware