WAVES MultiRack SETUP GUIDE V9.
Table of Contents 1. Overview ............................................................................................................................... 3 2. Basic Requirements .............................................................................................................. 3 3. Software ................................................................................................................................ 4 4. Required Waves Licenses .......
1. Overview There are two versions of the MultiRack software: Native and SoundGrid. Native utilizes the computer's CPU to power the plugin processing. In practice, this means that plugin count and overall system latency depend on the computer’s CPU and sound driver capabilities. SoundGrid uses a dedicated SoundGrid DSP server to power the plugin processing, providing low latency, high plugin counts, a backup DSP server, and networking capabilities. 2.
3. Software • MultiRack Native – Host software for Waves Native plugins; supports MultiRack Nativecompatible plugins only. • MultiRack SoundGrid – Host software for SoundGrid-compatible plugins; supports MultiRack SoundGrid-compatible plugins only. • MultiRack SoundGrid for DiGiCo offline software – For preparation of offline MultiRack sessions for SD consoles using DiGiCo's SD offline editor. • SoundGrid Studio – Required for recording and/or playback only (installation optional).
Follow the instructions below to download and install MultiRack Native and/or SoundGrid. 1. Download and install Waves Central for Mac | Windows. If you already have Waves Central installed, skip to step 2. 2. Launch Waves Central. Windows: via the desktop shortcut or Start Menu > All Programs > Waves. Mac: Applications > Waves Central. 3. Log into Waves Central using your Waves account information. 4. Click on Easy Install & Activate. 5.
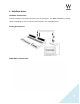
6. MultiRack Native Hardware Connections Connect an ASIO / Core Audio interface to your host computer. Use MADI, AES/EBU, or analog cables, depending on your console and audio interface. See examples below.
Yamaha Native Connections Behringer Native Connections 7
Software Setup Open the Preferences window “Ctrl+P” (PC) or “Cmd + ,” (Mac).. Select the audio I/O device by clicking the Audio Device dropdown menu and choosing from the available devices. (MultiRack Native supports Windows ASIO and Mac Core Audio sound cards.) Use the Sample Rate drop-down menu to set the sample rate for the plugin and the audio device. The Control Panel button opens the device’s control panel.
7. MultiRack SoundGrid Hardware Connections SoundGrid Requirements • The SoundGrid I/O card pipes audio in and out of the console. Please refer to the manual of your card for specific instructions regarding setup. • The SoundGrid DSP server acts as the “number cruncher” for all plugins used in the application. It is possible to connect a second “redundant” server working as a backup. Check http://www.waves.com/live-sound/soundgrid-servers for an updated list of qualified servers.
8. Yamaha Hardware Connections Begin by connecting your console and all other components to the network switch in order to create the SoundGrid network. Your MultiRack SoundGrid and DAW can be installed on the same computer or on separate computers. Ø You may connect two SoundGrid DSP servers, in which case the second server will function as a redundant server. Ø All components must be connected to the network switch using Cat 5e/Cat 6 cables.
9. MADI-Enabled Console Hardware Connections Begin by connecting your console and all other components to the network switch in order to create the SoundGrid network. Your MultiRack SoundGrid and DAW can be installed on the same computer or on separate computers. • You may connect two SoundGrid DSP servers, in which case the second server will function as a Redundant Server. • All Components must be connected to the network switch using Cat 5e/Cat 6 cables.
10. Allen & Heath Hardware Connections See detailed instructions here.
11. MultiRack SoundGrid Software Setup Preferences Window Enter the Preferences window from the Edit menu (PC) or the MultiRack SoundGrid menu (OSX), or by typing “Ctrl+P” (PC) or “Cmd + ,” (Mac). Local LAN Port lists the available network adapters on the host machine. Choose the network adapter that is connected to the SoundGrid network. Network adapters are displayed by their MAC addresses and port name. When you select the proper port, a SoundGrid network found message will be displayed.
Ø Automatic – When recovery type is set to Automatic, MultiRack SoundGrid will load the session to the server as quickly as possible. Ø Manual – When recovery type is set to Manual, MultiRack SoundGrid will relaunch itself but will not load the session to the server until you press the Connect button on the dialog box that appears. Enable Verbose Log: When this option is selected, MultiRack SoundGrid goes into a “debug” mode and creates a so-called “verbose data file.
Remote Control Tab The Remote Control tab sets the connection between MultiRack and a console. This enables an integrated workflow in which the console controls MultiRack remotely. Here you see the consoles that the network has discovered. You can then set up a connection with one of them. Once connected, MultiRack will load the appropriate configuration file that activates the integrated workflow with that console.
To assign a console, select it in the list and set its assignment number to “1”. Click “Apply.” You will be asked to restart MultiRack for the changes to take place. If you do not restart MultiRack, the changes you’ve made will not be applied, and console status will remain “N/A”. After restarting MultiRack, you will notice that some of the menus and functions are no longer seen in the user interface. These functions are now slaved directly to the controlling console.
Remote Controller Inventory Controls and Indicators • Assign: Selects devices that will be used in your setup. The number you assign to a device is its index number in the Inventory list. In the case of a console, setting “1” means it is the only console controlling MultiRack. Setting “1” and “2” means that one console is a redundant controller. • Console IP: Displays the IP address of each console. • Name: Displays the console’s name as set on its interface.
12. SoundGrid Inventory: This window is accessed by selecting SoundGrid Inventory in the Edit menu. Changes in the Inventory window are allowed only in Setup mode. In Show mode, the window opens as display-only and no changes are allowed. Changes made in the Inventory window are applied immediately. System Parameters Ø Sample Rate displays the sample rate. MultiRack SoundGrid is slaved to the console or I/O sample rate; this field cannot be edited.
The above diagram illustrates the various latencies in the SoundGrid system. Network latency occurs between the I/O device and the processing engine; driver latency is added between the network and the host computer on which the driver is installed. ASIO or Core Audio buffering is usually added between the driver and the DAW software. Ø Driver Latency determines the SoundGrid’s driver’s input latency, i.e., the latency between the driver’s host computer and the network.
Ø Device displays the type and description of the device. When you hover with a mouse over a device row, the device’s software/firmware version is displayed as a tool-tip. I/O Devices Ø I/O: An I/O device that streams audio to and from the SoundGrid network. Ø DRV: A SoundGrid driver installed either on another computer connected to the network, or on the same computer on which MultiRack SoundGrid is running. Ø MR: MultiRack, SoundGrid’s audio processing device.
Device Firmware: This column holds an Update button for each I/O or server device. Click the button to update the device’s firmware if incompatible with the MultiRack version you are using. The Update process will display a progress bar and status messages. Follow the status messages and instructions carefully. At the end of the process, reboot the updated devices, let them boot, then click the window’s Refresh button.
13. SoundGrid Connections Window The Connections table allows you to create audio connections (routes) between source and destination devices. Go to Edit menu and select the SoundGrid Connections menu item, or press F3. On the lefthand side of the table, select the source device and its output channels that will be routed to the destination device’s channels.
Source: Output Chn Range Use the pull-down menu to select a source device by its name (as set in the Inventory window), i.e., the device that will send audio in this audio connection. Destination: Device Name The channels of each connection are set by ranges. Use the two edit fields to set the range of channels the source device will send. Note that the values are limited by the number of channels the device supports and by your Inventory settings.