
User's Manual


SPEEDLAN TM
42
Part II - Setting Up the IP Address
In this section you will first assign a static IP address or enable the DHCP client. Second, choose the
appropriate interface for the DHCP client. Third, enable the DHCP Server on the SPEEDLAN TM.
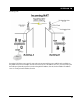
Note: Confirm the IP address of your SPEEDLAN TM units by performing the following tasks.
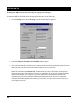
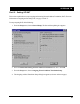
Open the SPEEDLAN TM Configurator. From the File menu, choose Open Remote Config.
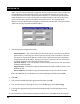
Then, click Scan. The Scan dialog box appears. Select the appropriate brouter and click OK.
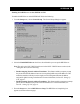
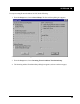
Click OK again. A message box appears confirming that the “Configuration has been read from the
Bridge” (i.e., 128.104.224.1). Click OK.
To set up the IP address, do one of the following:
1. Physically assign a static IP address (Static IP)
2. Enable DHCP client and choose appropriate interface (Dynamic).
Note: After following Option #2 above, proceed to Enabling the DHCP Server on the
SPEEDLAN, page 59.
Physically Assigning a Static IP Address
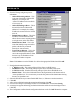
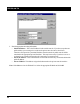
To physically assign a static IP address, do the following:
1. From the Setup menu, choose IP Setup. The IP Setup dialog box appears.