
User's Manual
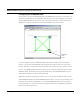
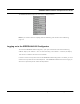
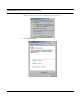
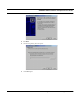
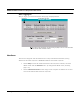
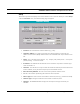
Table Of Contents
- Chapter 1 Introduction
- Features and Benefits
- Equipment Features
- SPEEDLAN K2's Polling Protocol -- How it Works in Star Networks
- SPEEDLAN 9000 Mesh Protocol -- How It Works in Non-Line-of-Sight Networks
- Chapter 2 Installing the SPEEDLAN 9101 & SPEEDLAN 9102 Hardware
- Rooftop and Tower Installations Warning
- Hardware Overview
- Drawings of Outdoor, Remote-Mounted Components
- The SPEEDLAN 9101 (with an Attached Standard Omni)
- The SPEEDLAN 9102 (with an External Antenna)
- Chapter 3 Using the SPEEDLAN 9000 Configurator
- Initial Configuration of the SPEEDLAN 9000
- Overview of the SPEEDLAN 9000 Configurator Main Menu
- Logging on to the SPEEDLAN 9000 Configurator
- Interfaces
- System
- Routing
- Wireless
- DHCP Server
- DHCP Relay
- NAT
- Diagnostics & Troubleshooting
- Administrative Access Pages
- Chapter 4 Using SPEEDView
- What is SPEEDView?
- System Requirements
- Installation Instructions
- Starting SPEEDView
- The Program Instructions
- The Main Tab
- Options Tab
- Admin Tab
- Chapter 5 Basics of IP Addressing
- Basics of IP Addressing
- Glossary for Standard Data Communications
- Glossary for Standard Data Communications
- Software License Agreement

SPEEDLAN 9000 Installation and Operation User Guide
3-6 Using the SPEEDLAN 9000 Configurator
The SPEEDLAN
9000 Configurator main menu is displayed below.
Note: If you need to reference anything about IP addressing, refer to Basics of IP Addressing,
page 5-2.
Logging on to the SPEEDLAN 9000 Configurator
To access the SPEEDLAN
9000 Configurator, open your web browser and enter the following
address: "https://192.168.69.1". You can also enter "http://192.168.69.1". However, the "https://
192.168.69.1" address is the more secure address.
In order to avoid a security alert each time the SPEEDLAN 9000 Configurator is accessed, you must
install it's security certificate into Internet Explorer. If the SPEEDLAN 9000's host name changes, you
will have to repeat this process. Follow the steps below: