
User's Manual
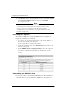
Table Of Contents
- WatchGuard® Firebox® X Edge User Guide
- Certifications and Notices
- Declaration of Conformity
- Notice to Users
- WatchGuard Firebox Software
- End-User License Agreement
- Copyright, Trademark, and Patent Information
- Limited Hardware Warranty
- Abbreviations Used in this Guide
- CHAPTER 1 Introduction to Network Security
- CHAPTER 2 Installing the Firebox® X Edge
- CHAPTER 3 Configuration and Management Basics
- CHAPTER 4 Changing Your Network Settings
- Using the Network Setup Wizard
- Configuring the External Network
- Configuring the Trusted Network
- Configuring the Optional Network
- Enabling the optional network
- Changing the IP address of the optional network
- Using DHCP on the optional network
- Setting optional network DHCP address reservations
- Configuring the optional network for DHCP relay
- Using static IP addresses for optional computers
- Adding computers to the optional network
- Requiring encrypted connections
- Making Static Routes
- Viewing Network Statistics
- Registering with the Dynamic DNS Service
- Enabling the WAN Failover Option
- Enabling External Modem Failover
- CHAPTER 5 Setting up the Firebox X Edge Wireless
- CHAPTER 6 Configuring Firewall Settings
- CHAPTER 7 Configuring Logging
- CHAPTER 8 Configuring WebBlocker
- CHAPTER 9 Configuring Virtual Private Networks
- CHAPTER 10 Configuring the MUVPN Client
- CHAPTER 11 Managing the Firebox® X Edge
- Viewing Current Sessions and Users
- About User Authentication
- Adding or Editing a User Account
- About Seat Licenses
- Selecting HTTP or HTTPS for Firebox Management
- Changing the HTTP Server Port
- Setting up VPN Manager Access
- Updating the Firmware
- Activating Upgrade Options
- Enabling the Model Upgrade Option
- Configuring Additional Options
- Viewing the Configuration File
- APPENDIX A Firebox®X Edge Hardware
- Index

Configuring the MUVPN Client
128 WatchGuard Firebox X Edge
From the connection window Networking tab:
1 Select the Internet Protocol (TCP/IP) component and click
Properties.
The Internet Protocol (TCP/IP) Properties window appears.
2 Click Advanced.
The Advanced TCP/IP Settings window appears.
3 Click the DNS tab and from the section labeled DNS server
addresses, in order of use, click Add.
The TCP/IP DNS Server window appears.
4 Type the IP address of the DNS server and click Add.
To add more DNS servers, repeat steps 3 and 4.
NOTE
The DNS server on the private network of the Firebox X Edge must
be the first server in the list.
5 Select the Append these DNS suffixes (in order) checkbox and
click Add.
The TCP/IP Domain Suffix window appears.
6 Type the domain suffix in the applicable field.
To add additional DNS suffixes, go back to step 5.
7 Click the WINS tab and then from the section WINS addresses,
in order of use, click Add.
The TCP/IP WINS Server window appears.
8 Type the IP address of the WINS server in the applicable field.
Click Add.
To add more WINS servers, repeat steps 7 and 8.
9 Click OK to close the Advanced TCP/IP Settings window. Click
OK to close the Internet Protocol (TCP/IP) Properties window.
10 Click OK.
11 Click Cancel to close the connection window.
Windows XP setup
Use this section to install and configure the network components
for the Windows XP operating system. You must install these com-
ponents if you use the MUVPN Client on a Windows XP computer.
From the Windows desktop:
1 Select Start > Control Panel
The Control Panel window appears.