
manual

20
PRINT ASSET TAGS
Asset Tags should be printed and attached to each asset in your database.
When you created your Assets, remember that you entered a number or
code for each asset in the Asset Tag field of the New Asset screen (if you
manually entered your assets) or in the Asset Tag column (if you imported
the data). Now an actual tag should be printed that contains the Asset Tag
number or code and (usually) a barcode for quick identification and
tracking. These tags should be affixed to each asset.
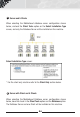
MobileAsset came bundled with the WaspLabeler application making the
creation of these Asset Tags simple. WaspLabeler was installed when you
installed MobileAsset. To print tags, first select the assets from the Asset
List for which you want to print tags, then click the Print Tags icon on the
Asset List toolbar. You can select multiple assets using the SHIFT or ALT
keys.
AUDIT YOUR ASSETS
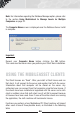
Note:
Test your mobile device to make sure data travels back and forth
correctly before starting to do actual work on the device.
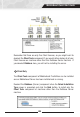
Now that your database is setup and you have attached Asset Tags to all
assets, you should audit all assets. This ensures you have not missed an
asset, miss-labeled an asset or assigned an asset to the wrong location.
The quickest way to do this is to use your mobile device. You will need to
setup your mobile device prior to performing this step. Please refer to the
Working With Mobile Devices section of your online help system for
assistance setting up, using and syncing your mobile devices.
STEP 4
STEP 5