
User guide


24
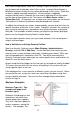
Figure 13
Step 4: Create Location Labels for Scanning
If you have setup more than one location and you will be using a mobile device
with an integrated barcode s canner, it is a good idea to create Location labels for
each location you have entered in the system. This allows you to quickly scan a
barcode label when auditing or adjusting inventory at that location, or when
adding, removing, picking or receiving inventory to or from that location. For
ideas on configuring your labels, refer to Chapter 1 – Where Do I Start.
After printing your labels, attach them to each location. For example, if your
locations are shelves, attach a label to each shelf to identify it.
How to Create Location Labels
You can use the Wasp Labeler software that came with your InventoryControl
software to print barcode Location labels for each location. You can access
Wasp Labeler from the InventoryControl Main W indow by clicking the Labels
button, then selecting a label type. After you create and print the labels, you
should attach them to each warehouse bin, vehicle, etc.
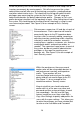
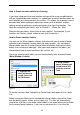
There are some pre-built labels you can create directly from InventoryControl
(Main Window > Labels).
To create a custom label, highlight the Create New Label option on the Labels
List.
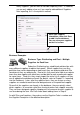
When saving new labels you've created with W asp Labeler, they will be listed
with the default names shown on the Labels List. The files will automatically
save to the .LAB files in the folder called Labels in the folder where you installed
the InventoryControl software. If you are unsure where this is, just use the
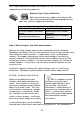
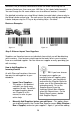
1. Highlight the
label you want to
create, then click
the OK button.
2. Wasp Labeler
opens allowing you
toaddinfotoand
print the selected
label.