User Guide
Copyright © 2007 Wasp Barcode Technologies 1400 10th St. Plano, TX 75074 All Rights Reserved First Printing October 2007 Written by Shari deBlonk STATEMENTS IN THIS DOCUMENT REGARDING THIRD PARTY PRODUCTS OR SERVICES ARE BASED ON INFORMATION MADE AVAILABLE BY THIRD PARTIES. WASP BARCODE TECHNOLOGIES AND ITS AFFILIATES ARE NOT THE SOURCE OF SUCH INFORMATION. THE INFORMATION IN THIS DOCUMENT IS SUBJECT TO CHANGE WITHOUT NOTICE.
Table of Contents Chapter 1: Where Do I Start? ............................................................................... 1 Using this Document........................................................................................ 1 Follow Our Examples....................................................................................... 2 Setup Cycle – What do I do first? .................................................................... 4 What is an Inventory Item? ................................
Auditing Best Practices.................................................................................. 52 How to Audit in InventoryControl ................................................................... 55 Common Audit Questions.............................................................................. 58 Chapter 6: Using Cost Tracking and Average Cost............................................ 63 How is Average Cost and Item Value Calculated? ........................................
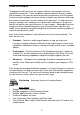
Chapter 1: Where Do I Start? Using this Document This manual contains information that will aid you in setting up and using the InventoryControl software. When you are reviewing the material in this manual, keep in mind that Chapter 1: Where Do I Start? takes you through the concepts and ideas behind InventoryControl. You should read this chapter first, before you begin setting up the software, to familiarize yourself with the terms and functionality used throughout InventoryControl.
Follow Our Examples Throughout this document we will suggest solutions and examples for three hypothetical companies. These companies represent generic business models that encompass scenarios for how most businesses commonly use this product. Find the example company that most closely resembles your business and study the scenario included for it in each section of this document.
Sebastian Distributing has been in business for many years and has previously used a different inventory software. They have a great deal of inventory in multiple warehouses they need to manage with InventoryControl. Each warehouse will be a site with multiple locations. The supervisor of each warehouse will use a computer setup with InventoryControl, but the general manager will be the one who has full administrative privileges.
Mid-sized Reseller - Standard Version of InventoryControl Basic Needs: • One Site, Multiple Locations • One PC running InventoryControl • No mobile devices but a barcode scanner is used at the PC • Add, Remove, Adjust, Move and Audit The example used here is an antique reseller, but this information applies to many different types of businesses, such as second-hand shops, hobby shops, beauty salons, etc., and even small medical/veterinarian businesses who want to track pharmaceuticals and other supplies.
Before starting this process, set aside a day or two when you can stop using the old system and transition over to InventoryControl. The audit, or inventory counting, step must be done when you are not receiving or shipping goods. Plan to perform the audit on a weekend or after hours, for example. In this manual we will detail each of the steps below and help guide you through the process. 1. 2. 3. 4. 5. 6. 7. Design your barcode labeling system and designate barcode label ranges.
123 becomes Figure 1 Whse1 becomes: Figure 2 Assigning a permanent barcode to each site, location, item supplier and customer creates an environment where a mobile device can be used to easily keep track of inventory movements and alleviates the problem of data-entry errors. Barcodes get wider with the amount of numbers and characters you want represented by them. A barcodes width is determined by the amount of numbers or characters represented by the barcode.
keep plenty of extra label stock and printer ribbons to make sure you never run out. To determine how to best provide good quality labels for daily use consider the kind of printer you are using. Organizations that have several hundred new inventory items a week, will need to have a dedicated barcode label printer at each site. They should use a good quality label media and use the feature built into InventoryControl that automatically prints inventory tags as soon as the item is received on the PC.
Figure 5 The first step for designing your labels is to decide what to print the barcode on. A variety of barcode label stock exists that can withstand any environment. There are two kinds of barcode label printers. Thermal transfer printers that work like an ink jet or laser printer by transferring ink from a ribbon to the label paper (stock). Direct Thermal printers do not have a ribbon but use heat to print onto a special label stock.
Before you label your locations you need to come up with a numbering scheme for each location and item. In InventoryControl there are two fields that describe where the item is: Site and Location. What is a Site? The term site is used to describe any grouping of locations where you plan to store and track inventory. Usually a site is a warehouse building but it can be an office, a truck or a field. Site design may be simple if your entire inventory is stored in your two warehouses.
Figure 6 Figure 7 Barcodes Best Practice In InventoryControl, when you are asked for a number to identify sites, customers, items, locations etc., we suggest you always use a short sequential set of numbers or numbers and characters. Put the full text description of the site or location in the description field, not the number field. These numbers can then be printed as a barcode and used to scan locations into mobile devices.
128 which supports both upper and lower case characters, all numbers and many of the special characters. How Should I Label My Items? Just as every location should have a barcode, each individual piece of inventory needs a barcode. We suggest that you print your item numbers on labels and put them on each individual item before they are put away in their final location on a shelf.
Identifying Additional Tracking Needs Sometimes it is important to be able to associate an exact item or range of items with an exact customer, serial number, date code or shipment date. This can be important for support and maintenance purposes or for recalls. Often, larger cost items that have a warranty or support contract are tracked by serial number so that if the item is sent back for maintenance you can be sure you are not fixing a product that is out of warranty.
make sure that you print a label for each track by field you have selected to use and attach them to each item. If the labels are not physically attached to each item, it will be very difficult for you to keep track of which items should be tracked by a specific field. How do I use my Handheld Device? The mobile devices that are supported by InventoryControl do not transmit every add, remove, move, etc. to the main computer every time an action or transaction is completed (real time).
devices. Throughout the day several people log in to each device and do several different kinds of transactions. By the end of the day each device is going to have a different count of inventory at certain locations. The PC is unaware of these changes. For example: When the day started: Location 10A had 20 of item 10250 Location 10B had nothing in it Location 10C had 50 of item 10100 Throughout the day: Device 1 added 100 of item 10100 to location 10C.
Sometimes this is the preferred way for companies if their items are all tracked by serial number or some other tracking field that must be correct.
Chapter 2: Getting Started After you have installed InventoryControl, you need to enter your inventory information. There are various ways you can enter information in InventoryControl; however, to help you setup your system quickly and minimize mistakes, we have compiled a list of steps you should follow. By completing these steps in order, you can be assured that all of your information is entered correctly and efficiently. First, let’s take a brief look at the steps required for setting up your system.
user name and password, rather than sharing a single user profile, as this allows you to keep track of who does what in the system. InventoryControl keeps a detailed transaction history of every action performed in the system. Each time an item is added, removed, moved, etc., the transaction is logged by InventoryControl and is listed with the user name, date/time of the transaction and the type of transaction on the Transaction List (Main Screen >Lists > Transaction List).
will be the primary user of the InventoryControl software and will keep track of inventory movements by running reports. Pat will also serve as the system administrator and will take care of maintaining user profiles, creating backups and other administrative tasks. Pat should set himself up with administrative privileges upon accessing the system for the first time. This will setup one administrator besides the default administrator profile.
Also available in the InventoryControl Help… For More Information On… Type this in the Index tab… Using the Security Privileges Adding Users/Editing Security Screen Privileges Adding Users/Editing Security Copying User Settings Privileges Step 2: Enter Your Company Information and all Shipping/Receiving Addresses Next you should enter your company's information on the Company Information screen.
sites. Now when purchase orders are created, she can select to have the order shipped to any of the three addresses. Business Type: Fleet and Reseller Both enter their business address once with the Attn field set to Accounting for billing correspondence and again Attn: Dock for shipping and receiving.
keep your naming simple so that you and your employees can readily identify the site or location they need. How to Add Sites and Locations You have two options for adding Sites and Locations to InventoryControl: • Manually Add Sites and Locations before you add Items – This option allows you to directly access the Create New Site and Create New Location screens. This is the best method for entering locations into your system (rather than importing), even if you have many different locations.
Business Examples Business Type: Distributing – Multiple Sites/Multiple Locations Sebastian’s Distributing has two warehouses. Each warehouse contains various bins, shelves, etc that will physically contain the inventory. Since this business has multiple warehouses, each warehouse is setup as a Site, then multiple locations can be created within each site to represent the specific areas where inventory will be stored.
Site Configuration screen to make each mobile device specific to a vehicle. The Site Configuration screen on the mobile devices allows him to designate one site as the From (Remove, Move, Pick,) site and one as the To (Add, Move, Receive) site. He can make the From and To sites the same sites, if needed. Since the usual transfer of inventory for his business flows directly to the vehicles via add/receive, then to the customer via remove, he can set up the From and To sites as the specific vehicle.
Step 4: Create Location Labels for Scanning If you have setup more than one location and you will be using a mobile device with an integrated barcode scanner, it is a good idea to create Location labels for each location you have entered in the system. This allows you to quickly scan a barcode label when auditing or adjusting inventory at that location, or when adding, removing, picking or receiving inventory to or from that location.
Windows Find (or Search) command to locate the folder containing the file InventoryControl.exe, then save your .LAB files in the Labels folder beneath it. You can change the file name and/or save to a different location, if needed. For detailed instructions on using Wasp Labeler to create labels, please refer to the Wasp Labeler online help. You can access the online help by opening Wasp Labeler and pressing the F1 key or by selecting Help > Contents.
many Suppliers, you will want to consider importing them. If, however, you are only adding a few, or if you need to add additional Suppliers after importing, this is the quickest method. Enter your supplier information, then click Save to add it to the database. You can view your suppliers on the List screen.
Business Type: Reseller – One Supplier for Some Items Brady’s Bargains has a list of suppliers from which they regularly receive certain items that they have been maintaining by hand. They will manually input these suppliers on the Create New Supplier screen before they add the items. They can later manually associate the suppliers to an item using the Edit Item screen/Manage Suppliers tab.
Make sure you enter or review (if importing) the information on all tabs of the Item screen. Many of these fields cannot be imported, but are needed to get the full value from InventoryControl. For detailed instructions on completing this screen, see your Online Help. Figure 17 • Import Items into the Database - If you already have item information contained in another database, you may want to use InventoryControl's Import function rather than manually entering in this information.
need ideas on how to label your items, refer to Chapter 1 – Where Do I Start Basics. They will also be tracking some items so he makes sure he imports this information correctly. Refer to Chapter 3 – Importing into the Database for details on importing tracking information. Business Type: Fleet – Items with Primary Locations Items are typically assigned to the same locations in Rusty’s Cable Company. They have setup their sites as vehicles and each vehicle contains basically the same locations.
Labels List will appear. Simply highlight the label you want to create, then click the OK button. Wasp Labeler will automatically open allowing you to print the selected labels. To create a custom label, highlight the Create New Label option on the Labels List. There are some pre-built labels you can create directly from InventoryControl (Main Window > Labels). 2. Wasp Labeler opens allowing you to add info to and print the selected label. 1.
How to Add Inventory to Your Database • Add Inventory via the PC or a Mobile Device –You can manually add inventory to items using the Add inventory screen (Main Window>Inventory>Add). This is the recommended method for adding inventory to your system. Manually entering inventory helps ensure your cost data and counts are correct. Before you add inventory, you should audit, or count your inventory to make sure your counts are correct. 1.
correct. If you do import, you should perform an audit of your inventory immediately after importing (before any transactions are performed on the data). See Chapter 5 for more information on auditing your inventory. If you choose to import your inventory, you MUST run a backup of your system BEFORE you import the inventory data. Name the backup file something that indicates it was run immediately prior to importing inventory so you can easily identify it if needed later.
Also available in the InventoryControl Help… For More Information On… Type this in the Index Tab… Using the Add Inventory Screen Manually Adding Inventory Windows Mobile Device – Adding Inventory on a Mobile Adding Inventory Device WDT2200 – Adding Inventory How to backup the database Backing up the Database How to restore the database Restoring the Database 33
Chapter 3: Importing Data into InventoryControl InventoryControl allows you to bring data into the program from external sources in .csv or .txt format. This allows you to quickly add information to your database rather than having to manually add it Importing Tips when you are initially setting up your • Do not use Import to modify software. existing records.
”Adams”, “Jane”, “46”, “female”, “New York” ”Doe”, “John”, “32”, “male”, “California” Not all software programs will export into .csv or .txt format. If your current software does not export into the correct file type, you will need to convert your files before you can import them into InventoryControl. You can easily format your files by opening the exported file in your favorite spreadsheet application © that exports to .
How to Import into InventoryControl InventoryControl contains an easy-to-use Import Wizard. This wizard will take you step by step through the import process. You cannot use the import function to edit data already in the database. Since importing adds information to the existing database, make sure you do not import the same file twice. In addition, make sure the data in your file does not already exist in the database. From the Main Window, click Administration > Import.
Mapping Your Data To tell InventoryControl which field in the software corresponds with each piece of data in your import file, you can Map the data. This process allows you to select an InventoryControl field and match it to data in your file. The import wizard can automatically map the columns in your import files to the correct column in the database if the column header matches one that the wizard is looking for and the data type is correct. In order for automatic mapping to work, you should edit your .
Importing Tracked By Information InventoryControl allows you to track your inventory by Serial Number, Lot, Pallet or Date Code. These fields are True/False fields and can be imported with your Item data. If you are manually entering your data, there are checkboxes you can select to activate the track by fields.
Item Number, Site, Location or Supplier Code will not be created using the new value. Instead, the Inventory record being imported will be rejected. This is why you must import your data in the order specified earlier in this chapter. Negative values for Quantity can also cause an Inventory record to be rejected. Rejected data will appear on an error report. You can manually enter the rejected data, or correct your .csv or .txt file and try to import again.
It is not uncommon to get errors when duplicates occur in your source data. Duplicate errors can usually be ignored and the Import can be considered to have completed successfully. For other error types, locate the error referenced in the Error report and correct it in the file. Then you can make a new import file (.txt or .csv) containing only these records and import again.
feature on the Options screen. To do this, from the Main Window click Tools > Options. On the Options screen, click on Edit Field Names, then select the Yes checkbox. When you return to the Edit screen (Edit Item, for example), you will need to click on the custom field header to open the Custom Field Edit screen. In this screen, select the Visible checkbox. Now the data in the field will be shown on the Item screen.
labels, used in the previous software do not match those used in InventoryControl. She knows that she has two options to match up (map) the data: 1. 2. she can edit her import files using the import templates (found on the installation cd) as a guide, or, she can use her files as is and manually map the columns using InventoryControl’s Import Wizard. When importing large amounts of data, it can be more time-consuming to try to manually map through the wizard, so Pat decides to edit her import files.
he knows InventoryControl will simply ignore the data that is not mapped to a header. Now he checks the other column headers, such as Item Number, Item Description, etc. against the import template file found on the installation cd to make sure the header names match those in InventoryControl. After he edits his headers to make them match, he saves the file as .csv and he is ready to import. After he imports his items, a notice appears in InventoryControl for him to check his error report.
Chapter 4: Working with Mobile Devices If your business consists of various warehouses, storage rooms, vehicles, or any site/location where a great deal of inventory is kept and transactions are performed, a handheld mobile device is an indispensable aid. Getting Started Using a Mobile Device InventoryControl works with two types of mobile devices: the WDT2200 and Windows Mobile Devices such as the WDT3200.
All of these steps are automated through the Mobile Devices Wizard in InventoryControl. It is also a good idea to create a backup of your database on the PC before sending it to the mobile device. Step 1: Send the InventoryControl Program to the Device First, make sure your device is connected to the computer. If you need assistance connecting the device, please refer to the user’s manual for that device.
Step 2: Create a Mobile Version of the Database Next you will create a mobile version of your InventoryControl database. This is a snapshot of the database as it appears on the PC at the time you create it. You can click Next without making any selections on this screen to send the entire database to the device, or choose filters to limit the information included in the database.
result in slow performance if you have a lot of information in your database. Filtering allows you to tailor the information that appears on the device to just those locations, items, suppliers, etc. that pertain to that device. TIP: Filtering the database before sending it to the mobile devices helps the device work faster and keeps the user from having to search through information not related to their job.
how many transactions are made on the database. Usually it is a good idea to send a new database to the mobile devices at the start of each workday. Creating and sending an updated database to the mobile devices is important, and also very easy to do. Simply repeat Step 2 - Create a Mobile Version of the Database and Step 3 Send the InventoryControl Database to the Device, described on the previous page. You can repeat these steps as often as necessary to keep the database on the mobile device updated.
Click Finish on the Wizard screen and the Pending Uploads screen appears. This screen lists all transactions that were transferred from the device and notes those that are duplicate transactions or transactions with errors that need to be resolved. At this point that data has not been entered into the database. This is your chance to edit the incoming data or to correct errors.
Common Mobile Devices Questions By what criteria can the InventoryControl database be filtered to produce the database that’s downloaded to a mobile device? Source and Destination Sites (To/From Sites), a range of Location values and a range of Item Number values can be specified in the Create Database screen’s Filter section. (Main Window > Mobility > WDT2200 or Windows Mobile/CE > Create Database).
a customer, the user will use the mobile device to access the Remove screen, scan the barcode to bring up that piece of inventory and mark it as removed in the system. At the end of the day, the user returns the mobile device to the supervisor who sends the data back to the PC and processes the transactions. Business Type: Reseller This business is not using mobile devices.
Chapter 5: Auditing Your Inventory What is an Audit? Sometimes referred to as “taking inventory”, Auditing is the process used to physically count the inventory you have in your warehouse, store, vehicle, etc. and comparing those counts to what you have recorded in InventoryControl. Auditing means you will have people in your sites and locations manually counting or scanning each piece of inventory.
• Plan Your Audit - Plan your audit date and time well in advance. This is especially important if you have multiple sites, warehouses that contain inventory, for example, that will be involved in the audit. Since all sites work from the same database, every PC running InventoryControl will need to be in Audit Mode when the counts are being done.
procedures should be. • Backup Your Database – Create a pre-audit backup of your database on the day of your audit, just before putting the system into Audit Mode. This is an important step as it preserves all of your data up to this point. If something goes wrong during the audit, you can restore this backup and return your database to its pre-audit status. We recommend you name this backup something that clearly identifies it as your pre-audit backup.
• Review Reports – The Discrepancies report and Not Counted Items report should be reviewed now. The Discrepancies report lists any items, by location, for which the count did not match the quantity in the database. The Not Counted Items Report lists any items for which counts were not received. • Spot-Check and Recount – You should spot-check some correctly counted items and recount all discrepancies.
simultaneously with the PC to perform an audit by downloading the database in audit mode to each device. Audit Mode features a simple Audit screen that allows you to enter your counts for inventory in each location and compares these to the counts already in the system. You can then view the Complete Audit screen to review any discrepancies between your counts and what was in the system. At the click of a button you can reconcile the counts or you can select certain transactions to accept or reject.
For more information on using the mobile devices to audit, please refer to the online help. 4. Review the Not Counted Items Report. This report lists all items for which no count was entered on the mobile devices or on the PC. Reviewing this report helps you make sure no items are missed during the audit. Figure 32 5. Reconcile your counts entered in the Audit screen against the counts that were in the system using the Complete Audit screen.
6. Review the remainder of the Audit Reports. Access the reports by selecting the Reports icon, then scrolling to the Audit Reports. Figure 34 7. End the Audit Mode. Common Audit Questions Can I use InventoryControl to perform cycle counts? InventoryControl can be used for cycle counting, but the process is different from performing a full physical inventory. Cycle counting is when a small portion of your inventory is counted on one day, a different portion is counted on another day, etc.
Cycle counts are like “mini-audits” and it is a good idea to perform them several times throughout the year, especially on fast-moving merchandise. When performing cycle counts in InventoryControl, count the item or items you want to include in the counts, then use the Adjust function (Main Window > Inventory > Adjust) to adjust the quantity up or down. This does not require putting the system into Audit Mode, therefore it is possible that transactions (add, removing, etc.
How often should I audit my inventory? This depends on your business needs, but at a minimum you should perform a full, physical audit at least once a year. It is also a good idea to perform cycle counts, or “mini-audits” several times throughout the year on fast-moving items so you can make sure your counts on these are always correct. Business Examples Business Type – Distributing – Auditing with Mobile Devices Sebastian Distributing has two sites that need to be audited.
Business Type – Fleet Rusty’s Cable Service has 20 vehicles setup as sites in InventoryControl and one storage room setup as a site. Each driver is assigned a handheld device that he or she uses throughout the workday to perform various functions. To audit their inventory, they follow the plan below: • A date and time of the audit is set and announced to the employees.
number counted matches the number in the system. This creates a paper trail for the audit. • The Discrepancies and Items Not Counted reports are run and spotchecking and recounts are performed. • After recounting they are ready to reconcile and complete the audit.
Chapter 6: Using Cost Tracking and Average Cost How is Average Cost and Item Value Calculated? Cost handling in InventoryControl is designed to show you the average cost and current value of your inventory. You can use this cost information for other purposes as well, such as determining pre-tax and purchase order totals and receiving totals. How do I determine my Stocking Unit The quantity of an item on all screens and reports is counted using the Stocking Unit you specify or eaches (ea.
What is the Cost for my Item? When you input cost for an item into the New or Edit Item screen the cost is your cost for purchasing one of the stocking units. If one Barcode Laser Scanner costs $300 you would enter 300 into the cost box. If you remove fractional quantities of an item, the cost should still be for one whole stocking unit. Lets use rope for an example. Normally the rope is sold in increments of a foot so the Stocking Unit is ft. Each foot costs $0.12 making the cost twelve cents.
If your cost for this add is different from the cost on the item record, you can change this cost on the Add screen to represent the actual cost. For example, if you purchased these 20 scanners for a discount, change the Cost on the Add window before you add the items. In this example the user received a $50 discount on the whole order for ordering 20 scanners so the Cost entered on the Add screen should be $297.50. 20 Scanners * $300 = $6000 - $50 = $5950 / 20 Scanners = $297.
If I order my Barcode Laser Scanners in boxes of 20 but my stocking unit is each, I need to specify the cost of a box of 20 when I create the Order Unit Settings on the Create New or Edit Item screen, Suppliers tab, as shown in the graphic. When the item is received, InventoryControl will do the math and put in the cost per item received. $3500 / 20 = $175 per Barcode Laser Scanner Average Cost Average Cost is calculated based on the costs of each of the items that are still in inventory.
st 50 Scanners * $300 = $15,000 (from the 1 ) th 50 Scanners * $320 = $16,000 (from the 8 ) 1 Scanner was found and added to inventory at $0 th 50 Scanners * $315 = $15,750 (from the 15 ) --------$46,750 / 150 = $311.67 average cost The average cost is not $309.60 if 46,750 was divided by 151. Since there is no way to edit the cost of an add or receive after it is processed, we must ignore $0 cost adds.
In Step 3: Transactions screen of the wizard, select the transaction for which you want to change the cost, then click Edit. Enter the new Cost and click the OK button. Figure 40 Keep in mind that there is no way to change the price after the handheld transactions are processed on the PC. If you have the Enterprise or Pro version, and the inventory is received against a PO on the handheld, the item cost will be calculated from the cost on the PO.
Chapter 7: Working with Purchase Orders Overview Purchase orders can be created in InventoryControl when you need to order additional inventory from suppliers. These orders can be emailed to the supplier and/or printed upon creation and can be easily referenced and searched in the system. When you receive shipment of the items on the purchase order, the items can be marked as received either on the PC's Receive screen or on the mobile devices.
Purchase Order Work Flow The graphic below illustrates the workflow of a purchase order from creation to close. Figure 41 Create Automatically Generated Purchase Order Numbers Each purchase order you create will be assigned a unique identifier. You can either enter this number manually each time you create a new purchase order, or you can create a template that the software will use to automatically generate a number for you.
We suggest you set up your numbers to contain a date field, followed by a serialized (count field), at the very least. Automatic Emailing of the Purchase Order At the bottom of the Create New Purchase Order screen is a check box labeled Email on Save. If this box is checked, a copy of this order is automatically sent to the email address listed in the Supplier screen for the supplier listed on this purchase order when you click the Save button.
In order for the email feature to work correctly, you must set your SMTP Server, User Name and Password (if authentication is required for outgoing mail) and the SMTP Port on the Options screen. If these are not set, an error message will appear. Figure 45 Automatic Notification of Under-Stocked Items To help you keep track of items that are in danger of becoming understocked, InventoryControl has an automatic notification system built in.
By enabling the Automatic Notification of Low Order Item on the Options screen, InventoryControl will display the Item Stock Level List when you first log into the system. This screen contains items that have a Quantity value equal to or less than the Minimum Stock Level value, broken down by location.
Defining Custom Shipping and Payment Methods When you are creating your purchase orders, you will notice that the Shipping and Payment Method fields contain standard methods from which you can choose. If you want to create your own custom shipping or payment method to add to these lists, you can do so on the Pay Method List screen (Main Window>Receive/Pick>Manage Payment Methods) or the Ship Method List screen (Main Window>Receive/Pick>Manage Shipping Methods). 1.
Figure 49 Receiving Inventory from a Purchase Order When you begin to receive inventory from the purchase order, you will enter the quantity received for each item on the Receive screen. Inventory for an item can be marked as received on the PC's Receive screen or on the mobile devices. The Receive screen allows you to enter quantities received by location, and can optionally show you costing information as well. Receiving inventory on the Receive screen adds inventory to that item.
Purchase orders that have some items marked as received, but others that have not yet been received have a status of In Process. If the order becomes overdue, it will have a status of In Process - Overdue. TIP: When you are receiving inventory from a purchase order, click the Quick/Scan Entry button to speed up entry of your information.
3. When you open the order, the Notes section contains a reference to the backorder and the Status is changed back to New. Figure 51 Note that while the partial received amounts can be marked as received on the mobile devices, the actual backorders will need to be created on the PC.
What is the difference between the Reorder Quantity field found on the Create New Item or Edit Item screen, General Tab and the Reorder Quantity field found on the Create New Item or Edit Item screen, Location Tab? The Reorder Quantity field on the General tab is the reorder quantity for the item throughout all sites and locations.
Each day, when a new mobile database is transmitted to the mobile devices, the current outstanding purchase orders are also sent. When the items arrive at the site, the warehouse employees match the orders to the printed receivers, then begin unpacking and scanning the items as received. The quantity does not appear on the mobile devices’ Receive screen, and the manager prefers that the employee not know how many should be in the order. This is a “blind receive” that can increase accuracy.
Also Available in InventoryControl Help… For More Information On… Type this in the Index tab… Purchase Order/Receive Purchase Order/Receiving Overview Overview Steps to create a purchase Creating a Purchase Order Order Steps to setup a purchase order Customizing Numbers number template Steps to receive inventory from Receiving Inventory a purchase order on the PC.
Chapter 8: Working with Pick Orders Overview Pick Orders are orders that you create when inventory is requested by a customer and needs to be taken (picked) from your warehouse, store, storage facility, etc. and shipped to the customer. InventoryControl allows you to create a pick order that can then be automatically emailed to the warehouse and/or printed for reference. Pick Order Work Flow The flow of pick orders is as follows: 1. You receive an invoice or sales slip for merchandise from a customer. 2.
Figure 52 Creating Automatically Generated Pick Order Numbers Each pick order you create will be assigned a unique identifier. You can either enter this number manually each time you create a new pick order, or you can create a template that the software will use to automatically generate a number for you.
Automatic Emailing of the Pick Order and/or the Packing Slip At the bottom of the Create New Pick Order screen is a check box labeled Email on Save. If this box is checked, a copy of this order is automatically sent to the email address listed in the Customer screen for the customer listed on this pick order when you click the Save button. Be aware that this emails the Order, not the actual Packing Slip.
In order for the email feature to work correctly, you must set your SMTP Server, User Name and Password (if authentication is required for outgoing mail) and the SMTP Port on the Options screen. If these are not set, an error message will appear. Figure 56 Creating a Pick Order Your business receives a request for inventory (through an invoice, a sales slip, etc.). A pick order for the requested merchandise is entered on the Create New Pick Order screen.
Defining Custom Shipping and Payment Methods When you are creating your pick orders, you will notice that the Shipping and Payment Method fields contain standard methods from which you can choose. If you want to create your own custom shipping or payment method to add to these lists, you can do so on the Pay Method List screen (Main Window>Receive/Pick>Manage Payment Methods) or the Ship Method List screen (Main Window>Receive/Pick>Manage Shipping Methods). 1.
Picking Inventory from a Pick Order When the order is actually being picked, meaning the inventory is being readied for shipping to the customer, the picked quantities for each item on the order are entered in the Picking Order screen (Receive/Ship menu > Pick). This can be done on the PC or on the mobile devices. If you are picking on the PC, the quantities are checked and you cannot pick more than you actually have in inventory.
Common Pick Order Questions Can I create a backorder for items listed on a pick order that are out of stock? Backorders cannot be created in InventoryControl for pick orders. You can leave those pick orders for which additional inventory is needed open and make a note in the Notes section. Then create a purchase order (if needed) for the additional inventory. When you receive the inventory, you can complete the pick order. You can print a packing slip and ship partial orders.
Also Available in InventoryControl Help… For More Information On… Type this in the Index tab… Pick Order/Pick Overview Pick Order Overview Steps to create a Pick Order Creating a Pick Order Steps to setup a Pick Order Customizing Numbers number template Steps to Pick inventory for a Picking Orders Pick Order on the PC Creating Custom Shipping Managing Shipping Methods Methods Creating Custom Payment Managing Payment Methods Methods Windows Mobile Device – Steps to Pick items on the Picking Items for Orders
Glossary Add – The InventoryControl function that allows you to manually add quantity to items already entered into your database. Inventory is the amount or quantity of a particular item. Adjust - This term refers to adjusting the quantity of inventory at a specified location. Adjust is like a "mini" Audit and will update the quantity using FIFO (First In First Out) to make the total equal to the quantity you enter here.
Batch Processing – A method of processing mobile device data in which uploads and downloads of data are performed only when the device is connected and ”synced” to the PC. Transactions performed on the devices are stored until the transfer takes place. Batch Processing is the method employed by InventoryControl for processing of mobile device data. Check-In - Check-in inventory means you are returning inventory that has been "checked-out", or assigned, to customer back into your on-hand inventory.
01 02 05 (for Row #, Shelf #, Bin #) Another example would be to create Site labeled Warehouse 1 containing a Locations labeled Bin1 and Bin 2. Looping – This function allows repeated scanning into a field on the WDT2200. Similar to “pinning” on the WDT3200, looping keeps the cursor stationary at a selected field so the user can continuously scan information into that field. Lot – Another tracking field in InventoryControl, Lot allows you to track items by lot number.
in boxes containing 10 jars. When creating purchase orders, you would want to specify the Order Unit as box rather then jar (or you could end up with 100 boxes of jars rather than 100 jars). Packing Slip – An itemized printout of everything included in a shipment. These can be printed from the Pick screen. Pallet – Another tracking field in InventoryControl, pallet allows you to track items by the number or code assigned to the pallet on which they were received.
Receive – A function in InventoryControl that allows you to increase the quantity of an item. Receive is similar to the Add function, but is used when the items being added to inventory are part of a Purchase Order. This function is only available in the Professional and Enterprise versions. Remove – A function in InventoryControl that allows you to remove quantity from any item in the database. This can be considered the same as shipping inventory.
Transaction Code (TransCode) - Transaction Codes can be any code your business assigns to certain types of Adjustment transactions. Assigning these codes can help you with reporting as each type of adjustment (breakage, return, etc.) can be given it's own code. InventoryControl does not contain any preset codes to give you the opportunity to assign a code that best suits your needs, and to allow the entry of codes you already use in your business for these types of transactions.
Index I A Importing, 34 Extracting Data from Another Application, 34 Handling Errors, 39 How To, 36 Import Order, 35 Mapping Your Data, 37 Importing Inventory, 38 Importing Inventory Required Fields, 38 Inventory - Auto Notification of under stocked, 72 Cost on Imported, 68 Importing, 38 Initial Add, 30 Zero Cost Inventory, 66 Inventory Items, 69 Item Labels, 29 Items - Entering, 27 Labeling, 11 Audit - How To, 55 Auditing, 52 Why Audit, 52 Auditing Best Practices, 52 Average Cost, 63, 66 B Backorders, 7
N R Negative Inventory - Allowing on the Mobile Devices, 14 Non-Inventory Items, 69 Receiving, 75 Receiving Inventory - How Cost is Handled, 67 Reorder Quantity, 41 Reports - Iimport/Export Error Report, 39 Required Fields - When Importing Inventory, 38 O Optional Track By Fields, 12 Order Units, 65 S P Security - Users, 16 Serial Number - Track By General Information, 12 Shipping Methods - Creating, 74, 85 Site - Definition of, 9 Labeling, 7 Sites and Locations - Entering, 20 Stocking Unit, 63 Suppl