
Installation Guide


5
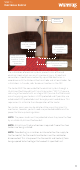
Quick Install Guide
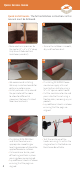
• Channel a groove in the
membrane and subfloor for
the coldtail & termination
joints, enabling them to
fit flush with the top of the
membrane. DO NOT tape over
these joints!
• Install the floor sensor
centrally between two runs of
the heater.
• Lay the tiles or levelling
compound over the system
• The heater, including its joints,
must be wholly within the
thinset or levelling compound
and not exposed.
• Use flexible grout when
grouting.
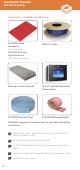
• Install the heating cable at the
chosen spacing.
• Maintain a minimum 2 peg (2
3
/
8
”) perimeter spacing.
• Test the resistance of the
heating cable aer installation
and check against the
previous value to ensure no
damage has occurred.
• Test the resistance of the
heating cable aer tiling and
check against previous values
to ensure no damage has
occurred.
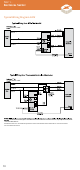
6
8
10 11
7
9
• Connect your Warmup
thermostat.