
Full Product Manual


PROGRESS PROFILES - PRODESO HEAT SYSTEM 15
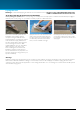
Laying the tiles
Warning: Be careful while applying the adhesive on the membrane not to d
PRODESO HEAT MEMBRANE.
50 lbs (22.70 Kg) for 40/50 ft
2
(3.7 m
2
/ 4.6 m
2
) using 1/4” x 3/8” (6 mm x 10 mm) square or U-Notched trowel 50 lbs (22.70 Kg) for
30/40 ft
2
(2.8 f
2
/ 3.7m
2
) using .” X .” (12.5 mm X 12.5 mm ) square or U-Notched trowel.
1
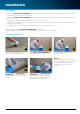
Tiles can be immediately laid after the
installation of the heating cables is
completed. Using the flat side of the
trowel fill with thin set mortar the cavities
of the membrane. Apply additional of
the same mortar with a notched trowel
over according to the tile size. Both
modified (ANSI A118.11) or unmodified
(ANSI 118.1) thin sets can be used
when installing tiles to Prodeso Heat
Membrane. (please consult with your
thin set manufacturer for proper thin set
selection and proper curing time for your
specific installation).
2
3
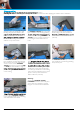
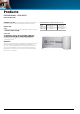
Apply the thin set to the back of the tiles
with a notched trowel and lay them on
the layer of thin set previously applied.
Occasionally remove and check some
tiles, to ensure full back coverage.
Carefully lay the tiles and press them
on the layer of thin set. If a layer of skin
has formed on the thin set, remove and
apply again.
4
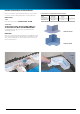
Warnings:
Full back coverage may vary depending on the consistency of the adhesive, the angle of inclination of the notched trowel and the
flatness of the substrate.If full back coverage is not achieved, remove the tile and apply new adhesive paying attention to the
consistency of the Thin set and its application. In case of large format tiles 12” x 12” and larger is recommended to double spread
each tile before laying them.