
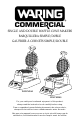
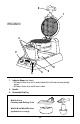
Instruction Booklet

8
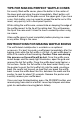
• Remove the rolling tool immediately after each roll.
• Remove the wafe cone from the at forming tool as soon as it
is cool enough to maintain desired shape.
HINT: To limit heat exposure on at forming tool, have a separate
container available to store cones while cooling when rolling
multiple cones.
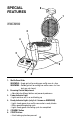
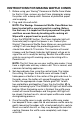
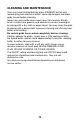
Place hot wafe cone
on at forming tool and
line the top of the cone
with the point of the cone
mold as shown in
gure 1.
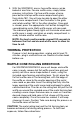
Press the rolling tool on
the hot wafe cone and
rotate counter clockwise
as directed in gure 2.
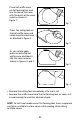
As you rotate apply
pressure onto the hot
wafe cone and feed it
into the cone mold as
shown in gures 3 and 4.
g. 1
g. 2
g. 3
g. 4