
Technical data


PerfectCharge Fastening the IU0U automatic charger
43
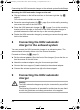
7 Fastening the IU0U automatic charger
You can fasten the IU0U automatic charger using the four holders supplied.
When selecting the installation location, observe the following instructions:
z You can mount the IU0U automatic charger either horizontally or vertical-
ly.
z Do not operate the device
– In wet or damp environments
– In dusty environments
– In the vicinity of flammable materials
– In spaces where there is a danger of explosion
z Select a well-ventilated location for the device.
A ventilation system must exist for installations in small, enclosed
spaces. The free space around the IU0U automatic charger must be at
least 5 cm.
z Make sure that the ventilation slots on the front and back as well as under
the IU0U automatic charger are not covered.
z Select a mounting surface which is flat and sufficiently firm.
z Make sure you have adequate space for the mounting bracket behind the
device when choosing a mounting location.
a
Caution
Before drilling any holes, make sure that no electrical cables or oth-
er parts of the vehicle can be damaged by drilling, sawing and filing.
Fastening the IU0U automatic charger to the floor
➤ Clip two holders on the left bar and two on the lower right bar (fig. 4,
page 5).
You can move the holders as required.
➤ Fasten the IU0U automatic charger by screwing one screw through each
hole in the holders.
➤ Lay the mounting bracket (fig. 5 1, page 5) with the clip over the edge
on the back of the IU0U automatic charger (fig. 5 2, page 5).
➤ Fasten the mounting bracket by screwing one screw into each of the four
holes.
_PerfectCharge_IU152A-IU802A.book Seite 43 Dienstag, 15. September 2009 5:19 17