
Installation Sheet

WAC Lighting retains the right to modify the design of our products at any time as part of the company's continuous improvement program. DECEMBER 2, 2015 12:02 PM
waclighting.com
Phone (800) 526.2588
Fax (800) 526.2585
Headquarters/Eastern Distribution Center
44 Harbor Park Drive
Port Washington, NY 11050
Central Distribution Center
1600 Distribution Ct
Lithia Springs, GA 30122
Western Distribution Center
1750 Archibald Avenue
Ontario, CA 91760
INSTALLATION INSTRUCTION
LED DISC
FM-304
1. Twist lens cover counter-clockwise to remove from Disk Light.
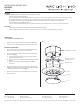
2. Attach plastic insert to Disk Light using supplied ¼” screws.
(Fig. 2)
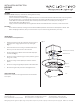
3. Detach the orange connector from socket adapter and insert
black and white fixture wire into non-wired half of orange
connector following color code marked. (Fig. 3)
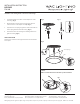
4. Screw the socket adapter to socket in housing. (Fig. 4)
5. Plug the female connector of the disc light onto the male
connector of the socket adapter assembly. (Fig. 4)
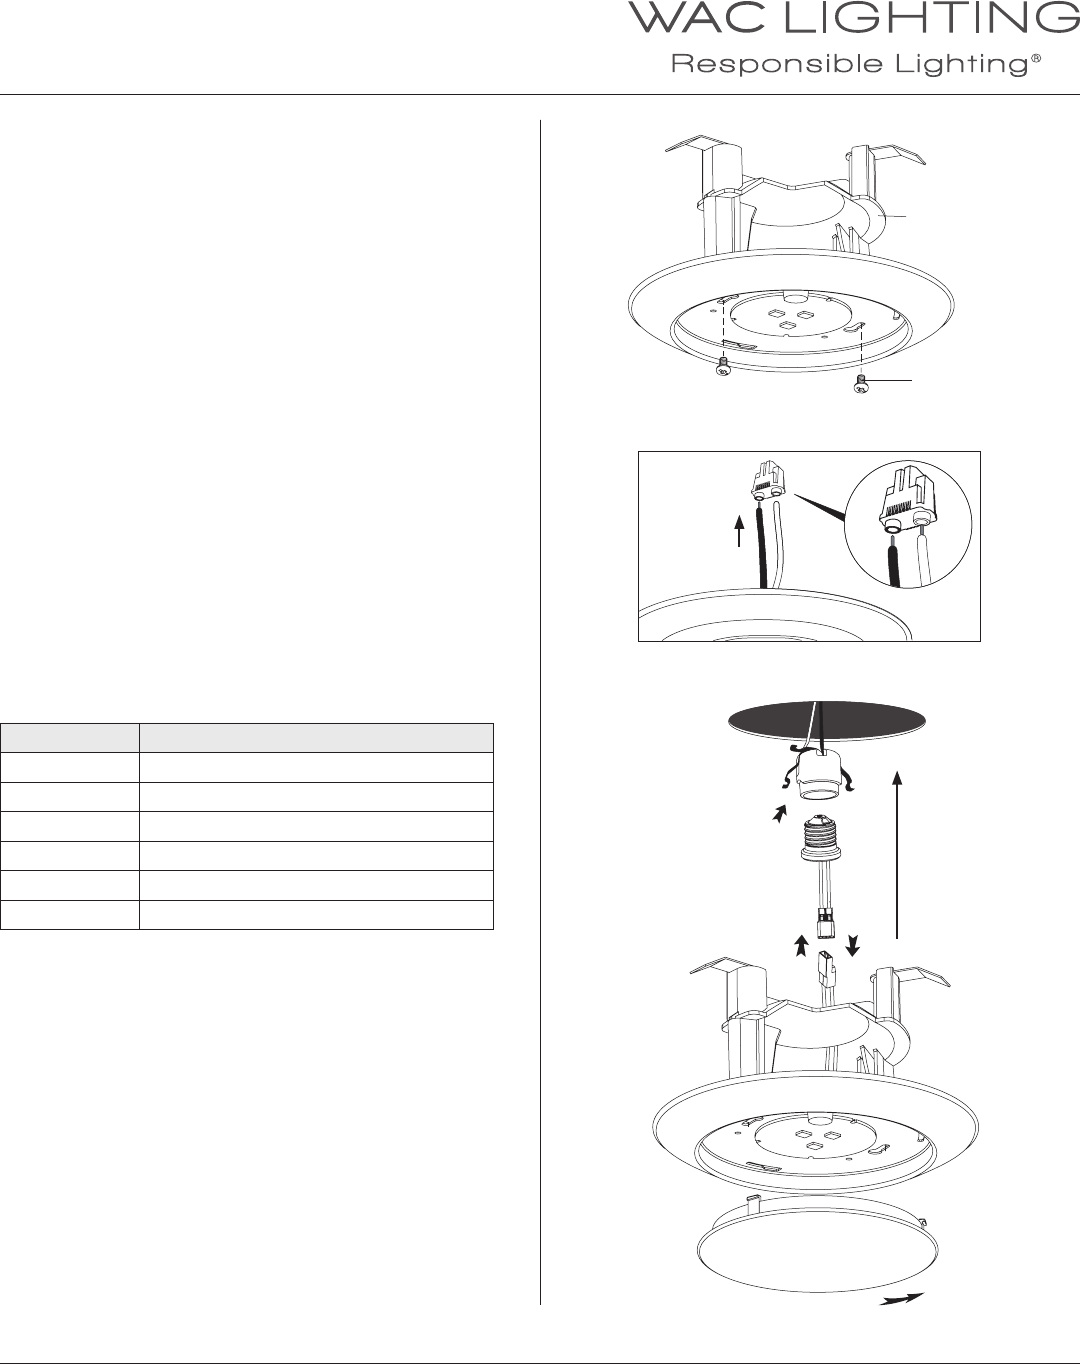
6. Push Disk Light through hole in plaster frame until flush
with ceiling. Spring clip tension can be adjusted by bending
spring clip.
7. Replace the lens back on to the Disk Light by twist the lens
counter clockwise.
HOUSING COMPATIBILTY
Brand Model
Halo® H99T, H99RT, H99ICT
All-Pro ET400, ET400R, ET400AT
Juno® TC1, TC1R, IC1P
Capril R4, RR4, R4ASIC
Lithonia® L3, L3R
Thomas® PS4, PS4RM, PS4ASIC
Fig. 2
Fig. 3
Fig. 4
Installation onto existing 4 inch recessed housings
Plastic Insert
¼” screws