
Technical data


Float Valves
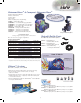
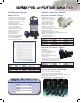
Nature Pond Float Valve and Support
•TheNPFVisanallplasticfloatvalveforcontrollingwaterlevels.
•Mountingrequiresdrillinga
5
/
8
"holeabout
1"abovethedesiredwaterlevel.
•TheNPFVmountslikeabulkheadthroughthishole.
Ithas
1
/
4
"maleNPTthreadsandcomesfittedwith
anadaptercompressionfittingfor
1
/
4
"tubingconnection.
•Thisvalvecanhandlepressuresupto90psi.
NPFV —PlasticFloatValve
NPFVS —FloatValveSupport
Forinstallingafloatvalvewithaflexibleliner
Atlantic Water Garden
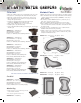
Float Valve
•Maintainsconsistentwaterlevelinwaterfeature.
AWGAF1000 —AutoFillKit
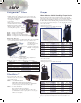
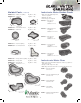
Expanding Black Spray Foam
•Simplifieswaterfeatureandwaterfallcreationbyfillingthecracks
andvoidsandthusdirectingtheflowofwaterovertherocks.
For pond installers: Use the large cans,
with a spray gun and gun tip
SAViO Black Foam
S.BF400—16ozBlackFoamdeliversabouta
1
/
2
"beadoffoam575'long
S.BF500—24ozBlackFoam
S.BF510—24ozBlackFoamGun
S.BF520—FoamGunCleaner
Pond Construction Supplies
Buying the Right Sized Liner
Tobuytheright size lineryoumustknowthemaximumlength,
width,anddepthinfeetoftheplannedexcavatedarea.Add
twicethemaximumdepthinfeetand2'foroverlap,tothelength
andwidthofyourplannedpond.
For Example: Takeapoolthatwillmeasures8'inlength,12'
inwidthand2'deep.Youwouldhavetotakethelengthof8',
addtwicethedepth,whichis4',andthenadd2'tocalculatea
finalmeasurementof14',Tocalculatethewidthyoutakethe
measurementof12',addtwicethedepth,whichis4',andadd
2'tocalculateafinalmeasurementof18'.Thelinersizeyou
wouldneedforthissizepoolwouldbe14'x18'.
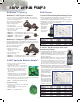
Basic Pond Installation
Theseareonlytheverybasicstepsforinstallingapondanddo
nottakeintoaccounttheinstallationoffiltrationorwaterfalls
1. Locate your pond where you can enjoy it and interact
with it.
A.Wesuggestanareawithfullsun.
B.CheckwithyourBuildingDepartmentforregulations.
2. Electricity addstoyouroptionsandENJOYMENT.
(BesuretouseaGroundFaultInterruptedoutletorplug.)
3. Before you start digging,trysettingoutagardenhoseto
“layout”theshapeandsizeyouwant.
A.Makeitaslargeasyoucanbecauseitwillalwaysseem
smallerwhenyou’redone.
B.Whileyouaredesigningtheareathinkaboutwhetheror
notyouwillwanttoaddinawaterfallorasecondpooland
keepthatinmind.
4. If you are using a preformed pool(quickandeasyforpools
under6-10')yousetthepoolinthehole,beingsureitislevel
and1-2"abovethesurroundingground—thenbackfillaroundit.
5. If you are using a liner
A.Definetheouteredge(allowingforastone“wall”orcoping
“inside”thepondifdesired)andthehighwaterlevelwith
Super-Edgandlevelitcarefully.(Remembertohavethe
edgingacoupleincheshigherthenthesurroundinggrade
ofthepondsothatrun-offiskeptout.)
B.Completetheexcavationofshelvesandpondbottom
measuringalldepthsfromtheSuper-Edg“topline.”
C.Very Important-Makesurethattheshelvesandtheedges
ofthepondarewelldefinedandsecured–considerusing
Super-Edgorotherrigidmaterialfordefinition.Thecon
-
stantfreezingandthawingoftheicewillcausethingstoshift
andsettleandiftheedgesaren’tproperlysecuredthenthe
poolsedgeswilleventuallyfallapart.
D.Grade the bottom of the holeandremoveanyrocks
thatarethere.
E.UnderlayfabricshouldbeusedaroundtheSIDESofthe
poolwheremostabrasionoccursandleaksappear.Sand
2-3"deepisbestforunderthebottomofthepond.The
underlayfabricwillprotectthelinerfromanyabrasionthat
mayoccurduringthosethawingandfreezingperiods.You
cantuckitovertheSuper-Edgtokeepitsecure.
F. Now you’re ready for the liner. Beforeyouputtheliner
inthehole,layitoutalongsidethepooltomakesureitis
therightsize.
G.Centerthelinerandanchoritwithwater.Foldtheedgeof
thelinerupandovertheSuper-Edgorwhateverstructural
supportisholdingtheedge.Keepingthatniceandtight,
secureitwithbackfillandrocks.
6. Startputtingthecopingtogetherwithrocksandsmallquart
sizeplants,placingtheplantsbetweentherockssoitlooks
morenatural.Uselinerscrapstopadalonginsidewallswhere
stonewillbeplaced(Goodcopingplantsonthewetsideare
forget-me-not,moneywort,mint,watercress.Forthedryside
putsomesedums.)
Enjoy!
Installation TIPS