TM User’s Manual Pdf downloaded from http://www.thepdfportal.
Dear Parent, Your child’s proudest moments are often a parent’s proudest moments. There is nothing more special than the light of a child’s eyes when they are proud of something that they create themselves. At VTech®, we know that each child learns in their own unique way, that’s why we created KidiCreative™, a line of high-tech creative fun for kids through hands-on electronic play. It’s a cool new way to learn music or explore art and photography.
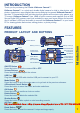
INTRODUCTION Thank you for purchasing the VTech® Kidizoom Camera™! Kidizoom Camera™ is a sleek and durable digital camera for kids to take photos, edit photos, view photos, record digital video movies and play fun games! Kidizoom Camera™ also has TV connectability that lets kids view their photos and movies or play games on a TV screen.
Note: Pressing the Reset Button will erase all data in the Kidizoom Camera™ internal memory, but it will not erase any data saved on an SD memory card (not included) if one is being used. Flash The autoexposure system of Kidizoom Camera™ will use the flash when it detects that it is necessary. When the flash is ready to use, a lightning bolt icon will show in the top left corner of the screen in camera mode. Press the Delete Button to switch between the flash modes before taking a picture.
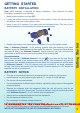
GETTING STARTED Battery Installation Note: Adult assembly is required for battery installation. Tools required for battery installation: screwdriver (not included). • Make sure the camera is turned OFF. • Locate the battery covers on the bottom of the camera. Loosen the screws using a screwdriver and remove the battery covers. • Replace the battery covers and tighten the screws. Do not over-tighten screws.
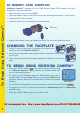
SD Memory Card Insertion Kidizoom Camera™ supports up to a 2GB Secure Digital (SD) memory card (not included) for memory expansion. • Make sure the camera is turned OFF. • Open the battery cover on the right side (as you are facing the camera’s LCD screen). • Locate the SD card slot inside. To Begin Using Kidizoom Camera™ • Insert the SD card (not included) as illustrated below. SD card • Replace the battery cover and tighten the screw. Do not over-tighten the screw. CHANGING THE FACEPLATE 1.
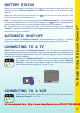
BATTERY STATUS When the screen shows a Low Battery icon , we recommend to backup all data in the internal memory of Kidizoom Camera™ by uploading all data to a PC and then change batteries. When the unit shows the No Batteries icon batteries should be inserted before use. , the unit will not work properly. New We recommend that you backup the data in the internal memory of the Kidizoom Camera™ regularly to avoid data lost, and suggest that you use a SD memory card (not included) for storage, if possible.
• Insert the A/V cable into the A/V port on your Kidizoom Camera™. • Connect the yellow plug on the A/V cable to the yellow video input port on your VCR. To Begin Using Kidizoom Camera™ • Connect the white plug on the A/V cable to the white audio input port on your VCR. Note: If the A/V cable is plugged into Kidizoom Camera™ while a game is already in progress on the LCD screen, the game will quit and exit to the main menu.
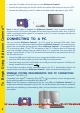
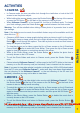
ACTIVITIES 1.Camera • In Camera mode, the user can either look through the viewfinders or look at the LCD screen to see the photo subject. • While holding the camera steady, press the Shutter Button on the top of the camera or press the OK Button on the back of the camera to take a picture. • When Kidizoom Camera™ is first turned ON, it will be in Autoflash mode. To change your flash settings, press the Delete Button to switch between the flash modes.
3.Photo Workshop In Photo Workshop, you can edit a photo or record voice and add it to a photo. 3.1) Photo Editor In Photo Editor, the user can add photo frames, stamps, and cool distortion effects to a photo or animate the photo. Press the Left or Right arrows on the 4-Directional Cursor Button and press the OK button to choose a picture. Press the Up or Down arrows again to choose one of the below functions, then press the OK Button to begin. A.
4.Games Three games are built into Kidizoom Camera™. Press the Left or Right arrows on the 4-Directional Cursor Button to choose a game, and then press the OK Button to start playing the selected game. A. Tic Tac Toe You and the computer take turns placing playing pieces on the 3x3 Tic Tac Toe grid. You can press the arrows on the 4-Directional Cursor Button to move your piece on the grid, and then press the OK Button to place it.
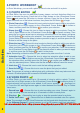
7.CD-ROM The included CD-ROM contains the VTech® Photo Editor program. If you choose to install this Photo Editor on your PC, you can add additional fun photo frames and stamps to your photos, as well as add distortion and animation effects. The VTech® Photo Editor can also be used to enlarge photos to 2.0 Mega Pixels for better printing. Please see the Read Me and Help sections of the VTech® Photo Editor for more details and user instructions.
TROUBLESHOOTING Go through this section if you experience difficulty in operating Kidizoom Camera™. Problem Solution Program stops working 1. Press the Reset Button with a paper clip. If this does not solve the problem, please continue the following steps. 2. Please make sure the camera is OFF. 3. Interrupt the power supply by removing the batteries. 4. Let the camera sit for a few minutes without batteries, then replace the batteries and press the Reset Button again. 5. Turn the unit ON.
Picture is rolling or has bars or lines on TV 1. Try to adjust the vertical or horizontal hold controls (if available) on your TV. Cannot save files 1. Check the memory status of both the internal Kidizoom Camera™ memory and the SD memory card (not included) if one is inserted into the camera. 2. Check your memory default setting (see procedure in the Memory Manager section above). If it is set to use an SD memory card (not included), check to make sure that the SD memory card is not write-protected.
DISCLAIMER AND LIMITATION OF LIABILITY VTech® Electronics North America, L.L.C. and its suppliers assume no responsibility for any damage or loss resulting from the use of this handbook. VTech® Electronics North America, L.L.C. and its suppliers assume no responsibility for any loss or claims by third parties that may arise through the use of this software. VTech® Electronics North America, L.L.C.
Note: This equipment has been tested and found to comply with the limits for a Class B digital device, pursuant to Part 15 of the FCC Rules. These limits are designed to provide reasonable protection against harmful interference in a residential installation. This equipment generates, uses and can radiate radio frequency energy and, if not installed and used in accordance with the instructions, may cause harmful interference to radio communications.
Kidizoom Camera™ Frequently Asked Questions What types of memory cards does the Kidizoom Camera™ support? Answer: The Kidizoom Camera™ works best with SD cards (versions 1.0 and 1.1) 2GB and lower (mini and micro SD cards could likewise be compatible, but only with a physical adapter). It can also support MMC cards earlier than version 4.0. Unfortunately, it does not support memory cards with very high rates of data transmission. This includes the latest generation MMC’s and any SDHC cards.
Question 6: What is the maximum picture resolution of the Kidizoom Camera™? The user’s manual states that it has 2.0 Mega Pixels interpolated resolution. What does this mean? Kidizoom Camera™ Frequently Asked Questions Answer: The maximum camera resolution of the Kidizoom Camera™ is 640x480 pixels. However, once you have downloaded the photos to your PC, you can use the Photo Editor program to increase the resolution to 2.0 Mega Pixels. Click the “Save As” icon and choose the 2.
Question 11: Can external videos be placed on an SD card and viewed on the camera? I’d like to load a movie or two into the camera for my child to view on car trips. Our “DV Album” application supports only standard motion jpeg video files. In order to view outside video clips, you would first have to convert the file to this format.
Question 17: Kidizoom Camera™ Frequently Asked Questions I am trying to download my pictures to my PC. I connected per the instructions (connecting the USB cable to the camera and PC), and the new driver VTech 773 appears. However, no pictures are automatically downloading. Is there something I need to do at start up to get the pictures downloaded and saved? Answer: The picture download operation does not start by itself.