
User`s manual


9
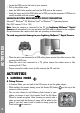
ACTIVITIES
• YoucanscrolltheZoomWheelupordowntoincreaseorreducethelevelofdigital
zoom.
• WhentheLightning McQueen™ Digital Camera is first turned ON, it will be set to
auto flash
mode. To change your flash settings, press the Flash button to switch
between auto flash , flash on or flash off .
Warning:Toavoideyedamage,turnofftheashwhenyou’retakingaclose-uppicture
of a person or animal.
Note: If the batteries are too weak, the auto flash feature may not be available. This icon
will appear:
.
Flash mode Optimum distance for using
Auto flash
2.5 – 3.5 feet
Flash on
3.5 – 8 feet
B. Viewing Photos
• Toviewthephotosyou’vetaken,pressthePlaybutton
to enter the Photo Album.
Scroll the Up/Down Wheel to view the next or previous picture stored in the album.
To return to Camera Mode, press the Shutter/OK button , or the Camera Mode
button.
C. Slideshow
• WhileinthePhotoAlbum,pressthePlaybutton
again and it will start to display
the photos in a slideshow. To return to Camera Mode, press the Shutter/OK button
or Camera Mode button .
D. Delete a Photo
• WhileinthePhotoAlbumorSlideshow,presstheTrashbutton
to delete the photo
that is currently shown on the screen.
Note: Photos taken with the Lightning McQueen™ Digital Camera will be saved in
the PHOTO folder. If you want to view your own photos, please save them to the folder
DOWNLOAD\PHOTO in the built-in memory or on an SD card (not included) if one is
inserted into the camera. The Lightning McQueen™ Digital Camera only supports
Standard Baseline JPEG.
2. MOVIE MODE
• In Movie Mode, you can create digital videos with the
Lightning McQueen™ Digital Camera. Press the Shutter/
OK button on the top of the camera to start or to stop
movie recording.
• YoucanscrolltheZoomWheeltoincreaseorreducethelevel
of digital zoom.