
User`s manual
3
Supported File Formats:
Photo: JPEG
Video: Kidizoom Plus
TM
Motion JPEG
Supported Hardware:
A/V cable for TV connection (included)
USB cable for PC connection (included)
SD and SDHC memory cards (not included) with a memory size of 32MB to 16GB
GETTING STARTED
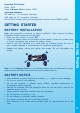
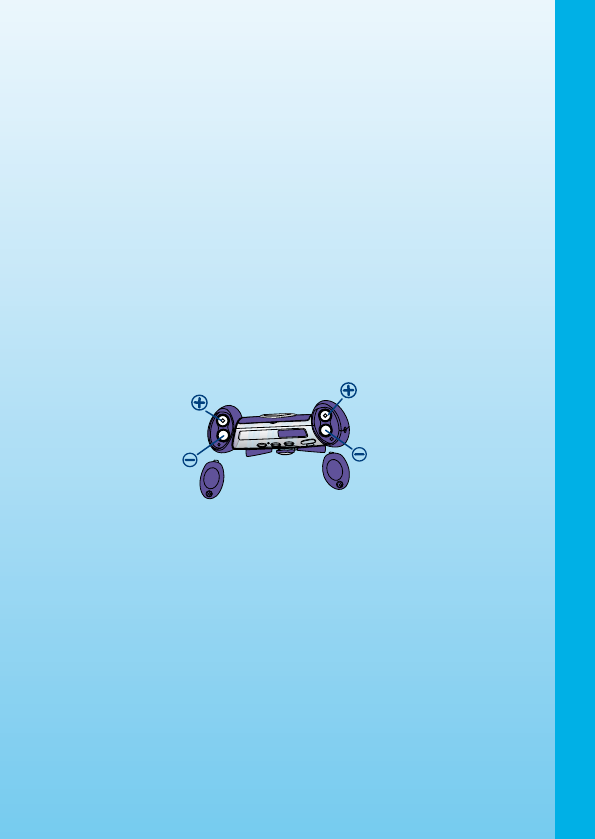
BATTERY INSTALLATION
Note: Adult assembly is required for battery installation. Tools required for battery
installation: Phillips screwdriver (not included).
• Make sure the camera is turned
OFF.
• Locate the battery covers on the bottom of the camera. Loosen the screws using
a Phillips screwdriver and remove the battery covers.
• Install 4 new “AA” batteries (2 on each side) as illustrated below. (the use of
new, alkaline batteries is recommended for maximum performance).
• Replace the battery covers and tighten the screws. Do not over-tighten the
screws.
Note: If your Kidizoom Plus
TM
is not working properly after the batteries have been
replaced, press the Reset Button and then turn the camera back on.
BATTERY NOTICE
• Install batteries correctly observing the polarity (+, -) signs to avoid leakage.
• Do not mix old and new batteries.
• Do not mix batteries of different types: alkaline, standard (carbon-zinc) or
rechargeable (nickel-cadmium).
• Remove the batteries from the equipment when the unit will not be used for an
extended period of time
• Always remove exhausted batteries from the equipment.
• Do not dispose of batteries in re.
• Do not attempt to recharge ordinary batteries.
• The supply terminals are not to be short-circuited.
• Only batteries of the same and equivalent type as recommended are to be
used.
Getting Started