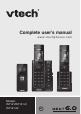
Complete user’s manual w w w.v t e c h p h o n e s .
Congratulations on purchasing your new VTech product. Before using this telephone, please read Important safety instructions on page 102 of this manual. This manual has all the feature operations and troubleshooting necessary to install and operate your new VTech telephone. Please review this manual thoroughly to ensure proper installation and operation of this innovative and feature rich VTech product. For support, shopping, and everything new at VTech, visit our website at www.vtechphones.com.
Table of contents Getting started..............................1 Dim mode..........................................36 Wallpaper..........................................36 Voicemail number..............................37 Clear voicemail indicators.................38 Key tone............................................39 Dial mode..........................................39 Home area code................................40 Parts checklist.....................................
Table of contents Multiple handset use..................50 Memory match...................................67 Missed call indicator..........................68 Review the caller ID log.....................68 View dialing options...........................69 Dial a caller ID log entry....................70 Save a caller ID log entry to the directory...................................70 Delete caller ID log entries................71 Caller ID log screen messages.........71 Join a call in progress............
Table of contents Appendix.....................................85 Expand your telephone system.........85 Add and register a handset...............85 Add and register a doorbell...............86 Deregister handsets and doorbells....87 Screen messages..............................88 Handset and telephone base indicators........................................90 Battery...............................................91 Troubleshooting.................................92 Important safety instructions...........
Getting started Parts checklist THIS SIDE UP / CE CÔTÉ VERS LE HAUT Handset (1 for IS7121) (2 for IS7121-2/IS7121-22) Wall anchors (2 for IS7121/IS7121-2) (4 for IS7121-22) Battery Pack / Bloc-piles : (2.4V Ni-MH) WARNING / AVERTISSEMENT : DO NOT BURN OR PUNCTURE BATTERIES. NE PAS INCINÉRER OU PERCER LES PILES. Made in China / Fabriqué en chine CR1232 Your telephone package contains the following items.
Getting started Telephone base and charger installation Install the telephone base and charger(s) as shown below. Make sure that the electrical outlet is not controlled by a wall switch. If you subscribe to digital subscriber line (DSL) high-speed Internet service through your telephone line, you must install a DSL filter between the telephone line cord and the telephone wall jack. The filter prevents noise and caller ID problems caused by DSL interference.
Getting started Handset battery installation Install the battery as shown below. 3. Align the cover flat against the battery compartment, then slide it towards the center of the handset until it clicks into place. THIS SIDE UP / CE CÔTÉ VERS LE HAUT Battery Pack / Bloc-piles : (2.4V Ni-MH) WARNING / AVERTISSEMENT : DO NOT BURN OR PUNCTURE BATTERIES. NE PAS INCINÉRER OU PERCER LES PILES. Made in China / Fabriqué en chine CR1232 THIS SIDE UP / CE CÔTÉ VERS LE HAUT 2.
Getting started Handset battery charging Once you have installed the battery, the screen indicates the battery status (see the table below). If necessary, place the handset in the telephone base or charger to charge the battery. For best performance, keep the handset in the telephone base when not in use. The battery is fully charged after 11 hours of continuous charging. See the table on page 91 for battery operating times.
Getting started Are you a new cable or VoIP subscriber? If your answer is yes, the existing telephone jacks in your home may no longer work. Your cable/VoIP service provider uses a different connection, separate from your old traditional telephone service, to connect the modem/router/terminal adapter installed in your home. To allow all existing telephone jacks to work, contact your telephone service provider for solutions, such as rewiring services (fees may apply).
Getting started Installation options Your telephone base is ready for tabletop use. If you want to mount your telephone on a wall, use the provided wall mount bracket to connect with a standard dualstud telephone wall mounting plate. If you do not have this mounting plate, you can purchase one from many hardware or consumer electronics retailers. You may need a professional to install the mounting plate. Tabletop to wall mount installation 1.
Getting started Tabletop to wall mount installation 3. Plug the telephone line cord into the telephone wall jack or DSL filter. Align the holes on the bracket with the standard wall plate and slide the bracket down until it locks securely. 4. Plug the power cord into an electrical outlet not controlled by a wall switch. Bundle the telephone line cord and power adapter cord neatly with twist ties.
Getting started Wall mount to tabletop installation 1. If the telephone line cord and power adapter cord are bundled, untie them first. 2. Slide the wall mount bracket up and remove it from the wall plate. Unplug the telephone line cord (or DSL filter) from the wall. Unplug the power adapter from the power outlet. 3. Slide the telephone base up and remove it from the wall mount bracket. 4. See Telephone base and charger installation on page 2.
Getting started Doorbell battery installation You can power up the doorbell by connecting it to the domestic power supply or two AA alkaline batteries (provided). Even if the doorbell is connected to the domestic power supply, we recommend you also install two AA alkaline batteries. This guarantees continual operation in case of a power outage. Install two AA batteries into the battery compartment, matching the polarity markings (+ and -) inside the battery compartment.
Getting started Locating the doorbell Before mounting the doorbell on a wall, make sure you test if the location you install the doorbell is in range, and adjust the camera angle to best suit your needs. To test the location for installation: Hold the doorbell in the location where you want to install the doorbell, then follow the steps below to test the reception range and video capture angle. 1. Press MENU >> Press q or p to Settings >> Press SELECT. 2. Press q or p to Doorbell setup >> Press SELECT. 3.
Getting started Locating the doorbell • Avoid mounting it to where reflections may be caused by sunlight, for example, opposite to a white wall. • Two built-in infrared LEDs are for night vision. Make sure the surrounding light source is sufficient for infrared operation. Test at the front door to determine when the infrared LEDs turn on. When they are in operation, they turn red.
Getting started Locating the doorbell To adjust the shooting area, you may either relocate the doorbell in different height level, or adjust the camera angle (see below). To adjust the camera angle: • Tilt the lever to adjust the angle of the camera lens. The camera lens can be adjusted to left, right or down, up to 10 degrees.
Getting started Locating the doorbell You may install the doorbell in a lower position. The diagram below demonstrates an example of doorbell camera position to view a visitor about 20 inches from the camera. The camera in this example is set in 10 degrees angle upward. Side view Shooting area 19 inches 50 degrees 20 inches 43 inches You may install the doorbell on the left or right side.
Getting started Doorbell installation Make sure to test the reception and the doorbell position before you mount the doorbell on the wall. 1. See Locating the doorbell on pages 10-13 to choose a desirable position for the doorbell. Use a pencil to mark two holes on the desired location. Then remove the wall mount and drill two holes in the wall. Check for reception strength and camera angle before drilling the holes. 2. If you drill the holes into a stud, go to step 3.
Getting started Doorbell installation 3. Align the holes on the wall mount cover with the holes on the wall (or stud). Tighten the screws into the holes to secure the wall mount cover onto the wall. 4. Use a sharp object to open a hole on the soft plastic part on the doorbell wall mount cover, then route the power adapter cord through the hole.
Getting started Doorbell installation 5. Insert a cross-head screwdriver to twist and lift to loosen the screws and the metallic plates. Slide the metal part of the wire with black end underneath the metallic plate on the left, and the metal part of the wire with red end underneath the metallic plate on the right. Then twist the screws to secure.
Getting started Doorbell installation 6. Push the doorbell gently onto the wall mount until they are sealed tightly. This doorbell meets the IPX4 waterproof standard. Make sure the doorbell is tightly sealed with its wall mount cover in order to maintain its waterproof ability. Seal tightly Push Push 7. Tighten the screw into the threaded socket at the bottom to secure. Then plug the adapter into the indoor domestic power supply.
Getting started Detach doorbell from wall mount cover After an extended exposure to cold, heat or humidity, the doorbell gasket rubber may become sticky. If you need to remove the doorbell from its wall mount cover in case of battery replacement or doorbell relocation, follow the steps below. 1. Remove the screw at the bottom. 2. Insert a flat-bladed screwdriver between the doorbell and its wall mount cover to pry open at both sides. 3. Pry the doorbell off.
Getting started Installing the doorbell with an existing wired doorbell If you already have a wired doorbell installed, follow the instructions below to install your new IS7121 doorbell unit. 1. Turn off the power supply to the existing wired doorbell. 2. Follow Step 1 through Step 5 in Doorbell installation on pages 14-16. 3. Insert a cross-head screwdriver to the side of battery compartment on the right, then twist and lift to loosen the screw and the metallic plates.
Getting started Installing the doorbell with an existing wired doorbell 4. Using another wire, slide one end of the metal part underneath the metallic plate on the doorbell, then connect the other end to the Trans terminal of your chime/buzzer unit of the wired doorbell. Option 1: Ring the front doorbell of the existing wired doorbell and the IS7121 doorbell simultaneously.
Getting started Installing the doorbell with an existing wired doorbell Option 2: Ring the rear doorbell of the existing wired doorbell and the IS7121 doorbell simultaneously. Angle Adjustment View Right View Left Transformer Rear Trans Front Chime/buzzer of wired doorbell • If you do not connect domestic power supply nor install AA batteries to the IS7121 doorbell, only the existing wired doorbell will ring when being pressed. 5.
Getting started Telephone base layout /FIND HANDSET • Press to page all system handsets (page 47). IN USE light • Flashes quickly when there is an incoming call. • Flashes when another telephone sharing the same line is in use. • On when the telephone line is in use. DOORBELL light • On when a doorbell is in a video streaming session. • Flashes quickly when the doorbell is being pressed. +/VOL/• Press to adjust the listening volume during a call or message playback (page 45).
Getting started Telephone base layout /ANS ON/OFF • Press to turn the answering system on or off. X/DELETE • Press to delete the playing message (page 81). • Press twice to delete all old messages when in idle (page 83). /SKIP • Press to skip to the next message (page 81). /REPEAT • Press to repeat the playing message (page 81). • Press twice to play the previous message (page 81). /PLAY/STOP • Press to play messages (page 81) • Press to stop playing messages (page 81).
Getting started Handset layout CHARGE light • On when the handset is charging in the telephone base or charger. q/VOL-/CID • Press to scroll down while in a menu, or in the directory, caller ID log or redial list (page 27). • Press to review the caller ID log when the phone is not in use (page 68). • While entering names or numbers, press to move the cursor to the left. • During a call or message playback, press to decrease the listening volume (page 45 or page 82).
Getting started Handset layout Softkeys (2) • Press to select a menu item displayed above the key. PUSH TO TALK (PTT)/SNAPSHOT • Press to begin a one-to-one or one-to-group broadcast (page 54). • Press and hold to broadcast to a group of handsets when the handset is not in use (page 56). • Press to take a photo shot of visitor from the doorbell during video streaming (page 42). p/VOL+/ • Press to scroll up while in a menu, or in the directory, caller ID log or redial list.
Getting started Doorbell layout Camera lens Infrared LEDs • Backup light for night vision (page 43). Doorbell light • Flashes when /DOORBELL is pressed. /DOORBELL • Press to send a chime to the telephone base and capture a photo (page 41).
Getting started Using the menu You can use the cordless handset to change your telephone settings. In the ringers menu, you can select the ringer tones and adjust the ringer volume for incoming calls. In the settings menu, you can change the settings for LCD language, CID time synchronization, rename devices, voice announce caller ID, LCD brightness, dim mode, wallpaper, voicemail number, voicemail indicators, key tone and dial mode.
Telephone settings Handset ringer volume You can set the ringer volume or turn the ringer off on each handset. When the ringer is off, the handset displays . 1. 2. 3. 4. 5. Press MENU when the handset is not in use. Press q or p to scroll to Ringers, then press SELECT. Press SELECT to choose Ringer volume. Press q or p to sample each volume level. Press SET to save your selection and return to the previous menu. You hear a confirmation tone. -ORPress OFF to turn off the ringer, then press SET to save.
Telephone settings Chime volume You can adjust the telephone base or handset chime volume level, or turn the chime off. Press MENU when the handset is not in use. Press q or p to scroll to Chime, then press SELECT. Press SELECT to choose Chime volume. Press q or p to choose Local handset or Base, then press SELECT. 5. Press q or p to sample each volume level. 6. Press SET to save your selection and return to the previous menu. You hear a confirmation tone.
Telephone settings Quiet mode You can turn on the quiet mode for a period of time (1-12 hours). During this period, all tones (except paging tone and chime), voice announce caller ID and call screening are muted. When you turn on the quiet mode, the answering system turns on automatically. When the quiet mode duration expires, the answering system remains on. To set the quiet mode duration: 1. Press and hold when the handset is not in use. 2. The handset displays SET QUIET MODE DURATION (1 to 12 hours).
Telephone settings Set date and time The answering system announces the date and time of each message prior to playing it. Before using the answering system, set the date and time as follows. If you subscribe to caller ID service, the day, month and time are set automatically with each incoming call.
Telephone settings LCD language You can select a language (English, French or Spanish) to be used in all handset screen displays. Press MENU when the handset is not in use. Press q or p to scroll to Settings, then press SELECT. Press SELECT to select LCD language. Press q or p to scroll to English, Français or Español then press SELECT. • The handset displays Set English as LCD language? when you select English. • The handset displays Set Français as LCD language? when you select Français.
Telephone settings CID time synchronization If you subscribe to caller ID service, the date and time will be set automatically by the caller ID information. You can turn off this feature if you want to set the date and time manually. To change the setting: 1. Press MENU when the handset is not in use. 2. Press q or p to scroll to Settings, then press SELECT. 3. Press q or p to scroll to CID time sync, then press SELECT. 4. Press q or p to choose On or Off, the press SET to save.
Telephone settings Rename devices You can create a name for each handset and doorbell. The new name can be up to 11 characters. 1. Press MENU when the handset is not in use. 2. Press q or p to scroll to Settings, then press SELECT. 3. Press q or p to scroll to Rename devices, then press SELECT. 4. Press q or p to choose Local handset or Doorbell, then press SELECT. 5. Use the dialing keys to edit the name • Press DELETE or BACKSP to erase a character. • Press and hold DELETE to erase all characters.
Telephone settings Voice Announce® caller ID You can set your handset and/or telephone base to announce the caller ID information for incoming calls. The voice announce caller ID setting is independent for each handset and the telephone base. Press MENU when the handset is not in use. Press q or p to scroll to Settings, then press SELECT. Press q or p to scroll to Annc Caller ID, then press SELECT. Press q or p to choose Set all On/Off, Local handset or Base, then press SELECT. 5.
Telephone settings LCD brightness You can adjust the screen brightness of your handset to optimize readability lighting conditions. 1. Press MENU when the handset is not in use. 2. Press q or p to scroll to Settings, then press SELECT. 3. Press q or p to scroll to LCD brightness, then press SELECT. 4. Press q or p to sample each brightness level. 5. Press SET to save your selection and return to the previous menu. You hear a confirmation tone.
Telephone settings Voicemail number If you subscribe to voicemail service offered by your telephone service provider, you can save the voicemail number to 1 for easy access. The voicemail number is shared by the handset and the telephone base. When you want to retrieve voicemail messages, press and hold 1 . Contact your telephone service provider for more information and assistance about using your voicemail service. To set the voicemail number: 1. Press MENU when the handset is not in use. 2.
Telephone settings Clear voicemail indicators If you subscribe to voicemail service offered by your telephone service provider, New voicemail and display on the handset when you have new voicemail messages. Contact your telephone service provider for more information and assistance about using your voicemail service. After you have listened to all new voicemail messages, the indicators on the handset turn off automatically.
Telephone settings Key tone You can adjust the volume level of key tone, or turn it off for each handset. If you turn the key tone off, there are no beeps when you press the handset keys. 1. 2. 3. 4. 5. Press MENU when the handset is not in use. Press q or p to scroll to Settings, then press SELECT. Press q or p to scroll to Key tone, then press SELECT. Press q or p to sample each volume level. Press SET to save your selection and return to the previous menu. You hear a confirmation tone.
Telephone settings Home area code If you dial your local calls using only seven digits (area code not required), you can program your home area code so that when you receive a call within your local area, the telephone number is automatically stored without the area code in the caller ID log. 1. Press MENU when the handset is not in use. 2. Press q or p to scroll to Directory, then press SELECT. 3. Press q or p to scroll to Home area code, then press SELECT. 4.
Doorbell operation Answer a chime When /DOORBELL is pressed, you hear a chime. The doorbell automatically captures a photo of the visitor. • Press SPEAK to answer. Doorbell 1 • Only one handset can answer the chime and start a video streaming session. • If you have more than two handsets, only the first two registered handsets display the photo. is ringing SPEAK VIEW • The video streaming ends after 30 seconds. • Press OFF to silence the chime.
Doorbell operation Options while video streaming: • Press the flashing SPEAK to talk to the visitor. • Press SNAPSHOT to take a photo shot of the visitor. • Press ISO, then press + or - to adjust the video stream brightness. • After you press SPEAK to start a conversation with the visitor, the video/audio streaming session ends in 45 seconds if it is initiated by the doorbell or 60 seconds if initiated by the handset.
Doorbell operation View captured photos The telephone stores up to 100 photos captured by the doorbell. 1. 2. 3. 4. Press MENU when the handset is not in use. Press q or p to scroll to Photo log, then press SELECT. Press q or p to scroll to Doorbell X, then press SELECT. Press q or p to browse through the photo log. Delete a captured photo PHOTO LOG Doorbell X Delete all BACK SELECT • When the desired photo displays, press DELETE. Delete all captured photos 1. 2. 3. 4.
Telephone operation Make a call 1. Press or on the handset. 2. When you hear a dial tone, dial the number. • The handset shows the elapsed time as you talk (in hours, minutes and seconds). • While entering numbers, press and hold PAUSE to insert a dialing pause (a p appears). Predial a call 1. Enter the telephone number. • Press DELETE to make corrections. or to dial. 2. Press • The handset shows the elapsed time as you talk (in hours, minutes and seconds).
Telephone operation Volume control During a call, press q/VOL- or p/VOL+ to adjust the listening volume. • The handset earpiece and speakerphone volume settings are independent. • When the volume reaches the minimum or maximum setting, you hear two beeps. Mute The mute function allows you to hear the other party but the other party cannot hear you. • During a call, press MUTE on the handset. The screen briefly displays Microphone off, then displays MIC OFF until the mute function is turned off.
Telephone operation Temporary tone dialing If you have pulse (rotary) service only, you can switch from pulse to touch-tone dialing temporarily during a call. This is useful if you need to send touch-tone signals to access your telephone banking or long distance services. 1. During a call, press on the handset. 2. Use the dialing keys to enter the number you wish to dial. The telephone sends touch-tone signals. It automatically returns to pulse dialing mode after you end the call.
Telephone operation Check voicemail Press and hold 1 on the handset to dial your stored voicemail number. • See Voicemail number on page 37 to set your voicemail number. Find handset This feature helps you find the misplaced handset(s). To start the paging tone: • Press /FIND HANDSET on the telephone base. All idle handsets ring and their screens display ** Paging **. To stop the paging tone: • Press /FIND HANDSET on the telephone base. -OR• Press , , CANCEL or any dialing key (0-9, or ) on a handset.
Telephone operation Redial Each handset stores the last 10 telephone numbers dialed (up to 30 digits). When there are already 10 entries, the oldest entry is deleted to make room for the new entry. To review and dial a redial number: 1. Press REDIAL when the phone is not in use. 2. Press q or p or REDIAL repeatedly to browse until the desired entry displays. 3. Press or to dial. -OR1. Press or . 2. Press REDIAL to enter the redial list. 3. Press q or p or REDIAL repeatedly to browse to the desired entry. 4.
Telephone operation Transfer a call While on an outside call, you can transfer the call from one system device to another. This feature is only applicable to models with more than one handset. 1. During a call, press OPTION. 2. Press q or p to scroll to Transfer, then press SELECT. • If your system has two handsets, the outside call is put on hold and your handset shows Transferring call to HANDSET X. The destination handset rings and displays Transfer from other handset.
Multiple handset use Join a call in progress You can use four cordless handsets at a time on an outside call. You can buy additional expansion handsets (IS7101) for this telephone base. You can register up to 10 handsets to the telephone base, including a maximum of two doorbells. To join a call�: • When a handset is already on a call, press the call. or on another handset to join • To exit the call, press OFF on the handset or place it back in the telephone base or charger.
Multiple handset use Intercom Use the intercom feature for conversations between two system handsets. This feature is only applicable to models with more than one handset. 1. Press INTCOM on the handset when not in use. -ORPress MENU on the handset when not in use. Press q or p to scroll to Intercom, then press SELECT. • If your system has two handsets, your handset displays Calling other handset. The destination handset displays Other handset is calling.
Multiple handset use Answer an incoming call during an intercom call If you receive an outside call during an intercom call, there is an alert tone. • To answer the call, press or on the handset. The intercom call ends automatically. • To end the intercom call without answering the outside call, press OFF on the handset. The intercom call ends and the telephone continues to ring.
Multiple handset use Call transfer using intercom Use the intercom feature to transfer an outside call from one handset to another. Directory Caller ID log 1. During a call, press OPTION on the handset. Transfer 2. Press q or p to scroll to Intercom, then press SELECT. Intercom • If your system has two handsets, your handset displays Calling other handset. The destination handset displays Other handset is calling.
Multiple handset use Push-to-talk (PTT) You can directly broadcast messages from one handset to the speakerphone of one or a group of handsets. Press and hold PUSH TO TALK to begin two-way communication. If only one handset is available or registered, the handset screen shows PTT requires two handsets when you press PUSH TO TALK. • Only one handset can talk at a time. To do so, press and hold PUSH TO TALK while you are speaking. • You must release PUSH TO TALK, so the other person can respond.
Multiple handset use PTT to a single handset 1. You have two ways to begin a PTT call: • If your system has two handsets, press and hold PUSH TO TALK when the handset is not in use. • If your system has more than two handsets, press PUSH TO TALK when the handset is not in use. Then use the dialing keys to enter a handset number (1 to 9 for HANDSET 1 to HANDSET 9, and 0 for HANDSET 10, or and for All handsets), or press q or p to scroll to the desired handset then press SELECT.
Multiple handset use PTT to multiple handsets When there are multiple handsets registered to the telephone system, PTT supports one-to-group calls. PTT supports a maximum of one-to-four calls when one to five handsets are registered, and a maximum of one-to-three calls when six or more handsets are registered. The first four registered handsets will be able to use this feature. Other handsets can only use PTT for one-to-one calls. To begin a PTT call to multiple handsets: 1.
Multiple handset use Answer a PTT call You can respond to a PTT call whenever the speakerphone light is off. 1. When your handset receives a PTT call, the handset beeps and displays Press and hold [PTT] to talk. 2. When the other party is speaking, your speakerphone light is on, and your handset displays PTT From HANDSET X To handset: Y (X represents the originating handset and Y represents the destination handset; a maximum of four handset numbers appear). 3.
Multiple handset use End a PTT call • For a one-to-one PTT call, both the originating and destination handsets can end the PTT call. • For a PTT call to multiple handsets, the originating handset can end the PTT call. If any one of the destination handsets leaves the PTT call, the call continues until all participants or the initiator hangs up. To end or leave a PTT call: Press OFF or place the handset in the telephone base or charger. The handset displays Push to talk Ended.
Directory About the directory The directory stores up to 50 entries with up to 30 digits for each phone number and 15 characters for each name. • Directory entries are shared by the handsets. Any modifications made on one device apply to all system devices. • When you access the directory without records, the screen shows Directory empty Add contact?. • When the directory is full and you try to save an entry, the screen shows Directory full.
Directory Add a directory entry 1. 2. 3. 4. Press MENU when the phone is not in use. Press q or p to scroll to Directory, then press SELECT. Press q or p to scroll to Add contact, then press SELECT. When ENTER NUMBER displays, use the dialing keys to enter a number (up to 30 digits). • Press q or p to move the cursor to the left or right. • Press DELETE or BACKSP to erase a digit. • Press and hold DELETE to erase all digits. • Press and hold PAUSE to enter a dialing pause (a P appears).
Directory Add a directory entry -OR1. Use the dialing keys to enter a number (up to 30 digits) when the phone is not in use. Press SAVE. The handset displays EDIT NUMBER. • Press q or p to move the cursor to the left or right. • Press DELETE or BACKSP to erase a digit. • Press and hold DELETE to erase all digits. • Press and hold PAUSE to enter a dialing pause (a P appears). -OR- 800-595-9511 1:35a m BACk REDIAL Copy a number from the redial list by pressing REDIAL.
Directory Review directory entries Directory entries appear alphabetically. 1. Press on the handset when the phone is not in use. The screen displays Directory Entries: XX for a few seconds, then displays the first entry in the directory. 2. Press q or p to browse through the directory. -OR1. 2. 3. 4. Directory Entries: 20 Press MENU when the phone is not in use. Press q or p to scroll to Directory, then press SELECT. Press SELECT to choose Review. Press q or p to browse through the directory.
Directory Dial a directory entry 1. Search for the desired entry in the directory (see Review directory entries or Alphabetical search on page 62). 2. To dial the displayed entry on the cordless handset, press or . Edit a directory entry 1. Search for the desired entry in the directory (see Review directory entries or Alphabetical search on page 62). 2. When the desired entry displays, press EDIT. The handset displays EDIT NUMBER. 3. Use the dialing keys to edit the name.
Directory Speed Dial You can assign nine of your directory entries to the speed dial locations (0 and 2-9) so that you can dial these numbers more quickly. The speed dial entries are shared by all devices. Changes made to the speed dial entries on one handset apply to all devices. Assign a speed dial slot Press MENU when the phone is not in use. Press q or p to scroll to Directory, then press SELECT. Press q or p to scroll to Speed dial, then press SELECT.
Directory Reassign a speed dial slot Press MENU when the phone is not in use. Press q or p to scroll to Directory, then press SELECT. Press q or p to scroll to Speed dial, then press SELECT. Press q or p, or a dialing key (0 or 2-9) to choose an occupied speed dial location, then press VIEW. 5. Press q or p to browse to the desired entry. -ORUse the alphabetical search to find the desired entry (page 62). 6. Press REPLACE when the desired entry appears. 7.
Caller ID About caller ID This product supports caller ID services offered by most telephone service providers. Depending on your service subscription, you may see the caller’s number, or the caller’s name and number that are sent by your telephone service provider after the first or second ring. Caller ID allows you to see the name, number, date and time of calls.
Caller ID Caller ID log If you subscribe to caller ID service, information about each caller will appear after the first or second ring. If you answer a call before the caller’s information appears, it will not be saved in the caller ID log. • The caller ID log stores up to 50 entries. Each entry can hold up to 24 digits for the phone number and 15 characters for the name. If the phone number has more than 24 digits, only the last 24 digits appear.
Caller ID Missed call indicator When there are calls that have not been reviewed in the caller ID log, the screens display XX Missed calls. When you have reviewed all the missed calls, the missed call indicator goes away. Each time you review a caller ID log entry marked NEW on the handset, the number of missed calls decreases by one. If you do not want to review the missed calls one by one, press and hold CANCEL on the handset when not in use to clear the missed call indicator.
Caller ID View dialing options Although the caller ID log entries received have 10 595-9511 digits (the area code plus the seven-digit number), 1-595-9511 in some areas, you may need to dial only the seven Press 800-595-9511 digits, or 1 plus the seven digits, or 1 plus the area 1-800-595-9511 code plus the seven digits. You can change the 1-800-595-9511 number of digits that you dial from the caller ID log Press 1 800-595-9511 and store the new number to the directory.
Caller ID Dial a caller ID log entry 1. Search for the desired caller ID log entry (see Review the caller ID log on page 68). 2. When the desired entry displays, press or on a handset to dial. Save a caller ID log entry to the directory 1. Use the handset to search for the desired caller ID log entry (see Review the caller ID log on page 68). 2. When the desired entry displays, press SAVE. Then the handset displays EDIT NUMBER. 3. Use the dialing keys to edit the number.
Caller ID Delete caller ID log entries To delete one entry: 1. Search for the desired caller ID log entry (see Review the caller ID log on page 68). 2. Press DELETE on the handset to delete the displayed entry. To delete all entries: 1. Press MENU when the phone is not in use. 2. Press q or p to scroll to Caller ID log, then press SELECT. 3. Press q or p to scroll to Del all calls, then press SELECT. 4. When the screen shows Delete all calls?, press YES to delete all caller ID log entries.
Answering system settings Answering system Use the answering system menu of a cordless handset to turn on or off the answering system or message alert tone, set up the announcement message, activate the call screening, or change the number of rings, remote access code or message recording time. Announcement The telephone is preset with a greeting that answers calls with, “Hello. Please leave a message after the tone.” You can use this preset announcement, or replace it with your own.
Answering system settings Play your announcement Press MENU when the phone is not in use. Press q or p to scroll to AnsweringSys, then press SELECT. Press SELECT again to choose Announcement. The handset displays ANNOUNCEMENT and announces, “Announcement. Press PLAY or press RECORD.” 5. Press PLAY to play the current announcement. 1. 2. 3. 4. ANSWERING SYS Announcement Announcement Delete all old Record memo Answer ON/OFF Ans sys setup BACK Delete your announcement Press MENU when the phone is not in use.
Answering system settings Answer on/off If you turn the answering system on, it answers calls and records messages. If your answering system is turned off and you change any of its settings, the answering system automatically turns on and the handset displays Calls will be answered. The answering system must be turned on to answer and record messages. When the answering system is turned on, the /ANS ON/OFF light on the telephone base turns on and ANS ON displays on the handset.
Answering system settings Call screening Use this feature to choose whether incoming messages can be heard on while they are being recorded. 1. 2. 3. 4. 5. 6. Press MENU when the phone is not in use. Press q or p to scroll to AnsweringSys, then press SELECT. Press q or p to scroll to Ans sys setup, then press SELECT. Press SELECT to select Call screening. Press q or p choose On or Off. Press SET to save and you hear a confirmation tone.
Answering system settings Remote access code A two-digit security code is required to access the answering system remotely from any touch-tone telephone. The preset code is 19. You can set the code from 00 to 99. Press MENU when the phone is not in use. Press q or p to scroll to AnsweringSys, then press SELECT. Press q or p to scroll to Ans sys setup, then press SELECT. Press q or p to scroll to Remote code, then press SELECT. Use the dialing keys to enter a two-digit number.
Answering system settings Recording time You can set the recording time limit for each incoming message. The recording time is preset to three minutes. Press MENU when the phone is not in use. Press q or p to scroll to Answering sys, then press SELECT. Press q or p to scroll to Ans sys setup, then press SELECT. Press q or p to scroll to Recording time, then press SELECT. 5. Press q or p to choose 3 minutes, 2 minutes or 1 minute. 6. Press SET to save and you hear a confirmation tone. 1. 2. 3. 4.
Answering system operation Answering system and voicemail Your telephone has separate indicators for two different types of voice messages: those left on its built-in digital answering system and those left with your telephone service provider’s voicemail (fees may apply). Your telephone’s built-in digital answering system messages and voicemail messages are separate. Each alerts you to new messages differently.
Answering system operation Message capacity The answering system can record and store up to 99 messages. Each message can be up to three minutes in length, depending on the recording time set (see page 77). The total storage capacity for the announcement, messages and memos is approximately 14 minutes. The actual recording time depends on individual message characteristics. Messages remain available for replay until you delete them.
Answering system operation Call screening To screen a call at the telephone base: If the answering system and call screening are on, the announcement and the incoming message broadcast at the telephone base while the call is answered by the answering system. Options while a message is being recorded: • Press +VOL or VOL- to adjust the call screening volume. • Press +VOL to temporarily turn on the call screening if the call screening is set to off.
Answering system operation Message playback On the telephone base, when playback begins, the total number of old or new messages is announced, and the message window displays the message number currently playing. On the handset, if you have both new and old messages, you can play either new or old messages. The caller ID information displays on the handset screen when you play messages and you can call back the caller. Before each message, you hear the day and time of the recording.
Answering system operation To play messages on the handset: 1. Press MENU when the phone is not in use. 2. Press SELECT to choose Play msgs. If you have either new or old messages, the messages play automatically. If you have both new and old messages: • To play new messages, press SELECT to select Play new msgs. Play new msgs • To play old messages, press q or p to choose Play old Play old msgs msgs, then press SELECT. When the handset is playing a message, its screen shows the caller’s name or number.
Answering system operation Delete all old messages You can only delete old (reviewed) messages. You cannot delete new messages until you review them. You cannot retrieve deleted messages. To delete all old messages at the telephone base: 1. Press X/DELETE when the phone in not in use. You hear, “To delete all old messages, press X/DELETE again.” 2. Press X/DELETE again. You hear, “All old messages deleted.” and a confirmation tone. To delete all old messages on the handset: 1.
Answering system operation Remote access A two-digit security code is required to access the answering system remotely from any touch-tone telephone. The preset code is 19. See Remote access code on page 76 to change it. 1. Dial your telephone number from any touch-tone telephone. 2. When the system plays your announcement, enter the two-digit security code. 3. You can enter one of the following remote commands. Command Description 1 Play all messages. 2 Play new messages.
Appendix Expand your telephone system The cordless handset provided within your product package is already registered as HANDSET 1. The doorbell provided within your product package is already registered as Doorbell 1. This telephone system accommodates up to 10 handsets, including a maximum of two doorbells. You can add new handsets (IS7101, purchased separately) or new doorbell (IS741, purchased separately) to your telephone base.
Appendix Add and register a doorbell You can add another new doorbell (IS741, purchased separately) to your IS7121 telephone system. This telephone system accommodates up to two doorbells. Each new doorbell must be paired to the telephone base before use. Make sure the doorbell is powered on before pairing it to the telephone base. 1. Press and hold /FIND HANDSET on the telephone base for about four seconds until the IN USE light turns on. 2.
Appendix Deregister handsets and doorbells If you want to replace a handset/doorbell, or reassign the designated handset/doorbell number of a registered handset/doorbell, you must deregister all system devices that are registered to the telephone base. Then register each handset/doorbell individually. Make sure the doorbell(s) is powered on before deregistration. To deregister all handsets and doorbells: 1.
Appendix Screen messages Area code will not show in Caller ID log The home area code you saved will not be shown in caller ID log. Caller ID log empty There are no caller ID log entries. Caller ID won’t be announced. The ringer volume on the handset is turned off so no caller ID information will be announced for incoming calls. Calling all handsets The handset is calling all system handsets. (for models with more than two handsets) Calling HANDSET X You are calling another handset.
Appendix Screen messages No battery The handset in the telephone base or charger has no battery installed. No line There is no telephone line connection. No PTT call The incoming PTT function is disabled. The handset will not receive PTT calls. Not available at this time Someone else is using the directory, caller ID log, or answering system. Number already saved The telephone number you have entered is already in the directory.
Appendix Handset and telephone base indicators Telephone base lights ANS ON/OFF On when the answering system is turned on. IN USE On when the telephone line is in use. DOORBELL Flashes when /DOORBELL is pressed. Handset lights CHARGE On when the handset is charging in the telephone base or charger. On when the handset speakerphone is in use. Handset icons The battery icon flashes when the battery is low and needs charging. The battery icon animates when the battery is charging.
Appendix Battery It takes up to 11 hours for the battery to be fully charged. When it is fully charged, you can expect the following performance: Operation Operating time While in handset use (talking*) Up to seven hours While in speakerphone mode (talking*) Up to three hours While not in use (standby**) Up to five days * Operating times vary depending on your actual use and the age of the battery. ** Handset is not charging or in use.
Appendix Troubleshooting If you have difficulty with your telephone, please try the suggestions below. For customer service, visit our website at www.vtechphones.com or call 1 (800) 595-9511. In Canada, go to www.vtechcanada.com or dial 1 (800) 267-7377. My telephone doesn’t work at all. • Make sure the power cord is securely plugged in. • Make sure you plug the battery connector securely into the cordless handset.
Appendix Troubleshooting I cannot dial out. • Try all the suggestions above. • Make sure you have a dial tone before dialing. The cordless handset may take a second or two to find the telephone base and produce a dial tone. This is normal. Wait an extra second before dialing. • Eliminate any background noise. Noise from a television, radio or other appliances might cause the phone to not dial out properly.
Appendix Troubleshooting The battery does not charge in the handset, or the handset battery does not accept charge. • If the cordless handset is in the telephone base and the charge light is not on, refer to The charge light is off (page 98). • Charge the battery in the cordless handset for at least 11 hours. For optimum daily performance, return the cordless handset to the telephone base when not in use.
Appendix Troubleshooting The captured image or video streaming is too bright or too dark. • If the image is too bright, it may be caused by sunlight reflection. Avoid mounting the doorbell to where it is exposed to direct sunlight or reflections caused by sunlight. • If the image is too dark, make sure the location where the doorbell is installed has enough exposure to light.
Appendix Troubleshooting I get noise, static, or weak signals even when I’m near the telephone base. • If you subscribe to high-speed Internet service (DSL - digital subscriber line) through your telephone line, you must install a DSL filter between the telephone line cord and the telephone wall jack (page 2). The filter prevents noise and caller ID problems as a result of DSL interference. Contact your DSL service provider for more information about DSL filters.
Appendix Troubleshooting The telephone does not ring when there is an incoming call. • Make sure that the ringer is not off. Refer to Handset ringer volume and Telephone base ringer volume on page 28 in this user’s manual. • Make sure you plug in the telephone line cord securely into the telephone base and the telephone jack. Make sure you plug in the power cord securely. • The cordless handset may be too far from the telephone base. • Charge the battery in the cordless handset for at least 11 hours.
Appendix Troubleshooting The charge light is off. • Make sure you plug the power and line cords in correctly and securely. • Unplug the electrical power. Wait for 15 seconds, then plug it back in. Allow up to one minute for the cordless handset and telephone base to reset. • Clean the charging contacts on the cordless handset and telephone base each month with a pencil eraser or cloth. My caller ID isn’t working properly. • Caller ID is a subscription service.
Appendix Troubleshooting The answering system does not answer after the correct number of rings. • Make sure that the answering system is on. ANS ON should show on the handset and the telephone base. • If toll saver is activated, the number of rings changes to two when you have new messages stored (page 75). • If the memory is full or the system is off, the system will answer after 10 rings. • In some cases, the answering system is affected by the ringing system used by your telephone service provider.
Appendix Troubleshooting The system announces “Time and date not set.” • You need to reset the system clock (page 31). The outgoing announcement is not clear. • When you record your announcement, make sure you speak in a normal tone of voice, about nine inches from the handset or telephone base. • Make sure there is no background noise (TV, music, etc.) while recording. New voicemail and show and I don’t know why. • Your telephone has both a built-in answering system and voicemail indication.
Appendix Troubleshooting Common cure for electronic equipment. If the telephone does not seem to be responding normally, do the following (in the order listed): 1. Disconnect the power to the telephone base. 2. Disconnect the cordless handset battery. 3. Wait a few minutes. 4. Connect power to the telephone base. 5. Install the battery again, and place the cordless handset in the telephone base. 6. Wait for the cordless handset to reestablish its connection with the telephone base.
Appendix Important safety instructions When using your telephone equipment, basic safety precautions should always be followed to reduce the risk of fire, electric shock and injury, including the following: 1. Read and understand all instructions. 2. Follow all warnings and instructions marked on the product. 3. Unplug this product from the wall outlet before cleaning. Do not use liquid or aerosol cleaners. Use a damp cloth for cleaning. 4.
Appendix Precautions for users of implanted cardiac pacemakers Cardiac pacemakers (applies only to digital cordless telephones): Wireless Technology Research, LLC (WTR), an independent research entity, led a multidisciplinary evaluation of the interference between portable wireless telephones and implanted cardiac pacemakers. Supported by the U.S. Food and Drug Administration, WTR recommends to physicians that: Pacemaker patients • Should keep wireless telephones at least six inches from the pacemaker.
Appendix Energy-saving charging mode When this mode is activated, all telephone functions, except handset battery charging, will be disabled. To activate the energy-saving charging mode: 1. Unplug the telephone base power adapter from the power outlet. Make sure all handsets are plugged with charged batteries before proceeding. 2. While you press and hold /FIND HANDSET, plug the telephone base power adapter back to the power outlet. 3.
Appendix About cordless telephones • • • • • Privacy: The same features that make a cordless telephone convenient create some limitations. Telephone calls are transmitted between the telephone base and the cordless handset by radio waves, so there is a possibility that the cordless telephone conversations could be intercepted by radio receiving equipment within range of the cordless handset.
Appendix FCC, ACTA and IC regulations FCC Part 15 This equipment has been tested and found to comply with the requirements for a Class B digital device under Part 15 of the Federal Communications Commission (FCC) rules. These requirements are intended to provide reasonable protection against harmful interference in a residential installation.
Appendix FCC, ACTA and IC regulations FCC Part 68 and ACTA This equipment complies with Part 68 of the FCC rules and with technical requirements adopted by the Administrative Council for Terminal Attachments (ACTA). The label on the back or bottom of this equipment contains, among other things, a product identifier in the format US:AAAEQ##TXXXX. This identifier must be provided to your telephone service provider upon request.
Appendix Limited warranty What does this limited warranty cover? The manufacturer of this VTech Product warrants to the holder of a valid proof of purchase (“Consumer” or “you”) that the Product and all accessories provided in the sales package (“Product”) are free from defects in material and workmanship, pursuant to the following terms and conditions, when installed and used normally and in accordance with the Product operating instructions.
Appendix Limited warranty How do you get warranty service? To obtain warranty service in the United States of America, please visit our website at www.vtechphones.com or call 1 (800) 595-9511. In Canada, go to www.vtechcanada.com or dial 1 (800) 267-7377. NOTE: Before calling for service, please review the user’s manual - a check of the Product’s controls and features may save you a service call.
Appendix Technical specifications Frequency control Crystal controlled PLL synthesizer Transmit frequency Handset: 1921.536-1928.448 MHz Telephone base: 1921.536-1928.448 MHz Doorbell: 1921.536-1928.448 MHz Channels 5 LCD 128 (RGB) x 160 DOTS; 1.77’’; TFT PANEL Nominal effective range Maximum power allowed by FCC and IC. Actual operating range may vary according to environmental conditions at the time of use. Power requirements Handset unit: 2.
Index A Add a directory entry, 60–61 Add a doorbell, 86 Add a handset, 85 Alphabetical search, 62 Announcement, 72 Answer a call, 44 Answer on/off, 74 H Handset battery charging, 4 Handset battery installation, 3 Handset icons, 90 Handset layout, 24–25 Handset lights, 90 Handset locator, 47 Home area code, 40 B Base layout, 22–23 Battery, 3, 4, 9, 91 I Important safety instructions, 102 Installation (battery), 3, 9 Installation (doorbell), 14–17, 19–21 Installation (telephone base), 2 Intercom, 51–53 C
Index Q Quiet mode, 30 R Redial, 48 Register a doorbell, 86 Register a handset, 85 Remote access, 84 Remote access code, 76 Review the caller ID log, 68 Ringer tone, 28 Ringer volume, 28 S Safety instructions, 102 Save a caller ID log entry, 70 Screen messages, 71, 88–89 Settings, 28–40, 72–77 Share a call, 50 Speakerphone, 44 T Technical specifications, 110 Telephone base layout, 22–24 Telephone base lights, 90 Temporary ringer silencing, 45 Temporary tone dialing, 46 Transfer a call, 49 Troubleshooting, 9
VTECH TELECOMMUNICATIONS LTD. A member of THE VTECH GROUP OF COMPANIES. VTech is the registered trademark of VTech Holdings Limited. Copyright © 2013 for VTECH TELECOMMUNICATIONS LTD. All rights reserved. Version 1 07/13.