
Instruction manual


3
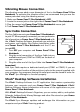
Backup Battery Installation
Power Zone™ Plus Notebook comes installed with
a backup battery. To avoid damage to Power Zone™
Plus Notebook from leaky batteries, replace the
backup battery at least once a year. Should find that
you need to replace the backup battery, follow the
instructions below.
1. Make sure Power Zone™ Plus Notebook is
turned OFF.
2. Locate the backup battery cover on the bottom of
Power Zone™ Plus Notebook and open it.
3. Use a screwdriver to unscrew the cover.
4. Insert 1 CR-2032 battery as illustrated.
5. Replace the battery cover.
Important!
While replacing the backup battery, the 4 “AA” size batteries must be kept in
Power Zone™ Plus Notebook or Power Zone™ Plus Notebook must be
connected to the 9V Adaptor while the Adaptor is plugged in.
When replacing the 4 “AA” size batteries, the backup battery must be kept in
Power Zone™ Plus Notebook, or Power Zone™ Plus Notebook must be
connected to the 9V Adaptor while the Adaptor is plugged in. Otherwise, you
will lose all the information stored in the following applications:
• Word Processor • Money Manager
• Calendar • Scoring Statistics
• Address Book • E-mail
• Test Trainer • Options
• Logo Programming • All downloaded activities
AC Adaptor Connection
Use a standard 9V Adaptor 300mA AC center-positive .
1. Make sure Power Zone™ Plus Notebook is turned OFF.
2. Locate the Adaptor jack on the left side of Power Zone™ Plus Notebook.
3. Plug the Adaptor into Power Zone™ Plus Notebook’s Adaptor jack.
4. Plug the Adaptor into a wall outlet.
5. Turn Power Zone™ Plus Notebook ON.
Important!
Do not leave the Adaptor plugged in for long periods of time if Power Zone™
Plus Notebook is not in use.