
User manual


49
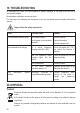
Continuity test
Make sure that all the circuit parts, switches and components and other objects of
measurement are disconnected from the voltage and discharged.
1. Switch on the DMM and select measuring function “Ω”. Press the “SELECT” button (8) to switch to
. The symbol for continuity test now appears in the display.
2. Plug the red measuring lead into the VΩ Hz measuring jack (10) and the black measuring
lead into the COM measuring jack (11).
3. A value of less than 10 Ω is measured as continuity; in this case a beep sounds. The measuring
range is up to 600 Ω.
4. As soon as “OL.” (overload) appears on the display, you have exceeded the measuring range or
the measuring circuit is interrupted.
5. After measuring, remove the measuring leads from the measured object and turn off the DMM.
Capacity measuring
Make sure that all the circuit parts, switches and components and other objects of
measurement are disconnected from the voltage and discharged.
Always observe polarity with electrolyte capacitors.
1. Switch on the DMM and select measuring range “ ”.
2. Plug the red measuring lead into the VΩ Hz measuring jack (10) and the black measuring
lead into the COM measuring socket (11).
3. The display shows the unit “nF”.
Due to the sensitive measuring input, the display may show a value if the measuring leads
are “open”. By pressing the button “REL/PC”, the display is set to “0”. The basic value (rel
difference) is displayed in the upper, small display. The autorange feature is deactivated.
4. Now connect the two test probes (red = plus/black = minus) with the object to be measured
(capacitator). After a short while the display shows the capacity. Wait until the displayed value has
stabilised. This may take a few seconds for capacities of >40 µF.
While measuring capacitance at mF range, the display sometime shows „dsc“ for few second
and then OL for few second before showing measured value.
5. If “OL” (overload) appears on the display, you have exceeded the measuring range.
6. After measuring, remove the measuring leads from the measured object and turn off the DMM.