
User manual


47
Proceed as follows to measure alternating current “AC” (A ~ ):
1. Switch on the DMM and select measuring range “A ”, “mA ” or “µA ”; If you are not sure
about the measured range, start with a larger range (“A ”). Press the shift button (8) to switch
to the function “A ~”, “mA ~” or “µA ~”. The indication “AC” and “TrueRMS” show on the display.
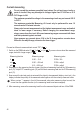
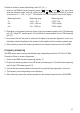
Measuring function Measuring range Measuring jacks
A ~ 0.001 – 10 A COM + 10A
mA ~ 0.001 – 600 mA COM + mAµA
µA ~ 0.01 – 6000 µA COM + mAµA
2. Depending on the measuring function chosen, plug the red measuring lead into the 10A measuring
jack (13) / mAµAºCºF measuring jack (12) and the black measuring lead into the COM measuring
jack (11).
3. Now connect the two test prods in series with the object to be measured (generator, circuit, etc.);
the display indicates the polarity of the measured value together with the currently measured value.
4. After measuring, remove the measuring leads from the measured object and turn off the DMM.
Frequency measuring
The DMM can be used to measure and indicate signal voltage frequencies from 0.001 Hz to 60 MHz .
Proceed as follows to measure frequencies:
1. Switch on the DMM and select measuring function “%”.
2. Plug the red measuring leads into the VΩ^aHz^a^a measuring jack (10) and the black measuring
lead into the COM measuring jack (11).
3. Connect the two measuring leads to the object to be measured (signal generator, circuit, etc.).
4. The frequency and corresponding unit are displayed.
5. After measuring, remove the measuring leads from the measured object and turn off the DMM.