
Instructions

56
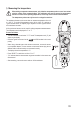
c) Removing the battery compartment cover
The multimeter casing is designed so that you can only access the battery compartment.
This makes the multimeter safer and easier to use.
Proceed as follows:
- Disconnect all test leads from the multimeter and switch it off.
- Remove the current clamp from all circuits.
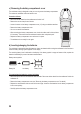
- Loosen the screw on the battery compartment cover (15) using a suitable screwdriver.
- Remove the battery compartment cover.
- You can now access the batteries.
- When removing the battery compartment cover, check the rubber seal for dirt and clean
it if necessary. This ensures that the multimeter remains dust- and splash-proof.
- Replace the battery compartment cover and screw it in place.
- The multimeter is now ready for use again.
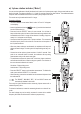
d) Inserting/changing the batteries
ThemultimeterispoweredbythreeAAAbatteries.Insertnewbatteriesbeforeusingthemultimeterforthersttimeor
when the battery warning symbol appears on the display.
Theremainingbatterylevelisindicatedonthedisplay.Ifthebatterysymbolisemptyandstartstoash,replacethe
batteries immediately to prevent inaccurate measurements.
Battery status symbols:
Battery full Low battery Battery empty
To insert/replace the batteries, proceed as follows:
- Disconnect all circuits from the multimeter and test leads. Disconnect all test leads from the multimeter. Switch the
multimeter off.
- Remove the battery compartment cover (see “Removing the battery compartment cover” for details).
- Replace the used batteries with new ones of the same type. Insert the new batteries into the battery compartment
in the correct polarity.
- Carefully replace the battery compartment cover.