
Instructions


47
Make sure that no consumers are connected.
The memory can also be set via the software provided, check the chapter CONTROL WITH
THE PC SOFTWARE.
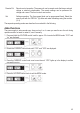
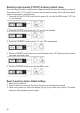
1. Activate the “Preset” function through the “MODE” (8)
slider on the rear.
2. Put the switch in the “Preset” position. The front LED
display “REAR CONTROL” (2) lights up. The front
rotary controls are now inactive.
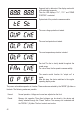
3. Select the respective memory slot “P1, P2 or P3” on
the rear slider “RECALL” (9). The respective output
voltage is indicated on the display (1).
2
3
4. Now you can connect and switch on the consumer.
5. For deactivating the xed voltage function, slide the “MODE” (8) slider back to the “Normal”
position. The LED display “REAR CONTROL” (2) goes out. The device switches back to normal
power unit operation (always remove DC consumers before!).
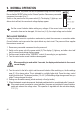
Assigning memory slots with “Set”
All three memory slots can be assigned user-specic values for output voltage and current limitation.
Make sure that no consumers are connected.
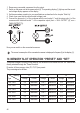
1. Activate the “Set” function through the “MODE” (8)
slider on the rear. Put the switch in the “Set” position.
The front LED display “REAR CONTROL” (2) lights
up.
2. Select the respective memory slot “P1, P2 or P3” on
the rear “RECALL” (9) slider. The respective values for
current and voltage are indicated on the display (1).
2
3
3. The front rotary controls (3 and 4) can be used to set the desired output voltage and current
limitation.
4. If required, repeat these steps with the other memory slots.
5. When all parameters are set, slide the “MODE” (8) slider back to the “Preset” position for xed
voltage operation or to the “Normal” position for standard operation.