
Instructions


44
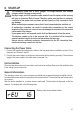
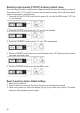
9. NORMAL OPERATION
In normal operation, the power unit can be operated through the front controls.
Ensure that the “MODE” slider is in the “Normal” position. Remove any connected
consumers from output (6 or 7).
Switch on the power unit at the power switch (5). The display (1) lights up, and
after a short self test, the current and voltage displays appear.
Set the current limitation before setting any voltages. If the current value is too high, your
connection lines can be damaged; if it is too low (<1 A), the output voltage can be limited.
Set current limitation
Limiting the output current is a protection mechanism to protect the consumer or connection cables.
Current limitation can be pre-set at the output without any short circuit. The power unit then supplies
the maximum current set.
1. Remove any connected consumers from the power unit.
2. Switch on the power unit at the power switch (5). The display (1) lights up, and after a short self
test, the current and voltage displays appear.
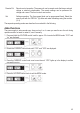
3. Set the current limitation at the “CURRENT” control (4) according to your application.
4. Turn the control and a current limitation value appears.
Where no setting is made within 3 seconds, the display switches back to the current
current display.
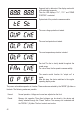
5. Turn the control to the left or right to set the current limitation. After switching on, the ne settings
area (0.1 A) is always active. This is indicated by a slightly lighter digit. Press the rotary control
slightly from the front. The decimal position (1.0 or 0.1) of the setting range changes each time you
press. Turning changes the value.
6. Settings can be made coarsely (whole numbers) or ne (by tenths).
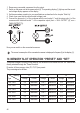
7. Where the desired current value was set, the display switches back to normal display after 3 seconds.
If the preset current is reached in normal operation, the power unit switches to current limitation
mode and reduces the voltage value. This operation is signalled with the red status display
“C.C.“ (1).