
6.5.1
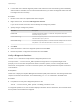
Table Of Contents
- vSphere Storage
- Contents
- About vSphere Storage
- Updated Information
- Introduction to Storage
- Getting Started with a Traditional Storage Model
- Overview of Using ESXi with a SAN
- Using ESXi with Fibre Channel SAN
- Configuring Fibre Channel Storage
- Configuring Fibre Channel over Ethernet
- Booting ESXi from Fibre Channel SAN
- Booting ESXi with Software FCoE
- Best Practices for Fibre Channel Storage
- Using ESXi with iSCSI SAN
- Configuring iSCSI Adapters and Storage
- ESXi iSCSI SAN Requirements
- ESXi iSCSI SAN Restrictions
- Setting LUN Allocations for iSCSI
- Network Configuration and Authentication
- Set Up Independent Hardware iSCSI Adapters
- About Dependent Hardware iSCSI Adapters
- About the Software iSCSI Adapter
- Modify General Properties for iSCSI Adapters
- Setting Up iSCSI Network
- Using Jumbo Frames with iSCSI
- Configuring Discovery Addresses for iSCSI Adapters
- Configuring CHAP Parameters for iSCSI Adapters
- Configuring Advanced Parameters for iSCSI
- iSCSI Session Management
- Booting from iSCSI SAN
- Best Practices for iSCSI Storage
- Managing Storage Devices
- Storage Device Characteristics
- Understanding Storage Device Naming
- Storage Rescan Operations
- Identifying Device Connectivity Problems
- Edit Configuration File Parameters
- Enable or Disable the Locator LED on Storage Devices
- Erase Storage Devices
- Working with Flash Devices
- About VMware vSphere Flash Read Cache
- Working with Datastores
- Types of Datastores
- Understanding VMFS Datastores
- Understanding Network File System Datastores
- Creating Datastores
- Managing Duplicate VMFS Datastores
- Increasing VMFS Datastore Capacity
- Administrative Operations for Datastores
- Set Up Dynamic Disk Mirroring
- Collecting Diagnostic Information for ESXi Hosts on a Storage Device
- Checking Metadata Consistency with VOMA
- Configuring VMFS Pointer Block Cache
- Understanding Multipathing and Failover
- Raw Device Mapping
- Software-Defined Storage and Storage Policy Based Management
- About Storage Policy Based Management
- Virtual Machine Storage Policies
- Working with Virtual Machine Storage Policies
- Populating the VM Storage Policies Interface
- Default Storage Policies
- Creating and Managing VM Storage Policies
- Storage Policies and Virtual Machines
- Assign Storage Policies to Virtual Machines
- Change Storage Policy Assignment for Virtual Machine Files and Disks
- Monitor Storage Compliance for Virtual Machines
- Check Compliance for a VM Storage Policy
- Find Compatible Storage Resource for Noncompliant Virtual Machine
- Reapply Virtual Machine Storage Policy
- Using Storage Providers
- Working with Virtual Volumes
- About Virtual Volumes
- Virtual Volumes Concepts
- Virtual Volumes and Storage Protocols
- Virtual Volumes Architecture
- Virtual Volumes and VMware Certificate Authority
- Snapshots and Virtual Volumes
- Before You Enable Virtual Volumes
- Configure Virtual Volumes
- Provision Virtual Machines on Virtual Volumes Datastores
- Virtual Volumes and Replication
- Best Practices for Working with vSphere Virtual Volumes
- Filtering Virtual Machine I/O
- Storage Hardware Acceleration
- Hardware Acceleration Benefits
- Hardware Acceleration Requirements
- Hardware Acceleration Support Status
- Hardware Acceleration for Block Storage Devices
- Hardware Acceleration on NAS Devices
- Hardware Acceleration Considerations
- Thin Provisioning and Space Reclamation
- Using vmkfstools
- vmkfstools Command Syntax
- The vmkfstools Command Options
- -v Suboption
- File System Options
- Virtual Disk Options
- Supported Disk Formats
- Creating a Virtual Disk
- Initializing a Virtual Disk
- Inflating a Thin Virtual Disk
- Converting a Zeroedthick Virtual Disk to an Eagerzeroedthick Disk
- Removing Zeroed Blocks
- Deleting a Virtual Disk
- Renaming a Virtual Disk
- Cloning or Converting a Virtual Disk or RDM
- Extending a Virtual Disk
- Upgrading Virtual Disks
- Creating a Virtual Compatibility Mode Raw Device Mapping
- Creating a Physical Compatibility Mode Raw Device Mapping
- Listing Attributes of an RDM
- Displaying Virtual Disk Geometry
- Checking and Repairing Virtual Disks
- Checking Disk Chain for Consistency
- Storage Device Options

3 Activate the core dump file for the host:
esxcli system coredump file set
The command takes the following options:
Option Description
--path | -p
The path of the core dump file to use. The file must be pre-allocated.
--smart | -s
This flag can be used only with --enable | -e=true. It causes the file to be
selected using the smart selection algorithm.
For example,
esxcli system coredump file set --smart --enable true
4 Verify that the core dump file is active and configured:
esxcli system coredump file list
The output similar to the following indicates that the core dump file is active and configured:
Path Active Configured Size
------------------------------------------------ ------ ---------- ---------
/vmfs/volumes/52b021c3-.../vmkdump/test.dumpfile True True 104857600
What to do next
For information about other commands you can use to manage the core dump files, see the vSphere
Command-Line Interface Reference documentation.
Deactivate and Delete a Core Dump File
Deactivate a configured core dump file and, if needed, remove it from the VMFS datastore.
You can temporarily deactivate the core dump file. If you do not plan to use the deactivated file, you can
remove it from the VMFS datastore. To remove the file that has not been deactivated, you can use the
system coredump file remove command with the --force | -F parameter.
Prerequisites
Install vCLI or deploy the vSphere Management Assistant (vMA) virtual machine. See Getting Started with
vSphere Command-Line Interfaces. For troubleshooting, run esxcli commands in the ESXi Shell.
Procedure
1 Deactivate the core dump file by running the following command:
esxcli system coredump file set --unconfigure | -u
vSphere Storage
VMware, Inc. 196