
6.5.1

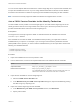


Table Of Contents
- Platform Services Controller Administration
- Contents
- About Platform Services Controller Administration
- Updated Information
- Getting Started with Platform Services Controller
- vCenter Server and Platform Services Controller Deployment Types
- Deployment Topologies with External Platform Services Controller Instances and High Availability
- Understanding vSphere Domains, Domain Names, and Sites
- Platform Services Controller Capabilities
- Managing Platform Services Controller Services
- Managing the Platform Services Controller Appliance
- vSphere Authentication with vCenter Single Sign-On
- Understanding vCenter Single Sign-On
- Configuring vCenter Single Sign-On Identity Sources
- Identity Sources for vCenter Server with vCenter Single Sign-On
- Set the Default Domain for vCenter Single Sign-On
- Add a vCenter Single Sign-On Identity Source
- Edit a vCenter Single Sign-On Identity Source
- Remove a vCenter Single Sign-On Identity Source
- Use vCenter Single Sign-On With Windows Session Authentication
- vCenter Server Two-Factor Authentication
- Using vCenter Single Sign-On as the Identity Provider for Another Service Provider
- Security Token Service STS
- Managing vCenter Single Sign-On Policies
- Managing vCenter Single Sign-On Users and Groups
- Add vCenter Single Sign-On Users
- Disable and Enable vCenter Single Sign-On Users
- Delete a vCenter Single Sign-On User
- Edit a vCenter Single Sign-On User
- Add a vCenter Single Sign-On Group
- Add Members to a vCenter Single Sign-On Group
- Remove Members From a vCenter Single Sign-On Group
- Delete vCenter Single Sign-On Solution Users
- Change Your vCenter Single Sign-On Password
- vCenter Single Sign-On Security Best Practices
- vSphere Security Certificates
- Certificate Requirements for Different Solution Paths
- Certificate Management Overview
- Managing Certificates with the Platform Services Controller Web Interface
- Explore Certificate Stores from the Platform Services Controller Web Interface
- Replace Certificates with New VMCA-Signed Certificates from the Platform Services Controller Web Interface
- Make VMCA an Intermediate Certificate Authority from the Platform Services Controller Web Interface
- Set up Your System to Use Custom Certificates from the Platform Services Controller
- Managing Certificates from the vSphere Web Client
- Managing Certificates with the vSphere Certificate Manager Utility
- Certificate Manager Options and the Workflows in This Document
- Regenerate a New VMCA Root Certificate and Replace All Certificates
- Make VMCA an Intermediate Certificate Authority (Certificate Manager)
- Generate CSR with vSphere Certificate Manager and Prepare Root Certificate (Intermediate CA)
- Replace VMCA Root Certificate with Custom Signing Certificate and Replace All Certificates
- Replace Machine SSL Certificate with VMCA Certificate (Intermediate CA)
- Replace Solution User Certificates with VMCA Certificates (Intermediate CA)
- Replace All Certificates with Custom Certificate (Certificate Manager)
- Revert Last Performed Operation by Republishing Old Certificates
- Reset All Certificates
- Manual Certificate Replacement
- Managing Services and Certificates With CLI Commands
- Troubleshooting Platform Services Controller
- Determining the Cause of a Lookup Service Error
- Unable to Log In Using Active Directory Domain Authentication
- vCenter Server Login Fails Because the User Account Is Locked
- VMware Directory Service Replication Can Take a Long Time
- Export a Platform Services Controller Support Bundle
- Platform Services Controller Service Logs Reference

2 Specify the user name and password for administrator@vsphere.local or another member of the
vCenter Single Sign-On Administrators group.
If you specified a different domain during installation, log in as administrator@mydomain.
3 Click Single Sign-On, click Configuration, and click the Login Banner tab.
4 Click Edit and configure the login banner.
Option Description
Status Click the Enabled check box to enable the login banner. You cannot make login
banner changes unless you click this check box.
Explicit Consent Click the Explicit Consent check box to require that the user clicks a check box
before logging in. You can also display a message without a check box.
Title Title of the banner. By default, the Login Banner text is I agree to the. You can
add to that, for example Terms and Conditions.
Message Message that the user sees when clicking the banner, for example, the text of the
terms and conditions. The message is required if you use explicit consent.
Using vCenter Single Sign-On as the Identity Provider for
Another Service Provider
The vSphere Web Client is automatically registered as trusted SAML 2.0 Service Provider (SP) to
vCenter Single Sign-On. You can add other trusted service providers to an identity federation where
vCenter Single Sign-On acting as the SAML Identity Provider (IDP). The service providers must conform
to the SAML 2.0 protocol. After the federation is set up, the service provider grants access to a user if that
user can authenticate to vCenter Single Sign-On.
Note vCenter Single Sign-On can be the IDP to other SPs.vCenter Single Sign-On cannot be an SP that
uses another IDP.
A registered SAML service provider can grant access to a user that already has a live session, that is, a
user that is logged in to the identity provider. For example, vRealize Automation 7.0 and later supports
vCenter Single Sign-On as an identity provider. You can set up a federation from vCenter Single Sign-On
and from vRealize Automation. After that, vCenter Single Sign-On can perform the authentication when
you log in to vRealize Automation.
To join a SAML service provider to the identity federation, you have to set up trust between the SP and
the IDP by exchanging SAML metadata between them.
You have to perform integration tasks for both vCenter Single Sign-On and the service that is using
vCenter Single Sign-On.
1 Export IDP metadata to a file, then import it to the SP.
2 Export SP metadata and import it into the IDP.
Platform Services Controller Administration
VMware, Inc. 56