
6.7

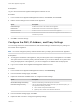
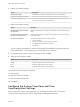
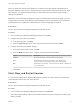
Table Of Contents
- vCenter Server Appliance Configuration
- Contents
- About vCenter Server Appliance Configuration
- vCenter Server Appliance Overview
- Using the Appliance Management Interface to Configure the vCenter Server Appliance
- Log In to the vCenter Server Appliance Management Interface
- View the vCenter Server Appliance Health Status
- Reboot or Shut Down the vCenter Server Appliance
- Create a Support Bundle
- Monitor CPU and Memory Use
- Monitor Disk Use
- Monitor Network Use
- Monitor Database Use
- Enable or Disable SSH and Bash Shell Access
- Configure the DNS, IP Address, and Proxy Settings
- Configure the System Time Zone and Time Synchronization Settings
- Start, Stop, and Restart Services
- Configure Update Settings
- Change the Password and Password Expiration Settings of the Root User
- Forward vCenter Server Appliance Log Files to Remote Syslog Server
- Configure and Schedule Backups
- Using the vSphere Client and vSphere Web Client to Configure the vCenter Server Appliance
- Join the vCenter Server Appliance to an Active Directory Domain
- Leave an Active Directory Domain
- Add a User to the SystemConfiguration.BashShellAdministrators Group
- Edit Access Settings to the vCenter Server Appliance
- Edit the DNS and IP Address Settings of the vCenter Server Appliance
- Edit the Firewall Settings of the vCenter Server Appliance
- Edit the Startup Settings of a Service
- Start, Stop, or Restart Services in the vCenter Server Appliance
- View the Health Status of Services and Nodes
- Edit the Settings of Services
- Export a Support Bundle
- Using the Appliance Shell to Configure the vCenter Server Appliance
- Access the Appliance Shell
- Enable and Access the Bash Shell from the Appliance Shell
- Keyboard Shortcuts for Editing Commands
- Get Help About the Plug-Ins and API Commands in the Appliance
- Plug-Ins in the vCenter Server Appliance Shell
- Browse the Log Files By Using the showlog Plug-In
- API Commands in the vCenter Server Appliance Shell
- Configuring SNMP for the vCenter Server Appliance
- Configuring Time Synchronization Settings in the vCenter Server Appliance
- Managing Local User Accounts in the vCenter Server Appliance
- User Roles in the vCenter Server Appliance
- Get a List of the Local User Accounts in the vCenter Server Appliance
- Create a Local User Account in the vCenter Server Appliance
- Update the Password of a Local User in the vCenter Server Appliance
- Update a Local User Account in the vCenter Server Appliance
- Delete a Local User Account in the vCenter Server Appliance
- Monitor Health Status and Statistics in the vCenter Server Appliance
- Using the vimtop Plug-In to Monitor the Resource Use of Services
- Using the Direct Console User Interface to Configure the vCenter Server Appliance
- Log In to the Direct Console User Interface
- Change the Password of the Root User
- Configure the Management Network of the vCenter Server Appliance
- Restart the Management Network of the vCenter Server Appliance
- Enable Access to the Appliance Bash Shell
- Access the Appliance Bash Shell for Troubleshooting
- Export a vCenter Server Support Bundle for Troubleshooting

6 Edit the IPv4 address settings.
Option Description
Disable IPv4 settings Disables the IPv4 address. The appliance uses only an IPv6 address.
Obtain IPv4 settings automatically Obtains the IPv4 address for the appliance automatically from the network.
Enter IPv4 settings manually Uses an IPv4 address that you set manually. You must enter the IP address,
subnet prefix length, and the default gateway.
7 Edit the IPv6 address settings.
Option Description
Obtain IPv6 settings automatically
through DHCP
Assigns IPv6 addresses to the appliance automatically from the network by using
DHCP.
Obtain IPv6 settings automatically
through router advertisement
Assigns IPv6 addresses to the appliance automatically from the network by using
router advertisement.
Use static IPv6 addresses Uses static IPv6 addresses that you set up manually.
1 Click the checkbox.
2 Enter the IPv6 address and the subnet prefix length.
3 Click Add to enter additional IPv6 addresses.
4 Click Save.
You can configure the appliance to obtain the IPv6 settings automatically through both DHCP and
router advertisement. You can assign static a IPv6 address at the same time.
8 To configure a proxy server, in the Proxy Settings section, click Edit.
9 Select the proxy setting to enable
Option Description
HTTPS Enable to configure the HTTPS proxy settings.
FTP Enable to configure the FTP proxy settings.
HTTP Enable to configure the HTTP proxy settings.
10 Enter the server hostname or IP address.
11 Enter the port.
12 Enter the username (optional).
13 Enter the password (optional).
14 Click Save.
Configure the System Time Zone and Time
Synchronization Settings
After you deploy the vCenter Server Appliance, you can change the system time zone and time
synchronization settings from the vCenter Server Appliance Management Interface.
vCenter Server Appliance Configuration
VMware, Inc. 14