
6.4
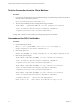

Table Of Contents
- VMware vRealize Operations for Published Applications Installation and Administration
- Contents
- VMware vRealize Operations for Published Applications Installation and Administration
- Introducing vRealize Operations for Published Applications
- System Requirements for vRealize Operations for Published Applications
- Installing and Configuring vRealize Operations for Published Applications
- Install and Configure vRealize Operations for Published Applications
- Downloading the vRealize Operations for Published Applications Installation Files
- Install the vRealize Operations for Published Applications Solution
- Open the Ports Used by vRealize Operations for Published Applications
- Adding a vRealize Operations for Published Applications License Key
- Associate XD-XA Objects with Your vRealize Operations for Published Applications License Key
- Create an Instance of the vRealize Operations for Published Applications 6.4 Adapter
- Enabling Firewall Rules for XenDesktop Delivery Controllers and PVS Server
- Install the vRealize Operations for Published Applications Broker Agent
- Configure the vRealize Operations for Published Applications Broker Agent
- Configure Broker Agent to use Non-Admin User for Citrix Desktop Delivery Controller
- Install a vRealize Operations for Published Applications Desktop Agent
- Push the vRealize Operations for Published Applications Desktop Agent Pair Token Using a Group Policy
- Install and Configure vRealize Operations for Published Applications
- Enable PowerShell Remoting on the Server
- Enabling HTTP or HTTPS Protocols for PowerShell Remoting
- Monitoring Your Citrix XenDesktop and Citrix XenApp Environments
- Managing RMI Communication in vRealize Operations for Published Applications
- Changing the Default TLS Configuration in vRealize Operations for Published Applications
- Managing Authentication in vRealize Operations for Published Applications
- Certificate and Trust Store Files
- Replacing the Default Certificates
- Certificate Pairing
- SSL/TLS and Authentication-Related Log Messages
- Upgrade vRealize Operations for Published Applications
- Create a vRealize Operations Manager Support Bundle
- Download vRealize Operations for Published Applications Broker Agent Log Files
- Download vRealize Operations for Published Applications Desktop Agent Log Files
- View Collector and vRealize Operations for Published Applications Adapter Log Files
- Modify the Logging Level for vRealize Operations for Published Applications Adapter Log Files
- Index
2 Open command prompt and go to C:\Utils\OpenSSL\bin, and set the default OpenSSL conguration
variable.
set OPENSSL_CONF=C:\Utils\OpenSSL-Win32\bin\openssl.cfg
3 Generate a self-signed certicate with a new private key.
openssl req -x509 -nodes -days 9999 -newkey rsa:2048 -keyout HOSTNAME.key -out HOSTNAME.cer -
subj "/CN=HOSTNAME"
4 Convert the certicate and the private key to a .pfx le.
openssl pkcs12 -export -out HOSTNAME.pfx -inkey HOSTNAME.key -in HOSTNAME.cer -name
"HOSTNAME" -passout pass:
5 Deploy the generated SSL certicate (HOSTNAME.PFX le in the bin folder) to the remote server and
import it there .
Import the SSL Certificate on the Remote Machine
Import the PFX certicate le on the remote server. You can do so by aaching your local disk drive to the
Remote Desktop session and copying the le in Windows Explorer.
Procedure
1 Import the certicate into the Local Machine certicate store by pasting the following script in the
PowerShell console:
Replace path-to-pfx-le with the path to the PFX le; for example, C:\OpenSSL-Win64\bin\.
function Install-Certificate ($certPath, [string]$storeLocation = "LocalMachine", [string]
$storeName = "My")
{
$cert = New-Object
System.Security.Cryptography.X509Certificates.X509Certificate2($certPath,"",
"MachineKeySet,PersistKeySet")
$store = New-Object
System.Security.Cryptography.X509Certificates.X509Store($storeName, $storeLocation)
$store.Open("ReadWrite")
$store.Add($cert)
$store.Close()
"Thumbprint: $($cert.Thumbprint)"
}
Install-Certificate path-to-pfx-file\xenapp-dc.vcops.local.pfx
The output of this script is a certicate thumbprint, which is required when seing up an HTTPS
listener for the WinRM service. If you generated a SSL certicate in the IIS Manager, you can get its
thumbprint using the following PowerShell command:
Get-ChildItem cert:\LocalMachine\My | Where-Object { $_.Subject -eq "CN=HOSTNAME" }
2 Copy the certicate to the remote machine (delivery controller) using Windows Explorer.
VMware vRealize Operations for Published Applications Installation and Administration
32 VMware, Inc.