
6.2


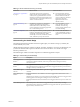
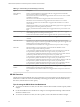
Table Of Contents
- VMware vRealize Operations for Published Applications Installation and Administration
- Contents
- VMware vRealize Operations for Published Applications Installation and Administration
- Introducing vRealize Operations for Published Applications
- System Requirements for vRealize Operations for Published Applications
- Installing and Configuring vRealize Operations for Published Applications
- Install and Configure vRealize Operations for Published Applications
- Downloading the vRealize Operations for Published Applications Installation Files
- Install the vRealize Operations for Published Applications Solution
- Open the Ports Used by vRealize Operations for Published Applications
- Adding a vRealize Operations for Published Applications License Key
- Associate XD-XA Objects with Your vRealize Operations for Published Applications License Key
- Create an Instance of the vRealize Operations for Published Applications 6.2 Adapter
- Enabling Firewall Rules for XenDesktop Delivery Controllers and PVS Server
- Install the vRealize Operations for Published Applications Broker Agent
- Configure the vRealize Operations for Published Applications Broker Agent
- Configure Broker Agent to use Non-Admin User for Citrix Desktop Delivery Controller
- Install a vRealize Operations for Published Applications Desktop Agent
- Push the vRealize Operations for Published Applications Desktop Agent Pair Token Using a Group Policy
- Install and Configure vRealize Operations for Published Applications
- Monitoring Your Citrix XenDesktop and Citrix XenApp Environments
- Managing RMI Communication in vRealize Operations for Published Applications
- Changing the Default TLS Configuration in vRealize Operations for Published Applications
- Managing Authentication in vRealize Operations for Published Applications
- Certificate and Trust Store Files
- Replacing the Default Certificates
- Certificate Pairing
- SSL/TLS and Authentication-Related Log Messages
- Create a vRealize Operations Manager Support Bundle
- Download vRealize Operations for Published Applications Broker Agent Log Files
- Download vRealize Operations for Published Applications Desktop Agent Log Files
- View Collector and vRealize Operations for Published Applications Adapter Log Files
- Modify the Logging Level for vRealize Operations for Published Applications Adapter Log Files
- Index

2 Follow these steps if you don't want the user to have Administrator access on delivery controller.
a Login to delivery controller as full administrator.
b Run command winrm configSDDL default from command prompt. Add Read/Execute permissions
for Read-Only/Custom Administrator.
c Run Set-PSSessionConfiguration -name Microsoft.PowerShell -ShowSecurityDescriptorUI from
powershell prompt. Add Read/Execute permissions for Read-Only/Custom Administrator.
d Go to Computer Management > Services and Applications > WMI Control.
e Right click and select Properties.
f Go to Security tab.
g Click CIMV2 > Security.
Add Execute Methods and Remote Enable permissions for Read-Only/Custom Administrator.
h Restart the WinRM Service.
i Download and install the "subinacl" tool from
http://www.microsoft.com/en-us/download/details.aspx?id=23510.
j Add Execute Methods and Remote Enable permissions for Read-Only/Custom Administrator.
k From Command Prompt, navigate to subinacl installation directory. By default, it gets installed in
"C:\Program Files (x86)\Windows Resource Kits\Tools".
l Run subinacl.exe /service CitrixBrokerService /grant=DOMAIN\USER_NAME=S.
Install a vRealize Operations for Published Applications Desktop Agent
You install desktop agents on all Delivery Controllers, Store Front server, RDS host, License server, and VDI
machines.
Prerequisites
Verify that you downloaded the desktop agent installation file.
Procedure
1 Log in to the machine where you plan to install the desktop agent, using a domain account that is part
of the local administrators group.
2 Install the desktop agent.
Option Action
Command line
a Access the command prompt.
b Run the Desktop agent:
n
For 64-bit: Run the VMware-v4padesktopagent-x86_64-6.2.0-
buildnumber.execommand using the /s, v, or /qn options.
n
For 32-bit: Run the VMware-v4padesktopagent-6.2.0-
buildnumber.execommand using the /s, v, or /qn options.
EXE file
a
Copy the VMware-v4padesktopagent-x86_64-6.2.0-
buildnumber.exe (64-bit) or VMware-
v4padesktopagent-6.2.0-buildnumber.exe (32-bit) file to a
temporary folder.
b
Double-click the VMware-v4padesktopagent-x86_64-6.2.0-
buildnumber.exe or the VMware-v4padesktopagent-
x86_64-6.2.0-buildnumber.exe (64-bit) or VMware-
v4padesktopagent-6.2.0-buildnumber.exe (32-bit)file.
c Follow the steps to complete the installer.
Chapter 4 Installing and Configuring vRealize Operations for Published Applications
VMware, Inc. 23