
7.3

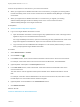
Table Of Contents
- Migrating vRealize Automation to 7.3 or 7.3.1
- Contents
- Updated Information
- Migrating vRealize Automation
- Migration Prerequisites
- Pre-Migration Tasks
- Review Changes Introduced by Migration from vRealize Automation 6.2.x to 7.x
- Set the vRealize Automation PostgreSQL Replication Mode to Asynchronous
- Change DoDeletes Setting on the vSphere Agent to False
- Prepare vRealize Automation Virtual Machines for Migration
- Gather Information Required for Migration
- Obtain the Encryption Key
- List Tenant and IaaS Administrators
- Add Each Tenant from the Source Environment
- Create an Administrator for Each Added Tenant
- Synchronize Users and Groups Before Migration to a Minimal Environment
- Synchronize Users and Groups Before Migration to a High-Availability Environment
- Run Data Collection in Source
- Manually Clone the Source Microsoft SQL Database
- Snapshot the Target Environment
- Migration Procedures
- Post-Migration Tasks
- Add Tenant and IaaS Administrators
- Set the vRealize Automation PostgreSQL Replication Mode to Synchronous
- Run Test Connection and Verify Migrated Endpoints
- Run Data Collection on Target
- Reconfigure Load Balancers After Migration
- Migrating an External vRealize Orchestrator Server to vRealize Automation 7.3
- Control Center Differences Between External and Embedded Orchestrator
- Migrate an External vRealize Orchestrator 6.x on Windows to vRealize Automation 7.3
- Migrate an External vRealize Orchestrator 6.x Virtual Appliance to vRealize Automation 7.3
- Migrate an External vRealize Orchestrator 7.x to vRealize Automation 7.3
- Configure the Built-In vRealize Orchestrator Server
- Migrate the Embedded vRealize Orchestrator Server
- Reconfigure the vRealize Automation Endpoint
- Reconfigure the vRealize Automation Infrastructure Endpoint
- Install vRealize Orchestrator Customization
- Reconfigure Embedded vRealize Orchestrator Endpoint
- Reconfigure the Azure Endpoint
- Migrate Automation Application Services
- Update Software Agent on Existing Virtual Machines
- Delete Original Target vRealize Automation IaaS Microsoft SQL Database
- Update Data Center Location Menu Contents After Migration
- Validate the Target vRealize Automation 7.3 Environment
- Troubleshooting Migration
- PostgreSQL Version Causes Error
- Some Virtual Machines Do Not Have a Deployment Created during Migration
- Load Balancer Configuration Causes Timeout for Long-Running Operations
- Migration Log Locations
- Catalog Items Appear in the Service Catalog After Migration But Are Not Available to Request
- Empty Deployments Are Seen in vRealize Automation After Migration
- XaaS Resource Mapping Named Deployment Is Missing After Migration

Perform this procedure for each tenant in your source environment.
n
When you migrate from a vRealize Automation 6.2.x environment, you migrate your existing SSO2
tenants and identity stores on the source environment to the VMware Identity Manager on the target
environment.
n
When you migrate from a vRealize Automation 7.x environment, you migrate your existing
VMware Identity Manager tenants and identity stores on the source environment to the
VMware Identity Manager on the target environment.
Prerequisites
n
Gather Information Required for Migration.
n
Log in to the target vRealize Automation console.
a Open the vRealize Automation console using the fully qualified domain name of the target virtual
appliance: https://vra-va-hostname.domain.name/vcac.
For a high-availability environment, open the console using the fully qualified domain name of the
target virtual appliance load balancer: https://vra-va-lb-hostname.domain.name/vcac.
b Log in with the user name administrator@vsphere.local and the password that you entered
when you deployed the target vRealize Automation.
Procedure
1 Select Administration > Tenants.
2
Click the New icon ( ).
3 In the Name text box, enter a tenant name that matches a tenant name in the source environment.
For example, if the tenant name in the source environment is DEVTenant, enter DEVTenant.
4 (Optional) Enter a description in the Description text box.
5 In the URL Name text box, enter a tenant URL name that matches the tenant URL name in the
source environment.
The URL name is used to append a tenant-specific identifier to the vRealize Automation console
URL.
For example, if the URL name for DEVTenant in the source environment is dev, enter dev to create
the URL https://vra-va-hostname.domain.name/vcac/org/dev.
6 (Optional) Enter an email address in the Contact Email text box.
7 Click Submit and Next.
What to do next
Create an Administrator for Each Added Tenant.
Migrating vRealize Automation to 7.3 or 7.3.1
VMware, Inc. 19