
7.3
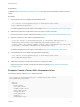
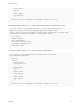
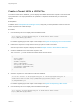
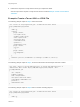


Table Of Contents
- Programming Guide
- Contents
- vRealize Automation Programming Guide
- Updated Information
- Overview of the vRealize Automation REST API
- REST API Authentication
- Creating a Tenant
- Prerequisites for Creating a Tenant
- Create a Tenant With Parameters Inline
- Create a Tenant With a JSON File
- Identity Service Examples for Creating a Tenant
- Syntax for Displaying Your Current Tenants
- Syntax for Requesting a New Tenant
- Syntax for Listing All Tenant Identity Stores
- Syntax for Linking an Identity Store to the Tenant
- Syntax for Searching LDAP or Active Directory for a User
- Syntax for Assigning a User to a Role
- Syntax for Displaying all Roles Assigned to a User
- Requesting a Machine
- Approving a Machine Request
- Listing Provisioned Resources
- Managing Provisioned Deployments
- Working with Reservations
- Prerequisites for Working With Reservations
- Create a Reservation
- Display a List of Supported Reservation Types
- Displaying a Schema Definition for a Reservation
- Get the Business Group ID for a Reservation
- Get a Compute Resource for the Reservation
- Getting a Resources Schema by Reservation Type
- Creating a Reservation By Type
- Verify a Reservation and Get Reservation Details
- Display a List of Reservations
- Update a Reservation
- Delete a Reservation
- Service Examples for Working with Reservations
- Syntax for Displaying a List of Reservations
- Syntax for Displaying a Schema Definition for a vSphere Reservation
- Syntax for Displaying a Schema Definition for an Amazon Reservation
- Syntax for Displaying a Schema Definition for a vCloud Air Reservation
- Syntax for Getting the Business Group ID for a Reservation
- Syntax for Getting a Compute Resource for a Reservation
- Syntax for Getting Resources Schema for a vSphere Reservation
- Syntax for Getting Resources Schema for an Amazon Reservation
- Syntax for Getting Resources Schema for a vCloud Air Reservation
- Syntax for Creating a vSphere Reservation
- Syntax for Creating an Amazon Reservation
- Syntax for Creating a vCloud Air Reservation
- Syntax for Verifying a Reservation and Getting Reservation Details
- Syntax for Displaying a List of Supported Reservation Types
- Syntax for Updating a Reservation
- Syntax for Deleting a Reservation
- Working with Reservation Policies
- Working with Key Pairs
- Working with Network Profiles
- Getting a List of Available IP Ranges
- Importing and Exporting Content
- Understanding Blueprint Schema
- Prerequisites for Importing and Exporting Content
- List Supported Content Types Example
- List Available Content Example
- Filter Content by Content Type Example
- Create a Package for Export Example
- List Packages in the Content Service Example
- Export a Package Example
- Validate a Content Bundle Before Importing example
- Import a Package Example
- Export XaaS Content Example
- Import XaaS Content Example
- Related Tools and Documentation
- Filtering and Formatting REST API Information

Create a Tenant With a JSON File
To create a tenant with a JSON file, you first display all available tenants then request a new tenant with
input parameters. The input parameters are specified in a separate JSON file that you call from the
request.
Prerequisites
In addition to the Prerequisites for Creating a Tenant, verify that you have parameter values for the new
tenant required for the JSON file input.
Procedure
1 Use the identity service to display all the available tenants.
curl --insecure -H "Accept:application/json" -H "Authorization: Bearer $token"
https://$vRA/identity/api/tenants
For details regarding input and output of this sample, see Syntax for Displaying Your Current Tenants.
2 Examine the response to verify that the tenant you plan to create is not listed.
See the output of the request to display all tenants Example: Create a Tenant With a JSON File.
3 Create a JSON file for the new tenant request to call.
The newTenant.json file contains information about the new tenant.
{
"@type":"Tenant",
"id":"rainpole",
"urlName":"rainpole",
"name":"rainpoleTenant",
"description":"New Custom Tenant",
"contactEmail":"admin@vmware.com",
"defaultTenant":false
}
4 Submit a request for a new tenant that calls the JSON file.
curl -X PUT --insecure -H "Accept:application/json" -H "Content-Type:application/json" -H
"Authorization: Bearer $token" https://$vRA/identity/api/tenants/rainpole --data
@C:/Temp/newTenant.json
For details regarding input and output of this sample, see Syntax for Requesting a New Tenant
5 Use the identity service to display all the available tenants again.
curl --insecure -H "Accept:application/json" -H "Authorization: Bearer $token"
https://$vRA/identity/api/tenants
Programming Guide
VMware, Inc. 23