
6.2
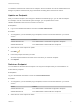
Table Of Contents
- Advanced Service Design
- Contents
- Advanced Service Design
- Updated Information for Advanced Service Design
- Using the Goal Navigator
- Introduction to VMware vRealize Orchestrator
- Configuring vRealize Orchestrator and Plug-Ins
- Authoring Services with Advanced Service Designer
- Advanced Service Designer Basics
- Creating an Advanced Service Overview
- Create a Custom Resource
- Create a Service Blueprint
- Publish a Service Blueprint as a Catalog Item
- Create a Resource Action
- Publish a Resource Action
- Assign an Icon to a Resource Action
- Create a Service
- Associate a Catalog Item with a Service
- Create an Approval Policy for Advanced Service Blueprints and Actions
- Entitle a Service, Catalog Items, and Actions to a User or a Group of Users
- Extending Operations on Resources Provisioned by Other Sources
- Importing and Exporting Advanced Service Designer Components
- Form Designer
- Advanced Service Designer Examples and Scenarios
- Create a Service for Creating and Modifying a User
- Create a Test User as a Custom Resource
- Create a Service Blueprint for Creating a User
- Publish the Create a User Blueprint as a Catalog Item
- Create a Resource Action to Change a User Password
- Publish the Change a Password Resource Action
- Create a Service for Creating a Test User
- Associate the Catalog Item with the Create a Test User Service
- Entitle the Service and the Resource Action to a Consumer
- Create and Publish an Action to Migrate a Virtual Machine
- Create an Action to Migrate a Virtual Machine With vMotion
- Create and Publish an Action to Take a Snapshot
- Create and Publish an Action to Start an Amazon Virtual Machine
- Creating a Data Refresh Service Offering
- Create a Service for Creating and Modifying a User

Procedure
1 To configure the your Orchestrator plug-in endpoints, browse to the location based on your current
version.
Version Location
vRealize Automation 6.2.1 Select Administration > Orchestration Configuration > Endpoints
vRealize Automation 6.2 Select Administration > Advanced Services > Endpoints
2
Click Add ( ).
3 Select vCenter Server from the Plug-in drop-down menu.
4 Click Next.
5 Enter a name and, optionally, a description.
6 Click Next.
7 Provide information about the vCenter Server instance.
a Enter the IP address or the DNS name of the machine in the IP or host name of the vCenter
Server instance to add text box.
This is the IP address or DNS name of the machine on which the vCenter Server instance you
want to add is installed.
b Enter the port to communicate with the vCenter Server instance in the Port of the vCenter
Server instance text box.
The default port is 443.
c Enter the location of the SDK to use for connecting to your vCenter Server instance in the
Location of the SDK that you use to connect to the vCenter Server instance text box.
For example, /sdk.
8 Click Next.
9 Define the connection parameters.
a Enter the HTTP port of the vCenter Server instance in the HTTP port of the vCenter Server
instance - applicable for VC plugin version 5.5.2 or earlier text box.
b Enter the credentials for vRealize Orchestrator to use to establish the connection to the
vCenter Server instance in the User name of the user that Orchestrator will use to connect to
the vCenter Server instance and Password of the user that Orchestrator will use to
connect to the vCenter Server instance text boxes.
The user that you select must be a valid user with privileges to manage vCenter Server
extensions and a set of custom defined privileges.
10 Click Add.
Advanced Service Design
VMware, Inc. 26