
6.2
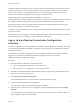
Table Of Contents
- Advanced Service Design
- Contents
- Advanced Service Design
- Updated Information for Advanced Service Design
- Using the Goal Navigator
- Introduction to VMware vRealize Orchestrator
- Configuring vRealize Orchestrator and Plug-Ins
- Authoring Services with Advanced Service Designer
- Advanced Service Designer Basics
- Creating an Advanced Service Overview
- Create a Custom Resource
- Create a Service Blueprint
- Publish a Service Blueprint as a Catalog Item
- Create a Resource Action
- Publish a Resource Action
- Assign an Icon to a Resource Action
- Create a Service
- Associate a Catalog Item with a Service
- Create an Approval Policy for Advanced Service Blueprints and Actions
- Entitle a Service, Catalog Items, and Actions to a User or a Group of Users
- Extending Operations on Resources Provisioned by Other Sources
- Importing and Exporting Advanced Service Designer Components
- Form Designer
- Advanced Service Designer Examples and Scenarios
- Create a Service for Creating and Modifying a User
- Create a Test User as a Custom Resource
- Create a Service Blueprint for Creating a User
- Publish the Create a User Blueprint as a Catalog Item
- Create a Resource Action to Change a User Password
- Publish the Change a Password Resource Action
- Create a Service for Creating a Test User
- Associate the Catalog Item with the Create a Test User Service
- Entitle the Service and the Resource Action to a Consumer
- Create and Publish an Action to Migrate a Virtual Machine
- Create an Action to Migrate a Virtual Machine With vMotion
- Create and Publish an Action to Take a Snapshot
- Create and Publish an Action to Start an Amazon Virtual Machine
- Creating a Data Refresh Service Offering
- Create a Service for Creating and Modifying a User

n
Log in to the vRealize Automation console as a system administrator or tenant administrator.
Procedure
1 To specify your Orchestrator server configurations, browse to the location based on your current
version.
Version Location
vRealize Automation 6.2.1 Select Administration > Orchestration Configuration > Server Configuration
vRealize Automation 6.2 Select Administration > Advanced Services > Server Configuration
2 Click Use an external Orchestrator server.
3 Enter a name and, optionally, a description.
4 Enter the IP or the DNS name of the machine on which the vRealize Orchestrator server runs in the
Host text box.
5 Enter the port number to communicate with the external vRealize Orchestrator server in the Port text
box.
8281 is the default port for vRealize Orchestrator.
6 Select the authentication type.
Option Description
Single Sign-On Connects to the vRealize Orchestrator server by using vCenter Single Sign-On.
Note This option is applicable only if you configured the vRealize Orchestrator
and vRealize Automation to use one common vCenter Single Sign-On instance.
Basic Connects to the vRealize Orchestrator server with the user name and password
that you enter in the User name and Password text boxes.
7 Click Test Connection.
8 Click Update.
You configured the connection to the external vRealize Orchestrator server, and the vCAC workflows
folder and the related utility actions are automatically imported. The vCAC > ASD workflows folder
contains workflows for configuring endpoints and creating resource mappings.
What to do next
Configure the vRealize Orchestrator plug-ins as endpoints. See Configuring Advanced Service Endpoints.
Configure the Default Workflow Folder for a Tenant
System administrators can group workflows in different folders and then define workflow categories per
tenant. By doing this, a system administrator can grant users from different tenants access to different
workflow folders from the same vRealize Orchestrator server.
Advanced Service Design
VMware, Inc. 17