
6.2
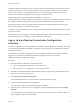
Table Of Contents
- Advanced Service Design
- Contents
- Advanced Service Design
- Updated Information for Advanced Service Design
- Using the Goal Navigator
- Introduction to VMware vRealize Orchestrator
- Configuring vRealize Orchestrator and Plug-Ins
- Authoring Services with Advanced Service Designer
- Advanced Service Designer Basics
- Creating an Advanced Service Overview
- Create a Custom Resource
- Create a Service Blueprint
- Publish a Service Blueprint as a Catalog Item
- Create a Resource Action
- Publish a Resource Action
- Assign an Icon to a Resource Action
- Create a Service
- Associate a Catalog Item with a Service
- Create an Approval Policy for Advanced Service Blueprints and Actions
- Entitle a Service, Catalog Items, and Actions to a User or a Group of Users
- Extending Operations on Resources Provisioned by Other Sources
- Importing and Exporting Advanced Service Designer Components
- Form Designer
- Advanced Service Designer Examples and Scenarios
- Create a Service for Creating and Modifying a User
- Create a Test User as a Custom Resource
- Create a Service Blueprint for Creating a User
- Publish the Create a User Blueprint as a Catalog Item
- Create a Resource Action to Change a User Password
- Publish the Change a Password Resource Action
- Create a Service for Creating a Test User
- Associate the Catalog Item with the Create a Test User Service
- Entitle the Service and the Resource Action to a Consumer
- Create and Publish an Action to Migrate a Virtual Machine
- Create an Action to Migrate a Virtual Machine With vMotion
- Create and Publish an Action to Take a Snapshot
- Create and Publish an Action to Start an Amazon Virtual Machine
- Creating a Data Refresh Service Offering
- Create a Service for Creating and Modifying a User

Log in to the vRealize Orchestrator Client
To perform general administration tasks or to edit and create workflows in the default
vRealize Orchestrator instance, you must log in to the vRealize Orchestrator client.
The vRealize Orchestrator client interface is designed for developers with administrative rights who want
to develop workflows, actions, and other custom elements.
Procedure
1 Navigate to the vRealize Appliance management console by using its fully qualified domain name,
https://vra-va-hostname.domain.name.
2 Click vRealize Orchestrator Client.
You are redirected to the VMware vRealize Orchestrator Login wizard.
3 Type the IP or the domain name of the vRealize Appliance in the Host name text box, and 8281 as a
port number.
For example, type vra-va-hostname.domain.name:8281 or
vrealize_automation_appliance_ip:8281.
4 Log in by using the vRealize Orchestrator Client user name and password.
The credentials are the vCenter Single Sign-On default tenant administrator user name and
password.
5 In the Certificate Warning window select an option to handle the certificate warning.
The vRealize Orchestrator client communicates with the vRealize Orchestrator server by using an
SSL certificate. A trusted CA does not sign the certificate during installation. You receive a certificate
warning each time you connect to the vRealize Orchestrator server.
Option Description
Ignore Continue using the current SSL certificate.
The warning message appears again when you reconnect to the same
vRealize Orchestrator server, or when you try to synchronize a workflow with a
remote Orchestrator server.
Cancel Close the window and stop the login process.
Install this certificate and do not
display any security warnings for it
anymore.
Select this check box and click Ignore to install the certificate and stop receiving
security warnings.
You can change the default SSL certificate with a certificate signed by a CA. For more information
about changing SSL certificates, see Installing and Configuring VMware vRealize Orchestrator.
What to do next
You can import a package, develop workflows, or set root access rights on the system. See Using the
VMware vRealize Orchestrator Client and Developing with VMware vRealize Orchestrator.
Advanced Service Design
VMware, Inc. 15