
Installation guide


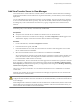
Table Of Contents
- VMware View Installation Guide
- Contents
- About This Book
- System Requirements for Server Components
- System Requirements for Client Components
- Supported Operating Systems for View Agent
- Supported Operating Systems for View Client and View Client with Local Mode
- Hardware Requirements for Local Mode Desktops
- Client Browser Requirements for View Portal
- Remote Display Protocol and Software Support
- Adobe Flash Requirements
- Smart Card Authentication Requirements
- Preparing Active Directory
- Configuring Domains and Trust Relationships
- Creating an OU for View Desktops
- Creating OUs and Groups for Kiosk Mode Client Accounts
- Creating Groups for View Users
- Creating a User Account for vCenter Server
- Create a User Account for View Composer
- Configure the Restricted Groups Policy
- Using View Group Policy Administrative Template Files
- Prepare Active Directory for Smart Card Authentication
- Installing View Composer
- Installing View Connection Server
- Installing the View Connection Server Software
- Installation Prerequisites for View Connection Server
- Install View Connection Server with a New Configuration
- Install a Replicated Instance of View Connection Server
- Configure a Security Server Pairing Password
- Install a Security Server
- Microsoft Windows Installer Command-Line Options
- Uninstalling View Products Silently by Using MSI Command-Line Options
- Configuring User Accounts for vCenter Server and View Composer
- Where to Use the vCenter Server User and Domain User for View Composer
- Configure a vCenter Server User for View Manager, View Composer, and Local Mode
- View Manager Privileges Required for the vCenter Server User
- View Composer Privileges Required for the vCenter Server User
- Local Mode Privileges Required for the vCenter Server User
- Configuring View Connection Server for the First Time
- Configuring View Client Connections
- Sizing Windows Server Settings to Support Your Deployment
- Installing the View Connection Server Software
- Installing View Transfer Server
- Configuring Certificate Authentication
- Replacing the Default Certificate
- Add keytool and openssl to the System Path
- Export an Existing Microsoft IIS SSL Server Certificate
- Creating a New SSL Certificate
- Configure a View Connection Server Instance or Security Server to Use a New Certificate
- Configure a View Transfer Server Instance to Use a New Certificate
- Configure SSL for Client Connections
- Configure SSL for View Transfer Server Communications
- Using Group Policy to Configure Certificate Checking in View Client
- Creating an Event Database
- Installing and Starting View Client
- Install the Windows-Based View Client or View Client with Local Mode
- Start the Windows-Based View Client or View Client with Local Mode
- Install View Client by Using View Portal
- Install View Client on Mac OS X
- Start View Client on Mac OS X
- Set Printing Preferences for the Virtual Printer Feature
- Using USB Printers
- Installing View Client Silently
- Index
Procedure
1 On the Windows Server computer, start the Windows Registry Editor.
a Select Start > Command Prompt.
b At the command prompt, type regedit.
2 In the registry, locate the subkey and click JvmOptions.
HKEY_LOCAL_MACHINE\SOFTWARE\VMware, Inc.\VMware VDM\Plugins\wsnm\tunnelService\Params
3 Click Edit > Modify.
A Windows dialog box displays an entry like the following one.
-Xms128m -Xmx512m -Xss96k -Xrs -XX:+UseConcMarkSweepGC
-Dsimple.http.poller=simple.http.GranularPoller
-Dsimple.http.connect.configurator=com.vmware.vdi.front.SimpleConfigurator
4 Edit the -Xmx parameter to have the value -Xmx1024m.
The dialog box displays the following entry.
-Xms128m -Xmx1024m -Xss96k -Xrs -XX:+UseConcMarkSweepGC
-Dsimple.http.poller=simple.http.GranularPoller
-Dsimple.http.connect.configurator=com.vmware.vdi.front.SimpleConfigurator
5 Click OK and exit the Registry Editor.
6 Restart the Windows Server computer.
Configure the System Page-File Settings
You can optimize the virtual memory on the Windows Server computers on which your View Connection
Server instances are installed by changing the system page-file settings.
When Windows Server is installed, Windows calculates an initial and maximum page-file size based on the
physical memory installed on the computer. These default settings remain fixed even after you restart the
computer.
If the Windows Server computer is a virtual machine, you can change the memory size through vCenter Server.
However, if Windows uses the default setting, the system page-file size does not adjust to the new memory
size.
Procedure
1 On the Windows Server computer on which View Connection Server is installed, navigate to the Virtual
Memory dialog box.
By default, Custom size is selected. An initial and maximum page-file size appear.
2 Click System managed size.
Windows continually recalculates the system page-file size based on current memory use and available
memory.
Chapter 5 Installing View Connection Server
VMware, Inc. 65