
5.2

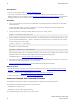

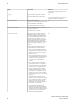
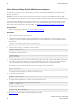
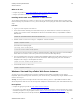
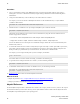
Table Of Contents
- vFabric Web Server Installation and Configuration
- Table of Contents
- 1. About vFabric Web Server Installation and Configuration
- 2. Overview of vFabric Web Server
- 3. Installing vFabric Web Server
- Installation Note for vFabric Suite Customers
- Available Distribution Packages
- RHEL: Install vFabric Web Server from an RPM
- Unix: Install vFabric Web Server from a Self-Extracting ZIP
- Windows: Install vFabric Web Server from a ZIP File
- Activate a vFabric Web Server Local License
- Description of the vFabric Web Server Installation
- 4. Upgrading vFabric Web Server
- 5. Creating and Using vFabric Web Server Instances
- 6. Configuring vFabric Web Server Instances
- Using Sample Configuration Files to Enable Features and Modify Configuration
- Configure Load Balancing Between Two or More tc Runtime Instances
- Configure SSL Between vFabric Web Server and vFabric tc Server
- Configure tc Runtime Instances to Use SSL
- Configure the vFabric Web Server Instance to Use SSL
- Restrict Communication With tc Runtime Instances to Known Clients
- Update the Web Server Configuration for HTTPS Connections to tc Runtime Instances
- Configure vFabric Web Server to Authenticate Itself Using a Specific Client Certificate
- Configure BMX for Monitoring vFabric Web Server Instances
- 7. Security Information
- 8. Managing Planned and Unplanned Outages
- 9. Additional Documentation

Creating and Using vFabric Web
Server Instances
23
VMware vFabric Suite 5.2 23
Option Description Required?
The following example shows how to specify
that the new vFabric Web Server instance
run as the newhttpd user in the newhttpd
group:
prompt# ./newserver --server=myserver --set User=newhttpd --set Group=newhttpd
--sourcedir=sourcedir Name of the directory that contains the
template that newserver uses to create the
new vFabric Web Server instance.
The default value is httpdir/_instance.
No.
Table 5.2. newserver Prompts
Prompt Description
Enable SSL and create a default key [y/n]? Enabling SSL provides secure communication between client and
server by allowing mutual authentication; the use of digital signatures
for integrity; and encryption for privacy. If you answer yes, you are
later asked for information that will be used to create a certificate.
Server hostname (e.g. www.example.com) [myserver]? Name that the vFabric Web Server instance uses to identify itself. If
your host does not have a registered DNS name, enter its IP address.
The default value is the value you entered for the --server option.
Administrator email [webmaster@myserver]? Email address to which vFabric Web Server instances send problems.
This address appears on some instance-generated pages, such as
error documents.
Port for http:// traffic [80]? HTTP port to which the vFabric Web Server instance listens. Default
value is 80 when running the newserver command as the root user
on Unix, 8080 otherwise.
Port for https:// SSL traffic [443]? HTTPS port to which the vFabric Web Server instance listens. Default
value is 443 when running the newserver command as the root
user on Unix, 8443 otherwise.
If you previously specified that you want to enable SSL... The newserver command prompts you for information required to
create the private key, such as the size of the SSL RSA key in bits and
the PEM pass phrase you specify when you start the instance.
You also are prompted to enter information for your certificate. The
information is mostly about your Distinguished Name, or DN, that will
be incorporated into your certificate request. As indicated, some fields
have default values. You can also leave some fields blank by entering
a '.' (period.)
When newserver completes, it generates the following SSL files in
the ssl subdirectory of the instance directory:
• instancename.key: Unencrypted private key. The file has a
permission code of 0600 for additional security.
• instancename.pem: DES 3 encrypted private key.
• instancename.csr: Certificate-signing request. Submit this file to
the Certificate Authority.
• instancename.crt: Self-signed certificate. Replace this certificate
with a signed certificate by the CA.
Important Be sure to record the passphrase to decrypt the *.pem
file and back up the file. Never transmit the .key file or cause it to be
readable by others.