
5.0
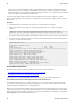
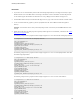
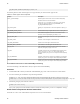
Table Of Contents
- Getting Started with vFabric Cloud Application Platform
- Table of Contents
- 1. About Getting Started with vFabric Cloud Application Platform
- 2. Quick Start Guide
- 3. Introducing vFabric Cloud Application Platform 5.0
- vFabric Platform Application Services and Packages
- Simplified VM-Based Licensing Model
- Integration with vSphere
- Engineered for Spring-Built Applications
- 4. vFabric Licensing
- 5. Installing vFabric Platform
- vSphere, JVM, and Operating System Support
- Install vFabric License Server on Your vCenter Server
- Activate vFabric Platform Licenses
- RHEL: Installing vFabric Components from the VMware YUM Repository
- Important Information About Installing Using RPMs
- Install the vFabric Repository RPMs
- Pre-Installation Instructions
- Install vFabric Components: General Instructions
- Post-Installation Instructions
- Post-Installation Instructions for tc Server
- Post-Installation Instructions for Spring Insight Operations (Agent and Dashboard)
- Post-Installation Instructions for Web Server
- Post-Installation Instructions for GemFire
- Post-Installation Instructions for SQLFire
- Post-Installation Instructions for RabbitMQ
- Post-Installation Instructions for Hyperic Server
- Post-Installation Instructions for Hyperic Agent
- Windows/Linux: Example Walkthrough of Installing Component from Download Page
- Monitor vFabric License Usage
- Upgrade vFabric License Server
- Uninstall vFabric License Server from vCenter Server
- RHEL: Upgrade vFabric Components From the VMware YUM Repository

32 vFabric Platform
32 Installing vFabric Platform
• If you installed Spring Insight Operations, see Post-Installation Instructions for Spring Insight Operations (Agent and
Dashboard).
• If you installed Web Server, see Post-Installation Instructions for Web Server.
• If you installed GemFire, see Post-Installation Instructions for GemFire.
• If you installed SQLFire, see Post-Installation Instructions for SQLFire.
• If you installed RabbitMQ, see Post-Installation Instructions for RabbitMQ.
• If you installed Hyperic Server, see Post-Installation Instructions for Hyperic Server.
• If you installed Hyperic Agent, see Post-Installation Instructions for Hyperic Agent.
Post-Installation Instructions
The following sections describe post-installation instructions for some vFabric Components:
• Post-Installation Instructions for tc Server
• Post-Installation Instructions for Spring Insight Operations (Agent and Dashboard)
• Post-Installation Instructions for Web Server
• Post-Installation Instructions for GemFire
• Post-Installation Instructions for SQLFire
• Post-Installation Instructions for RabbitMQ
• Post-Installation Instructions for Hyperic Server
• Post-Installation Instructions for Hyperic Agent
Post-Installation Instructions for tc Server
The yum installation of vFabric tc Server does not automatically create a tc Runtime instance, so you must manually create
one before you can start deploying Web applications to it. There are many options to creating a new instance, but this section
describes the simplest and quickest way.
Procedure
1. If you have not already done so, download and install a JDK or JRE on the RHEL VM on which you installed tc Server.
2. Set the JAVA_HOME environment variable of the tc-server user to point to the JDK installation and update the PATH
environment variable to point to the JAVA_HOME/bin directory.
3. Log in to the RHEL VM on which you installed tc Server as the root user, and then su to the tc-server user:
prompt# su - tc-server
You cannot login directly as the tc-server user because interactive login for the tc-server user has been disabled.
4. Open a terminal window and change to the /opt/vmware/vfabric-tc-server-standard directory:
prompt$ cd /opt/vmware/vfabric-tc-server-standard
5. Execute the tcruntime-instance.sh to create a new tc Runtime instance. Use the -i option to specify the full
pathname of the directory in which the new instance will be created; be sure the tc-server user can write to this
directory. For example: