
User`s guide
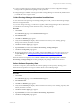

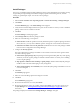

Table Of Contents
- VCM Installation and Getting Started Guide
- Updated Information
- About This Book
- Preparing for Installation
- Installing VCM
- Using Installation Manager
- Installing and Configuring the OS Provisioning Server and Components
- Installing the Operating System Provisioning Server
- Preparing Boot Images for Windows Provisioning
- Copy the VCM Certificate to the OS Provisioning Server for Linux Provisioning
- Importing Distributions into the OS Provisioning Server Repository
- Configuring the OS Provisioning Server Integration with the VCM Collector
- Maintaining Operating System Provisioning Servers
- Upgrading or Migrating vCenter Configuration Manager
- Upgrade and Migration Scenarios
- Prerequisites
- Back up Your Databases
- Back up Your Files
- Back up Your Certificates
- Software Supported by the VCM Collector
- Migration Process
- Prerequisites
- Foundation Checker Must Run Successfully
- Use the SQL Migration Helper Tool
- Migrate Only Your Database
- Replace your existing 32-Bit Environment with the Supported 64-bit Environment
- How to Recover Your Machine if the Migration is not Successful
- Migrate a 32-bit environment running VCM 5.3 or earlier to VCM 5.4
- Migrate a 64-bit environment running VCM 5.3 or earlier to VCM 5.4
- Migrate a split installation of VCM 5.3 or earlier to a single-server install...
- After You Migrate VCM
- Upgrade Process
- Upgrading Existing Windows Agents
- Upgrading Existing Remote Clients
- Upgrading Existing UNIX Agents
- Upgrading VCM for Virtualization
- Getting Started with VCM Components and Tools
- Getting Started with VCM
- Discover, License, and Install Windows Machines
- Verifying Available Domains
- Checking the Network Authority
- Assigning Network Authority Accounts
- Discovering Windows Machines
- Licensing Windows Machines
- Installing the VCM Windows Agent on your Windows Machines
- Performing an Initial Collection
- Exploring Windows Collection Results
- Getting Started Collecting Windows Custom Information
- Discover, License, and Install UNIX/Linux Machines
- Discover, License, and Install Mac OS X Machines
- Discover, License, and Collect Oracle Data from UNIX Machines
- Customize VCM for your Environment
- How to Set Up and Use VCM Auditing
- Discover, License, and Install Windows Machines
- Getting Started with VCM for Virtualization
- Getting Started with VCM Remote
- Getting Started with VCM Patching
- Getting Started with Operating System Provisioning
- Getting Started with Software Provisioning
- Getting Started with VCM Management Extensions for Assets
- Getting Started with VCM Service Desk Integration
- Getting Started with VCM for Active Directory
- Accessing Additional Compliance Content
- Installing and Getting Started with VCM Tools
- Maintaining VCM After Installation
- Troubleshooting Problems with VCM
- Index

Creating Packages
A software package provides the files and metadata necessary to install and remove programs. One of the
most useful features of a package is the metadata regarding dependencies, conflicts, and other
relationships that are not represented by software installation files. This metadata is used to determine if
the necessary dependencies are in place so that an installation is successful, and if not, what is necessary to
make the installation successful. This use of metadata is similar to rpm on Linux.
Packages support commercial and custom software that may be installed using any Windows installation
technology, including .msi, .exe, or scripts (Python, VBScript, PowerShell, and others).
Once a package is created and ready for distribution, it is published to a software repository. You then use
Package Manager to download the package from the repository to the local machine and install it on your
Windows systems.
Creating a software package includes creating and saving a project. Projects can be used to create
variations based on platform or version that can then be published as separate packages.
General Process
Detailed steps for creating and publishing packages are provided in the Package Studio online Help and in
the VCMSoftware Provisioning Installation and User's Guide.
1. Start the VMware vCenter Configuration Manager Package Studio. Select Start > All Programs All >
VMware vCenter Configuration Manager > Tools > Package Studio.
NOTE If you are running Package Studio on the Collector or a Windows 2008 Server, you must run
the application as administrator. See "Run Package Studio as Administrator" on page 192 for more
information.
2. Click Manage Packages. Configure the package contents based on the options on the following tabs:
a. Click Properties. Type a Name, Version, and Description. Select the Architecture. These are
required fields. You have the option to update the other fields, depending on you requirements.
Configuring the package with Depends, Conflicts, Provides, and adding and configuring the
installation and removal files.
b. Click Files. Import the installation files, add pre-command files, configure the commands and
arguments, and add post-command files.
c. Click Save to save the setting and files as a Project (*.prj).
d. Click Generate to save the project as a package (*.crate).
3. Click Package Signing. Sign the package with a signing certificate.
a. Click Open to select a package (*.crate file).
b. Click Sign. Select a certificate from the certificate store or from a file.
4. Click Manage Repositories. Select the platforms and sections to which you are publishing the package.
Getting Started with Software Provisioning
VMware, Inc. 191