
User`s guide
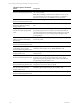

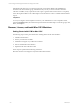
Table Of Contents
- VCM Installation and Getting Started Guide
- Updated Information
- About This Book
- Preparing for Installation
- Installing VCM
- Using Installation Manager
- Installing and Configuring the OS Provisioning Server and Components
- Installing the Operating System Provisioning Server
- Preparing Boot Images for Windows Provisioning
- Copy the VCM Certificate to the OS Provisioning Server for Linux Provisioning
- Importing Distributions into the OS Provisioning Server Repository
- Configuring the OS Provisioning Server Integration with the VCM Collector
- Maintaining Operating System Provisioning Servers
- Upgrading or Migrating vCenter Configuration Manager
- Upgrade and Migration Scenarios
- Prerequisites
- Back up Your Databases
- Back up Your Files
- Back up Your Certificates
- Software Supported by the VCM Collector
- Migration Process
- Prerequisites
- Foundation Checker Must Run Successfully
- Use the SQL Migration Helper Tool
- Migrate Only Your Database
- Replace your existing 32-Bit Environment with the Supported 64-bit Environment
- How to Recover Your Machine if the Migration is not Successful
- Migrate a 32-bit environment running VCM 5.3 or earlier to VCM 5.4
- Migrate a 64-bit environment running VCM 5.3 or earlier to VCM 5.4
- Migrate a split installation of VCM 5.3 or earlier to a single-server install...
- After You Migrate VCM
- Upgrade Process
- Upgrading Existing Windows Agents
- Upgrading Existing Remote Clients
- Upgrading Existing UNIX Agents
- Upgrading VCM for Virtualization
- Getting Started with VCM Components and Tools
- Getting Started with VCM
- Discover, License, and Install Windows Machines
- Verifying Available Domains
- Checking the Network Authority
- Assigning Network Authority Accounts
- Discovering Windows Machines
- Licensing Windows Machines
- Installing the VCM Windows Agent on your Windows Machines
- Performing an Initial Collection
- Exploring Windows Collection Results
- Getting Started Collecting Windows Custom Information
- Discover, License, and Install UNIX/Linux Machines
- Discover, License, and Install Mac OS X Machines
- Discover, License, and Collect Oracle Data from UNIX Machines
- Customize VCM for your Environment
- How to Set Up and Use VCM Auditing
- Discover, License, and Install Windows Machines
- Getting Started with VCM for Virtualization
- Getting Started with VCM Remote
- Getting Started with VCM Patching
- Getting Started with Operating System Provisioning
- Getting Started with Software Provisioning
- Getting Started with VCM Management Extensions for Assets
- Getting Started with VCM Service Desk Integration
- Getting Started with VCM for Active Directory
- Accessing Additional Compliance Content
- Installing and Getting Started with VCM Tools
- Maintaining VCM After Installation
- Troubleshooting Problems with VCM
- Index

drwxr-x--- 3 root cfgsoft 4096 Jul 2 17:34 Agent
drwxr-x--- 3 root cfgsoft 4096 Jul 2 17:34 CFC
-rw-rw---- 1 root cfgsoft 49993 Jul 2 17:34 CSIRegistry
-rw-rw---- 1 root cfgsoft 0 Jul 2 17:34 .CSIRegistry.lck
drwxrwx--- 3 csi_acct cfgsoft 4096 Jul 2 17:34 data
drwxrwx--- 3 root cfgsoft 4096 Jul 2 17:34 ECMu
drwxr-x--- 6 root cfgsoft 4096 Jul 2 17:34 install
lrwxrwxrwx 1 root root 20 Jul 2 17:34 log -> /var/log/CMAgent/log
dr-xr-x--x 3 root cfgsoft 4096 Jul 2 17:34 ThirdParty
drwxr-xr-x 2 root root 4096 Jul 2 17:34 uninstall
13. To verify the Agent was installed correctly and is listening on the port and ready to collect data,
execute the following command:
# netstat -na | grep <port_number>
Where the default <port_number> is typically 26542 for VCM installations.
14. For SUSE machines, after the installation completes, you may need to start xinetd using the command:
# ./etc/init.d/xinetd start
After you have installed the Agent on the UNIX/Linux machines, you are now ready to start collecting
data from them. To do this, see "Performing a UNIX/Linux Collection". After selecting UNIX/Linux
machines, note that UNIX/Linux data classes are available for collection.
Updates to UNIXPatch Assessment Content Affects UNIX Agent Performance
By default, VCM Patching checks for patch updates every 4 hours. The time required to perform this
action depends on the amount of new content downloaded to the Collector during the update process.
When the UNIX patch assessment content is pushed out to the UNIX agents, the time required to execute
jobs such as collections and remote commands will increase slightly. The time required will vary based on
how much new or updated content needs to by synchronized between the Collector and the agent. This
content push will happen when the first communication is initiated after installing the UNIX agent
package, or when there is new patch content on the Collector that is applicable to the UNIX agent
platform since the last agent/collector communication occurred.
Manually Uninstalling the UNIX/Linux Agent
Every installation generates an uninstall script, UninstallCMAgent, located at:
<path>/CMAgent/uninstall
Consider these points when uninstalling an Agent:
n
The uninstall reverses all changes made by installation, however the installation log files are retained in
<AgentRoot>/install. <AgentRoot> defaults to the CMAgent directory that was created during
installation. Refer to "Locating the Agent Directory" if necessary.
n
After executing UninstallCMAgent, VMware recommends that you delete the remaining the
CMAgent directory prior to running a new installation.
To uninstall the Agent, use the steps in the following procedure. If you want to use a custom configuration
file, follow the optional step below before uninstalling the Agent.
Getting Started with VCM
VMware, Inc. 105