
User`s guide


Technical white paper
19
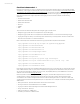
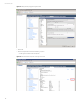
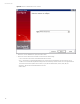
Figure 19. Selection of “VMware Web Services”
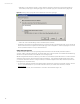
• Select the “Details” tab and select “Copy to File…”
– Select “Next >” on the Welcome screen
– Select “Base-64 encoded X.509 (.CER)” and select “Next >”
– Select “Browse” and save the file to a location on your local disk and select “Next >”
– Select “Finish”
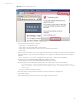
• Now open a command window. If you are not logged in as Administrator you will need to run the command window with
“Run as administrator”. If you do not “Run as administrator” you may get access denied messages when importing the
certificate.
– Start -> All Programs -> Accessories -> (Right Click) Command Prompt -> Select “Run as administrator”
• Change directory to the %ARCSIGHTSMARTCONNECTORS_HOME%\current\bin
– By default that is C:\Program Files (x86)\ArcSightSmartConnectors\current\bin
• Run the following command, setting the parameter after “-file” with the location of your saved certificate.
C:\Program Files (x86)\ArcSightSmartConnectors\current\bin>arcsight agent
keytool -import -trustcacerts -alias vmware -file c:\vcenter-cert.cer -store
clientcerts
– Type “yes” when asked “Trust this certificate?”
• Rerun the connector setup by entering in that same command prompt window “runagentsetup”
• Select “Add a Connector”
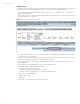
• Select “VMware Web Services” as the connector “Type” (Figure 20 and select “Next >”