
6.1
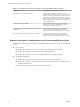

Table Of Contents
- Site Recovery Manager Installation and Configuration
- Contents
- About VMware Site Recovery Manager Installation and Configuration
- Updated Information
- Overview of VMware Site Recovery Manager
- Site Recovery Manager System Requirements
- Creating the Site Recovery Manager Database
- Site Recovery Manager Authentication
- Creating SSL/TLS Server Endpoint Certificates for Site Recovery Manager
- Installing Site Recovery Manager
- Site Recovery Manager and vCenter Server Deployment Models
- Site Recovery Manager in a Two-Site Topology with One vCenter Server Instance per Platform Services Controller
- Site Recovery Manager in a Two-Site Topology with Multiple vCenter Server Instances per Platform Services Controller
- Site Recovery Manager in a Single Site Topology with a Shared Platform Services Controller
- Prerequisites and Best Practices for Site Recovery Manager Server Installation
- Install Site Recovery Manager Server
- Connect the Site Recovery Manager Server Instances on the Protected and Recovery Sites
- Establish a Client Connection to the Remote Site Recovery Manager Server Instance
- Install the Site Recovery Manager License Key
- Site Recovery Manager Server Does Not Start
- Unregister an Incompatible Version of vSphere Replication
- Site Recovery Manager and vCenter Server Deployment Models
- Modifying and Uninstalling Site Recovery Manager
- Modify a Site Recovery Manager Server Installation
- Reconfigure the Connection Between Sites
- Break the Site Pairing and Connect to a New Remote Site
- Repair a Site Recovery Manager Server Installation
- Rename a Site Recovery Manager Site
- Uninstall Site Recovery Manager
- Uninstall and Reinstall the Same Version of Site Recovery Manager
- Upgrading Site Recovery Manager
- Information That Site Recovery Manager Upgrade Preserves
- Types of Upgrade that Site Recovery Manager Supports
- Upgrade Site Recovery Manager
- Order of Upgrading vSphere and Site Recovery Manager Components
- Prerequisites and Best Practices for Site Recovery Manager Upgrade
- In-Place Upgrade of Site Recovery Manager Server
- Upgrade Site Recovery Manager Server with Migration
- Configure and Verify the Upgraded Site Recovery Manager Installation
- Revert to a Previous Release of Site Recovery Manager
- Installing Site Recovery Manager to Use with a Shared Recovery Site
- Shared Recovery Sites and vCenter Server Deployment Models
- Limitations of Using Site Recovery Manager in Shared Recovery Site Configuration
- Site Recovery Manager Licenses in a Shared Recovery Site Configuration
- Install Site Recovery Manager In a Shared Recovery Site Configuration
- Use vSphere Replication in a Shared Recovery Site Configuration
- Install Site Recovery Manager Server on Multiple Protected Sites to Use with a Shared Recovery Site
- Install Multiple Site Recovery Manager Server Instances on a Shared Recovery Site
- Connect the Site Recovery Manager Sites in a Shared Recovery Site Configuration
- Use Array-Based Replication in a Shared Recovery Site Configuration
- Configure Placeholders and Mappings in a Shared Recovery Site Configuration
- Upgrade Site Recovery Manager in a Shared Recovery Site Configuration
- Index

6 (Optional) Restore the database from the backup that you created in Step 4 by using the pg_restore
command.
pg_restore -Fc --host 127.0.0.1 --port port_number --username=db_username --dbname=srm_db
srm_backup_name
7 Start the Site Recovery Manager service.
Create an ODBC System DSN for Site Recovery Manager
You must provide Site Recovery Manager with a system database source name (DSN) for a 64-bit open
database connectivity (ODBC) connector. The ODBC connector allows Site Recovery Manager to connect to
the Site Recovery Manager database.
You can create the ODBC system DSN before you run the Site Recovery Manager installer by running
Odbcad32.exe, the 64-bit Windows ODBC Administrator tool.
Alternatively, you can create an ODBC system DSN by running the Windows ODBC Administrator tool
during the Site Recovery Manager installation process.
NOTE If you use the embedded Site Recovery Manager database, the Site Recovery Manager installer
creates the ODBC system DSN according to the information that you provide during installation. If you
uninstall the embedded database, the uninstaller does not remove the DSN for the embedded database. The
DSN remains available for use with a future reinstallation of Site Recovery Manager.
Prerequisites
You created the database instance to connect to Site Recovery Manager.
Procedure
1 Double-click the Odbcad32.exe file at C:\Windows\System32 to open the 64-bit ODBC Administrator tool.
IMPORTANT Do not confuse the 64-bit Windows ODBC Administrator tool with the 32-bit ODBC
Administrator tool located in C:\Windows\SysWoW64. Do not use the 32-bit ODBC Administrator tool.
2 Click the System DSN tab and click Add.
3 Select the appropriate ODBC driver for your database software and click Finish.
Option Action
SQL Server
Select SQL Server Native Client 10.0, SQL Server Native Client 11.0, or
ODBC Driver 11 for SQL Server.
Oracle Server
Select Microsoft ODBC for Oracle.
Site Recovery Manager Installation and Configuration
20 VMware, Inc.