
5.0
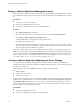
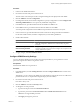
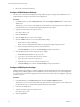


Table Of Contents
- Site Recovery Manager Administration Guide
- Contents
- About This Book
- Administering VMware vCenter Site Recovery Manager
- Installing and Updating Site Recovery Manager
- Configuring the SRM Database
- About the vSphere Replication Management Database
- Install the SRM Server
- Upgrading SRM
- Install Storage Replication Adapters
- Install the SRM Client Plug-In
- Connect the Sites
- Revert to a Previous Release
- Repair or Modify the Installation of a Site Recovery Manager Server
- Install the SRM License Key
- Establishing Inventory Mappings and Placeholder Datastores
- Configuring Array-Based Protection
- Installing vSphere Replication Servers
- Creating Protection Groups and Replicating Virtual Machines
- Limitations to Protection and Recovery of Virtual Machines
- Create Array-Based Protection Groups
- Create vSphere Replication Protection Groups
- Configure Replication for a Single Virtual Machine
- Configure Replication for Multiple Virtual Machines
- Replicate Virtual Machines Using Physical Couriering
- Move a Virtual Machine to a New vSphere Replication Server
- Apply Inventory Mappings to All Members of a Protection Group
- Recovery Plans and Reprotection
- Customizing Site Recovery Manager
- Customizing a Recovery Plan
- Configure Protection for a Virtual Machine or Template
- Configure Resource Mappings for a Virtual Machine
- Configure SRM Alarms
- Working with Advanced Settings
- Troubleshooting SRM
- Index

Procedure
1 Connect to the VRMS Web interface.
2 Provide the user name and password for the server.
The user name is root and the password is configured during the OVF deployment of the VRMS.
3 Click the VRMS tab and click Configuration.
4 In Configuration mode, select manual configuration to specify a configuration or select Configure from
an Existing VRMS Database to use a previously established configuration.
5 In the DB text boxes, provide information about the database for VRMS to use.
6 In the VRMS text boxes, provide the name and network address for the VRMS.
You must provide unique names for the VRMS on the protected site and on the recovery site.
7 In the VC text boxes, provide information about the vCenter Server being used with this installation.
Use the same address format, IP address or FQDN, that you used during installation.
8 Install an SSL certificate.
Option Description
Enable the SSL Certificate Policy
Enabling the policy provides greater assurance, but might require additional
public-key configuration. Enable the SSL Certificate Policy for greater
assurance.
Generate a self-signed certificate or
install an existing certificate
Using a self-signed certificate might provide reduced levels of trust and
might not be suitable for environments where high-levels of compliance with
security standards are required.
9 To apply changes, click Save and Restart Service.
Configure VRMS Security Settings
You may change the VRMS server password to meet security standards of your organization. Use this
password to log into the VAMI or to log into the console.
Prerequisites
Ensure that the VRMS server is powered on.
Procedure
1 In the SRM interface, click the Getting Started tab and click Configure VRMS Server to connect to the
VRMS server.
Alternatively, you can connect to the VRMS server web interface by entering the server's IP address and
port 8080 in a browser. A sample address might be https://192.168.1.2:8080/.
2 Provide the user name and password for the server.
User name is always root.
3 Click the VRMS tab and click the Security button.
4 To change the root user password:
a Type the current password in the Current Password field.
b Type the new password in the New Password and the Confirm New Password text boxes.
VRMS does not support blank passwords.
c Click Apply to change the password.
Chapter 5 Installing vSphere Replication Servers
VMware, Inc. 53