
6.0.1
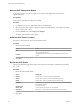

Table Of Contents
- vCenter Server and Host Management
- Contents
- About VMware vCenter Server and Host Management
- Updated Information
- vSphere Concepts and Features
- Using the vSphere Web Client
- Log in to vCenter Server by Using the vSphere Web Client
- Log Out of vCenter Server Using the vSphere Web Client
- Use the vSphere Web Client Navigator
- Customize the User Interface
- Install the Client Integration Plug-In
- Pause and Resume a Task in Progress
- Refresh Data
- Searching the Inventory
- Use Quick Filters
- View Recent Objects
- Configure the vSphere Web Client Timeout Value
- Remove Stored User Data
- Drag and Drop Objects
- Export Lists
- Keyboard Shortcuts
- Configuring Hosts and vCenter Server
- Host Configuration
- Synchronizing Clocks on the vSphere Network
- Configuring vCenter Server
- Configure License Settings for vCenter Server
- Configuring Statistics Settings
- Configure Runtime Settings for vCenter Server
- Configure User Directory Settings
- Configure Mail Sender Settings
- Configure SNMP Settings
- View Port Settings
- Configure Timeout Settings
- Configure Logging Options
- Configure Database Settings
- Verifying SSL Certificates for Legacy Hosts
- Configure Advanced Settings
- Send a Message to Other Logged In Users
- Edit the Settings of Services
- Start, Stop, and Restart Services
- Configuring Services in the vSphere Web Client
- Using Enhanced Linked Mode
- Configuring Communication Among ESXi , vCenter Server, and the vSphere Web Client
- Configuring Customer Experience Improvement Program
- Providing vCenter Server Availability
- Managing Third-Party Hypervisors by Using vCenter Host Gateway
- vCenter Host Gateway System Requirements
- Supported Third-Party Hypervisors
- Deploy the vCenter Host Gateway Appliance
- vCenter Host Gateway User Permissions
- Configure the vCenter Host Gateway Appliance
- Restart the vCenter Host Gateway Service
- Synchronize the Time Settings of the vCenter Host Gateway Appliance
- Change Network Settings of the vCenter Host Gateway Appliance
- Configure Proxy Settings
- Manage the Registration of the vCenter Host Gateway Service
- Change the Administrator Password of the vCenter Host Gateway Appliance
- Restart or Shut Down the vCenter Host Gateway Appliance
- Download a Support Bundle
- Add Third-Party Hosts to the vCenter Server Inventory
- Supported Actions for Managing Third-Party Hosts in the vSphere Web Client
- Supported Actions for Managing Third-Party Virtual Machines in the vSphere Web Client
- Organizing Your Inventory
- Tagging Objects
- License Management and Reporting
- Working with Tasks
- Reboot or Shut Down an ESXi Host
- Managing Hosts with vCenter Server in the vSphere Client
- Migrating Virtual Machines
- Cold Migration
- Migration with vMotion
- Migration with Storage vMotion
- CPU Compatibility and EVC
- CPU Compatibility Scenarios
- CPU Families and Feature Sets
- About Enhanced vMotion Compatibility
- EVC Requirements for Hosts
- Create an EVC Cluster
- Enable EVC on an Existing Cluster
- Change the EVC Mode for a Cluster
- Determine EVC Modes for Virtual Machines
- Determine the EVC Mode that a Host Supports
- Prepare Clusters for AMD Processors Without 3DNow!
- CPU Compatibility Masks
- View CPUID Details for an EVC Cluster
- Migrate a Powered-Off or Suspended Virtual Machine
- Migrate a Virtual Machine to a New Compute Resource
- Migrate a Virtual Machine to a New Compute Resource and Storage
- Migrate a Virtual Machine to New Storage
- Place vMotion Traffic on the vMotion TCP/IP Stack of an ESXi Host
- Place Traffic for Cold Migration on the Provisioning TCP/IP Stack
- Limits on Simultaneous Migrations
- About Migration Compatibility Checks
- Automating Management Tasks by Using vRealize Orchestrator
- Concepts of Workflows
- Performing Administration Tasks on the vSphere Objects
- Configure the Default vRealize Orchestrator
- Managing Associations of Workflows with vSphere Inventory Objects
- Managing Workflows
- Workflows for Managing Inventory Objects
- Cluster and Compute Resource Workflows
- Guest Operation Files Workflows
- Guest Operation Processes Workflows
- Custom Attributes Workflows
- Data Center Workflows
- Datastore and Files Workflows
- Data Center Folder Management Workflows
- Host Folder Management Workflows
- Virtual Machine Folder Management Workflows
- Basic Host Management Workflows
- Host Power Management Workflows
- Host Registration Management Workflows
- Networking Workflows
- Distributed Virtual Port Group Workflows
- Distributed Virtual Switch Workflows
- Standard Virtual Switch Workflows
- Resource Pool Workflows
- Storage Workflows
- Storage DRS Workflows
- Basic Virtual Machine Management Workflows
- Clone Workflows
- Linked Clone Workflows
- Linux Customization Clone Workflows
- Tools Clone Workflows
- Windows Customization Clone Workflows
- Device Management Workflows
- Move and Migrate Workflows
- Other Workflows
- Power Management Workflows
- Snapshot Workflows
- VMware Tools Workflows
- About Headless Systems
- Index

Accept the OVF License Agreements
The Accept License Agreements page of the Deploy OFV Template wizard appears only if license
agreements are packaged with the OVF template.
Procedure
1 On the Accept License Agreements page of the wizard, read the End User License Agreements and click
Accept.
2 Click Next.
Select OVF Name and Location
When you deploy an OVF template, you provide a unique name for the virtual machine or vApp. The name
can contain up to 80 characters. You can select a data center or folder location for the virtual machine.
Procedure
1 On the Select name and folder page of the Deploy OVF Template wizard, specify a name for the virtual
machine.
The name must be unique within each vCenter Server virtual machine folder.
2 Select or search for a datacenter or folder for the virtual machine.
3 Click Next.
Select Storage for the vCenter Host Gateway OVF Template
Select the location to store the les for the deployed vCenter Host Gateway template.
Prerequisites
Select the disk format to store the virtual machine virtual disks.
Procedure
1 On the Select storage page of the Deploy OVF Template wizard, select the virtual disk format to store
the virtual machine virtual disks.
Option Description
Thick Provisioned Lazy Zeroed
Creates a virtual disk in a default thick format. Space required for the
virtual disk is allocated when the virtual disk is created. Data remaining
on the physical device is not erased during creation, but is zeroed out on
demand at a later time on rst write from the virtual machine.
Thick Provision Eager Zeroed
Creates a thick virtual disk that supports clustering features such as Fault
Tolerance. Space required for the virtual disk is allocated at creation time.
In contrast to the at format, the data remaining on the physical device is
zeroed out when the virtual disk is created. Creating disks in this format
might take much longer than creating other types of disks.
Thin Provision
Creates a thin disk, which starts small, at rst using only as much
datastore space as the disk needs for its initial operations. The disk space
grows when the virtual machine needs more storage. Use this format to
save storage space. For the thin disk, you provision as much datastore
space as the disk requires based on the value that you enter for the disk
size.
Chapter 6 Managing Third-Party Hypervisors by Using vCenter Host Gateway
VMware, Inc. 69