
6.0.1
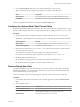
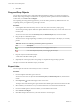

Table Of Contents
- vCenter Server and Host Management
- Contents
- About VMware vCenter Server and Host Management
- Updated Information
- vSphere Concepts and Features
- Using the vSphere Web Client
- Log in to vCenter Server by Using the vSphere Web Client
- Log Out of vCenter Server Using the vSphere Web Client
- Use the vSphere Web Client Navigator
- Customize the User Interface
- Install the Client Integration Plug-In
- Pause and Resume a Task in Progress
- Refresh Data
- Searching the Inventory
- Use Quick Filters
- View Recent Objects
- Configure the vSphere Web Client Timeout Value
- Remove Stored User Data
- Drag and Drop Objects
- Export Lists
- Keyboard Shortcuts
- Configuring Hosts and vCenter Server
- Host Configuration
- Synchronizing Clocks on the vSphere Network
- Configuring vCenter Server
- Configure License Settings for vCenter Server
- Configuring Statistics Settings
- Configure Runtime Settings for vCenter Server
- Configure User Directory Settings
- Configure Mail Sender Settings
- Configure SNMP Settings
- View Port Settings
- Configure Timeout Settings
- Configure Logging Options
- Configure Database Settings
- Verifying SSL Certificates for Legacy Hosts
- Configure Advanced Settings
- Send a Message to Other Logged In Users
- Edit the Settings of Services
- Start, Stop, and Restart Services
- Configuring Services in the vSphere Web Client
- Using Enhanced Linked Mode
- Configuring Communication Among ESXi , vCenter Server, and the vSphere Web Client
- Configuring Customer Experience Improvement Program
- Providing vCenter Server Availability
- Managing Third-Party Hypervisors by Using vCenter Host Gateway
- vCenter Host Gateway System Requirements
- Supported Third-Party Hypervisors
- Deploy the vCenter Host Gateway Appliance
- vCenter Host Gateway User Permissions
- Configure the vCenter Host Gateway Appliance
- Restart the vCenter Host Gateway Service
- Synchronize the Time Settings of the vCenter Host Gateway Appliance
- Change Network Settings of the vCenter Host Gateway Appliance
- Configure Proxy Settings
- Manage the Registration of the vCenter Host Gateway Service
- Change the Administrator Password of the vCenter Host Gateway Appliance
- Restart or Shut Down the vCenter Host Gateway Appliance
- Download a Support Bundle
- Add Third-Party Hosts to the vCenter Server Inventory
- Supported Actions for Managing Third-Party Hosts in the vSphere Web Client
- Supported Actions for Managing Third-Party Virtual Machines in the vSphere Web Client
- Organizing Your Inventory
- Tagging Objects
- License Management and Reporting
- Working with Tasks
- Reboot or Shut Down an ESXi Host
- Managing Hosts with vCenter Server in the vSphere Client
- Migrating Virtual Machines
- Cold Migration
- Migration with vMotion
- Migration with Storage vMotion
- CPU Compatibility and EVC
- CPU Compatibility Scenarios
- CPU Families and Feature Sets
- About Enhanced vMotion Compatibility
- EVC Requirements for Hosts
- Create an EVC Cluster
- Enable EVC on an Existing Cluster
- Change the EVC Mode for a Cluster
- Determine EVC Modes for Virtual Machines
- Determine the EVC Mode that a Host Supports
- Prepare Clusters for AMD Processors Without 3DNow!
- CPU Compatibility Masks
- View CPUID Details for an EVC Cluster
- Migrate a Powered-Off or Suspended Virtual Machine
- Migrate a Virtual Machine to a New Compute Resource
- Migrate a Virtual Machine to a New Compute Resource and Storage
- Migrate a Virtual Machine to New Storage
- Place vMotion Traffic on the vMotion TCP/IP Stack of an ESXi Host
- Place Traffic for Cold Migration on the Provisioning TCP/IP Stack
- Limits on Simultaneous Migrations
- About Migration Compatibility Checks
- Automating Management Tasks by Using vRealize Orchestrator
- Concepts of Workflows
- Performing Administration Tasks on the vSphere Objects
- Configure the Default vRealize Orchestrator
- Managing Associations of Workflows with vSphere Inventory Objects
- Managing Workflows
- Workflows for Managing Inventory Objects
- Cluster and Compute Resource Workflows
- Guest Operation Files Workflows
- Guest Operation Processes Workflows
- Custom Attributes Workflows
- Data Center Workflows
- Datastore and Files Workflows
- Data Center Folder Management Workflows
- Host Folder Management Workflows
- Virtual Machine Folder Management Workflows
- Basic Host Management Workflows
- Host Power Management Workflows
- Host Registration Management Workflows
- Networking Workflows
- Distributed Virtual Port Group Workflows
- Distributed Virtual Switch Workflows
- Standard Virtual Switch Workflows
- Resource Pool Workflows
- Storage Workflows
- Storage DRS Workflows
- Basic Virtual Machine Management Workflows
- Clone Workflows
- Linked Clone Workflows
- Linux Customization Clone Workflows
- Tools Clone Workflows
- Windows Customization Clone Workflows
- Device Management Workflows
- Move and Migrate Workflows
- Other Workflows
- Power Management Workflows
- Snapshot Workflows
- VMware Tools Workflows
- About Headless Systems
- Index

6 Click OK.
Synchronizing Clocks on the vSphere Network
Make sure that all components on the vSphere network have their clocks synchronized. If the clocks on the
machines in your vSphere network are not synchronized, SSL certicates, which are time-sensitive, might
not be recognized as valid in communications between network machines.
Unsynchronized clocks can result in authentication problems, which can cause the installation to fail or
prevent the vCenter Server Appliance vpxd service from starting.
Make sure any Windows host machine on which a vCenter component runs is synchronized with the NTP
server. See the Knowledge Base article hp://kb.vmware.com/kb/1318.
Edit Time Configuration for a Host
You can congure the time seings on a host manually, or you can synchronize the time and date of the host
by using an NTP server.
Procedure
1 In the vSphere Web Client, navigate to the host in the vSphere inventory.
2 Select Manage, and select .
3 Under System, select Time and click Edit.
4 Select an option for seing the time and date of the host.
Option Description
Manually configure the date and
time on this host
Set the time and date for the host manually.
Use Network Time Protocol (Enable
NTP client)
Synchronize the time and date of the host with an NTP server. The NTP
service on the host periodically takes the time and date from the NTP
server.
a In the NTP Servers text box, type the IP addresses or host names of the
NTP servers that you want to use.
b From the NTP Service Startup Policy drop-down list, select an option
for starting and stopping the NTP service on the host.
n
Start and stop with port usage - Starts or stops the NTP service
when the NTP client port is enabled or disabled for access in the
security prole of the host.
n
Start and stop with host - Starts and stops the NTP service when
the host powers on or shuts down.
n
Start and stop manually - Enables manual starting and stopping
of the NTP service.
You can use the Start, Stop, or Restart buons to control the status of the
NTP service on the host manually at any time no maer of the selected
startup policy for the NTP service. For the Start and stop manually policy,
you always use the buons to control the status of the NTP service.
5 Click OK.
Chapter 3 Configuring Hosts and vCenter Server
VMware, Inc. 39