
Installation guide
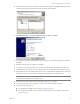
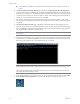

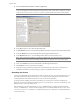
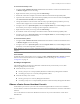

Table Of Contents
- Installation Guide
- Contents
- About This Book
- Getting Started
- Introduction
- Installation
- vCenter Server Heartbeat Implementation
- Installing vCenter Server Heartbeat
- Unattended Installation of vCenter Server Heartbeat
- Appendix - Setup Error Messages
- Glossary

Installation Guide
50 VMware, Inc.
To install vCenter Server Heartbeat Client Tools
1 Copy the WinZip Self-Extracting file to the client where it is to be installed.
2 Double-click the WinZip Self-Extracting file to initiate the installation process. The Setup Introduction
dialog appears. Review the information and click OK.
3The WinZip Self-Extractor dialog appears. Click Setup to continue.
4The Setup Type page appears. Because this is a vCenter Server Heartbeat Client Tools installation, select
Install Client Tools Only and click Next.
5 Read the license agreement carefully and select I accept terms of the License Agreement. Click Next.
6 Configure the installation paths. The default installation location is C:\Program Files\VMware\VMware
vCenter Server Heartbeat, but you can change it by manually typing a path to another install location.
Alternatively, click Browse to select one of these locations. Select Create icons on Desktop and click Next.
7 Review the summary of options and configuration information for the installation. Click Next.
8 Pre-install checks run to ensure that the installation can continue. The Report pane displays the results of
the pre-install checks. If some pre-install checks are unsuccessful, go back through the wizard, make the
necessary changes, and run the pre-install checks again. If the pre-install checks are successful, click Next.
9 The next page displays the progress of the installation. During this process, Setup installs the necessary
files and folders onto your system and applies the configuration you specified. Click Next after vCenter
Server Heartbeat Client Tools components are complete.
10 The Client Tools Installation Complete page is displayed. Click Finish.
Uninstall vCenter Server Heartbeat
Under normal conditions it is not necessary to uninstall vCenter Server Heartbeat. Should the need arise,
vCenter Server Heartbeat can be uninstalled easily allowing you to retain current log information.
Uninstalling vCenter Server Heartbeat
1From the Windows Start menu, navigate to the VMware vCenter Server Heartbeat program group and
select Uninstall or Modify. The Setup wizard starts and detects the presence of installed components and
provides a means for their removal.
2 Select the Uninstall option and click Next.
3 Follow the instructions provided in the Setup wizard to stop vCenter Server Heartbeat. You can shut
down vCenter Server Heartbeat from the system tray icon or from its console.
4 After the application is stopped, click Next.
5 Verify that all programs associated with VMware vCenter Server Heartbeat are closed. Click Next.
6 The Setup wizard prompts you to select whether to leave the current server on the network. In a typical
uninstall process, the active server remains on the network to continue providing application services to
end users, and the passive server is removed from the network.
N
OTE The path of the VMware installation folder cannot contain Unicode characters. The path of the
VMware installation folder can only contain lower and upper case letters A to Z, digits from 0 to 9, and
the following special characters: space \ _ - ( ) . :
Additionally, vCenter Server Heartbeat does not support file or folder names ending with a period “.” or
space “ “.
NOTE You should leave only the currently active server on the network. If the passive server is a virtual
machine, the image can be deleted and the uninstall procedure applied only to the active server.