
Installation guide
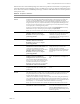
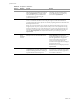
Table Of Contents
VMware, Inc. 15
Chapter 1 Getting Started with vCenter Server Heartbeat
2 Start vCenter Server Heartbeat on the Primary server. Right-click the vCenter Server Heartbeat System
Tray icon and select Start VMware vCenter Server Heartbeat. The icons change from a double dash (–/–)
to a P, indicating the server is the Primary server, and an A indicating the server is acting in an active role
(P/A).
3 Start vCenter Server Heartbeat on the Secondary server. Right-click the vCenter Server Heartbeat System
Tray icon and select Start VMware vCenter Server Heartbeat. The icon changes from a double dash (–/–)
to an S, indicating that the server is the Secondary server, and a dash (–), indicating that the server is in a
passive role (S/–).
The Primary and Secondary servers establish a handshake and commence replication.
4 Verify that Nslookup resolves as shown below:
Nslookup resolves the Service Name to the Public IP
Nslookup resolves Primary Name to Primary Management IP
Nslookup resolves Secondary Name to Secondary Management IP
Configuring SQL Server Plug-in to run with the Correct Credentials
After installation, you must configure the SQL Server Plug-in with the correct credentials.
To add the SQL Server Plug-in credentials
1 Launch the vCenter Server Heartbeat Console and navigate to the Applications: Tasks page.
2Click User Accounts. Verify that the user account under which you installed vCenter Server Heartbeat is
present in the list of User Accounts. If it is present and is a member of the Domain Admins group,
Enterprise Admins group, or has been delegated Administrator rights, go to Step 6.
3In the User Accounts dialog, click Add.
4 Enter the credentials of a domain account that is a member of the Domain Admins group, Enterprise
Admins group, or one that has been delegated Administrator rights and click OK.
5 Once the account has been successfully added to the list, click Close.
6In the Tasks pane, select the Network Configuration task Set SPN (Primary).
7Click Edit.
8In the Edit Task dialog, in the Run As: drop-down field, select an account with appropriate rights (the
account previously added).
9Click OK.
10 In the Tasks pane, select the Network Configuration task Set SPN (Secondary).
11 Click Edit.
12 In the Edit Task dialog, in the Run As: drop-down field, select an account with appropriate rights (the
account previously added).
13 Click OK.
14 After successfully configuring the correct credentials, select the Set SPN (Primary) task and click Run Now.
Installing the View Composer Plug-in
After installation you must install the View Composer Plug-in.
To install the View Composer Plug-in after vCenter Server Heartbeat has been installed
1 Ensure that View Composer has been installed on both the Primary and Secondary servers with the same
configuration settings.
2 Launch the vCenter Server Heartbeat Console.