
5.5
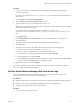

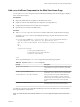
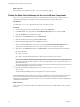
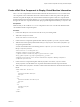

Table Of Contents
- Developing Web Views for VMware vCenter Orchestrator
- Contents
- Developing Web Views for VMware vCenter Orchestrator
- Web View Overview
- Weboperator Web View
- Web View Development Tasks to Perform in Orchestrator
- Create a Web View Skeleton
- Export a Web View as a Template
- Create a Web View from a Template
- Define a Web View Template as a Resource Element
- Create a Web View from a Resource Element Template
- Export Web View Files to a Working Folder
- Configure the Server for Web View Development
- Import Web View Files from a Working Folder
- Create a Web View Attribute
- Add a Resource Element to a Web View
- Disable Web View Development Mode
- Publish a Web View
- File Structure of a Web View
- Web View Home Page
- Web View Components
- Tapestry Web View Components
- Creating Tapestry Web View Components
- Orchestrator Tapestry Component Library
- vco:DisplayProperty Component
- vco:IfMemberOf Component
- vco:IncludeJavascript Component
- vco:IncludeStylesheet Component
- vco:IncludeWorkflowHeader Component
- vco:ListPane Component
- vco:Login Component
- vco:PageAccessControl Component
- vco:TaskAction Component
- vco:WebformContainer Component
- vco:WorkflowLink Component
- Accessing Server Objects from URLs
- Create a Simple Web View Using the Default Template
- Import the Default Web View Template
- Export the Virtual Machine Manager Web View to a Working Folder
- Provide Unique Component Names
- Configure the Server for Web View Development
- Edit the Virtual Machine Manager Web View Home Page
- Add a vco:ListPane Component to the Web View Home Page
- Define the Web View Attributes for the vco:ListPane Component
- Create a Web View Component to Display Virtual Machine Information
- Create a Web View Tab by Using the Menu Component
- Add Links to Run Workflows from a Web View by Using the vco:WorkflowLink Component
- Customize the Web View Interface
- Publish the Virtual Machine Manager Web View
- Index

</a></li>
<li><a jwcid="@vco:WorkflowLink" workflow="deleteVM" isDialog="true">
Delete a virtual machine
</a></li>
NOTE Make sure that you create the Web view attribute in the Orchestrator client for each
vco:WorkflowLink reference.
You added links to the Virtual Machine Manager Web view that run workflows on virtual machines in the
vSphere inventory.
What to do next
Customize the appearance of the Web view.
Customize the Web View Interface
You can customize the appearance of the Web view by adjusting the custom.css style sheet and changing
the images in the \images folder.
Prerequisites
You created the Virtual Machine Manager Web view.
Procedure
1 (Optional) Change the Web view logo by overwriting the \images\header_logo.jpg file, for example,
with a JPEG of your company logo.
2 Open the \css\custom.css style sheet file in a text editor.
3 Adjust the width and height values of siteTitle to fit the proportions of your company logo file.
4 Refresh the page in the browser.
5 (Optional) Customize any part of the Web view by modifying the custom.css file.
You can edit the custom.css to override the VMMBorder.html component template file and the
border.css style sheet to modify the overall layout of the Web view.
NOTE The custom.css style sheet is the only layout file that you should modify. If you modify other
style sheets or component template files, your changes are lost if you upgrade Orchestrator.
You customized the appearance of the Web view by adjusting the custom.css style sheet and by changing
the logo.
What to do next
Disable Web view development mode, import the Web view files to the server, and publish the Web view.
Publish the Virtual Machine Manager Web View
After you finish developing the Virtual Machine Manager, you must disable Web view development mode,
import the Web view from your working directory to the Orchestrator server, and publish the Web view.
Prerequisites
You finished developing the Virtual Machine Manager Web view.
Chapter 8 Create a Simple Web View Using the Default Template
VMware, Inc. 59