
5.5

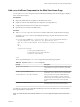
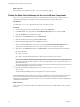
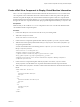

Table Of Contents
- Developing Web Views for VMware vCenter Orchestrator
- Contents
- Developing Web Views for VMware vCenter Orchestrator
- Web View Overview
- Weboperator Web View
- Web View Development Tasks to Perform in Orchestrator
- Create a Web View Skeleton
- Export a Web View as a Template
- Create a Web View from a Template
- Define a Web View Template as a Resource Element
- Create a Web View from a Resource Element Template
- Export Web View Files to a Working Folder
- Configure the Server for Web View Development
- Import Web View Files from a Working Folder
- Create a Web View Attribute
- Add a Resource Element to a Web View
- Disable Web View Development Mode
- Publish a Web View
- File Structure of a Web View
- Web View Home Page
- Web View Components
- Tapestry Web View Components
- Creating Tapestry Web View Components
- Orchestrator Tapestry Component Library
- vco:DisplayProperty Component
- vco:IfMemberOf Component
- vco:IncludeJavascript Component
- vco:IncludeStylesheet Component
- vco:IncludeWorkflowHeader Component
- vco:ListPane Component
- vco:Login Component
- vco:PageAccessControl Component
- vco:TaskAction Component
- vco:WebformContainer Component
- vco:WorkflowLink Component
- Accessing Server Objects from URLs
- Create a Simple Web View Using the Default Template
- Import the Default Web View Template
- Export the Virtual Machine Manager Web View to a Working Folder
- Provide Unique Component Names
- Configure the Server for Web View Development
- Edit the Virtual Machine Manager Web View Home Page
- Add a vco:ListPane Component to the Web View Home Page
- Define the Web View Attributes for the vco:ListPane Component
- Create a Web View Component to Display Virtual Machine Information
- Create a Web View Tab by Using the Menu Component
- Add Links to Run Workflows from a Web View by Using the vco:WorkflowLink Component
- Customize the Web View Interface
- Publish the Virtual Machine Manager Web View
- Index
2 Open the default.html file in an HTML editor.
The default.html page uses the MyBorder component to render itself. It contains little code, as the
following code sample shows.
<vco jwcid="@layout/MyBorder" section="literal: home" title="Home">
<!-- Content of the homepage -->
<h2 style="margin-left: 16px; margin-top: 0px; padding-top:18px;">
Welcome to Default Webview Template
</h2>
<p style="margin-left: 16px;">
This webview is a base for your own webview development.
</p>
</vco>
The vco tag initializes a Tapestry component by setting the jwcid attribute to point to the MyBorder
component, which you renamed to VMMBorder.
3 Change the jwcid attribute to refer to VMMBorder instead of MyBorder.
<vco jwcid="@layout/VMMBorder" section="literal: home" title="Virtual Machine Manager">
4 Change the title attribute to Virtual Machine Manager.
<vco jwcid="@layout/VMMBorder" section="literal: home" title="Virtual Machine Manager">
5 Delete the default <h2> heading from the default.html file.
This heading is unnecessary for the simple Web view that this example demonstrates. Delete the
following code line.
<h2 style="margin-left: 16px; margin-top: 0px; padding-top:18px;">
Welcome to Default Webview Template
</h2>
6 Change the paragraph text from This webview is a base for your own webview development to the
following text:
<p style="margin-left: 16px; margin-top: 0px; padding-top:18px;">
Click one of the virtual machines in your inventory to display its
information.</p>
7 Go to https://orchestrator_server:8280/vco/vmo/ in a browser to check the appearance of the Web
view.
8 Make any necessary adjustments to the HTML code to improve the appearance of the Web view.
For example, change the spacing of the text by adjusting the margins of the <p> tag and add a hard
return line under the text.
<p style="margin-left: 16px; margin-top: 5px; margin-bottom: 5px;">
Click one of the virtual machines in your inventory to display its information.
</p>
<hr />
What to do next
Add a function to the default.html page by referring to a Web view component.
Developing Web Views for VMware vCenter Orchestrator
52 VMware, Inc.