
1.2.0


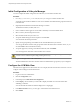


Table Of Contents
- Lifecycle Manager Installation and Configuration Guide
- Contents
- About This Book
- Introducing LCM
- Installing and Configuring Orchestrator
- Orchestrator Components Setup Guidelines
- Install Orchestrator
- Configuring Orchestrator
- Check Configuration Readiness
- Log In to the Orchestrator Configuration Interface
- Change the Default Password
- Revert to the Default Password for Orchestrator Configuration
- Configure the Network Connection
- Change the Default Configuration Ports on the Orchestrator Client Side
- Import the vCenter SSL Certificate
- Configuring LDAP Settings
- Password Encryption and Hashing Mechanism
- Configure the Database Connection
- Server Certificate
- Configure the Default Plug-Ins
- Import the vCenter Server License
- Start the Orchestrator Server
- Export the Orchestrator Configuration
- Import the Orchestrator Configuration
- Configure the Maximum Number of Events and Runs
- Change the Web View SSL Certificate
- Define the Server Log Level
- Maintenance and Recovery
- Controlling Orchestrator Access
- Installing and Configuring LCM
- Installing LCM
- Configuring LCM
- Check Configuration Readiness
- Initial Configuration of Lifecycle Manager
- Configure the LCM Web View
- Set Approval Requirements
- Configure Archiving Settings
- Change Authorization Groups
- Change the Naming Convention for Virtual Machines
- Enable Email Notifications
- Configure Email Notification Content
- Configure Currency and Date Formats
- Upgrading Orchestrator and LCM
- Uninstall LCM and Orchestrator
- Index

Initial Configuration of Lifecycle Manager
You must complete the initial configuration of LCM when you run LCM for the first time.
Procedure
1 Go to http://
orchestrator_server
:8280/vmo/lifecycle to log in to LCM for the first time.
You need to log in with the credentials of a user who is a member of the administrator group that is selected
in Orchestrator.
2 (Optional) Edit the default virtual machine naming convention.
The default is lcm-0001, lcm-0002, and so on.
3 Choose whether to allow approvers and IT staff to manually overwrite the default name.
4 Select a currency from the drop-down menu.
5 Select the date format that you want to use.
6 Accept the default setting for advanced options and click Next.
You can edit the advanced options later.
7 Specify which groups belong to the different roles and click Next when you are done.
You can type the first few letters of the group name and let the LDAP search match the choices, or you
can click Search to browse the LDAP inventory.
8 Accept the approvals, archiving, and notification defaults, and click Submit.
You can change these values later. The LCM Web view is started.
CAUTION Do not change the LDAP settings in Orchestrator after submitting the configuration. This might
result in a serious error that requires using a backup for recovery.
9 Log in to LCM again as the LCM Administrator.
The LCM Administrator must be a member of the LCM Administrators group that you just configured.
Configure the LCM Web View
The Web UI of an application is called a Web view. For example, the front end of LCM is a Web view. You can
configure custom settings for the LCM Web view.
Procedure
1 Log in to LCM as an administrator.
2 Click the Configuration view.
3 In the left pane, click Edit Advanced Configuration.
4 Under Display, choose whether you want LCM to display the details of an execution token after
submitting a workflow.
You can also limit the number of elements displayed on a single page.
5 In the Webview URL text box, you can type a custom URL for the LCM Web view.
6 Click Submit.
Lifecycle Manager Installation and Configuration Guide
68 VMware, Inc.